Show index Hide index
- 5 Quick Christmas Nail Art Tutorials That Actually Work for Holiday Parties
- How to plan the session
- Design 1 — Gift-Wrapped Glam ✨
- Design 2 — Santa’s Crew with Glittered Cheer 🎅
- Design 3 — Rudolph & Candy Stripe 🦌
- Design 4 — Peppermint Hearts on Pink Frost ❤️
- Design 5 — Frosty Blue Sparkle ❄️
- 5 Step-by-Step Techniques for Professional-Looking Christmas Nail Art
- Stamping — repeatable patterns in minutes
- Striping tape and liner brushes for precise lines
- Dotting tool magic for berries and ornaments
- Layered glitter & flake placement
- Micro-painting for characters and scenes
- 5 Budget-Friendly Product Picks and Brand Tips for Christmas Nail Art
- Top product roles and cost breakdown
- Tool choices that save time and money
- Where to learn the exact steps
- Quick shopping checklist and substitutions
- 5 Shape & Color Combinations to Match Every Holiday Outfit and Event
- Short square + glossy emerald (office friendly)
- Almond + red glitter (party standout)
- Blush rounded + gingerbread sketch (family cozy)
- Short square + frosty blue French (winter formal)
- Almond + multicolor playful set (youthful gatherings)
- 5 Pro Tips for Longevity, Removal, and When to Book a Nail Tech
- Longevity hacks for at-home gels and regular polish
- Safe removal without damage
- When to DIY vs. when to book a tech
- Travel and gift-season considerations


5 Quick Christmas Nail Art Tutorials That Actually Work for Holiday Parties
Main benefit first: Create five festive looks that are wearable, fast, and showroom-ready in under 45 minutes per set 🎄. These tutorials focus on clear steps, exact times, and affordable product swaps to get holiday-ready nails without the salon queue.
Start with the result: choose one design, gather three core polishes, and follow the timed steps below. This approach minimizes tools and maximizes visual impact, perfect for busy hosts or last-minute gift exchanges.
How to plan the session
Choose shape and base: short square or almond keeps designs readable at small scales. Preparation takes 10–15 minutes: remove old polish, push cuticles, and lightly buff for adhesion.
Essential supplies: a base coat, two glitters, a contrasting accent color, a thin brush, and topcoat. Brands like OPI, Essie, and Sally Hansen offer reliable base/top options. For stamping or detailed dots, include a MoYou London plate or a thin liner brush from Born Pretty.
Design 1 — Gift-Wrapped Glam ✨
Start with a nude base on all nails. Paint the ring finger and thumb in glittery red and a contrasting green on the middle finger. Add a fine white or gold ribbon using a liner brush to create a bow on the accent nails. Seal with a glossy topcoat. Expect: 25–30 minutes.
Why it works: the visual weight of glitter keeps focus on two nails while the nude balance stays professional. This is perfect when wearing cuffed sleeves or showing off a cocktail ring.
To read Black Christmas Nails: Edgy Holiday Manicure Tutorial
Design 2 — Santa’s Crew with Glittered Cheer 🎅
Paint a base of soft white on two nails and deep green on the others. Use a dotting tool for a white beard, red for Santa hat, and glitter for coat trim. Use a small black dot for eyes. Expect: 35–40 minutes.
Use China Glaze or ILNP for standout glitters that catch holiday lights. This playful look reads well in photos.
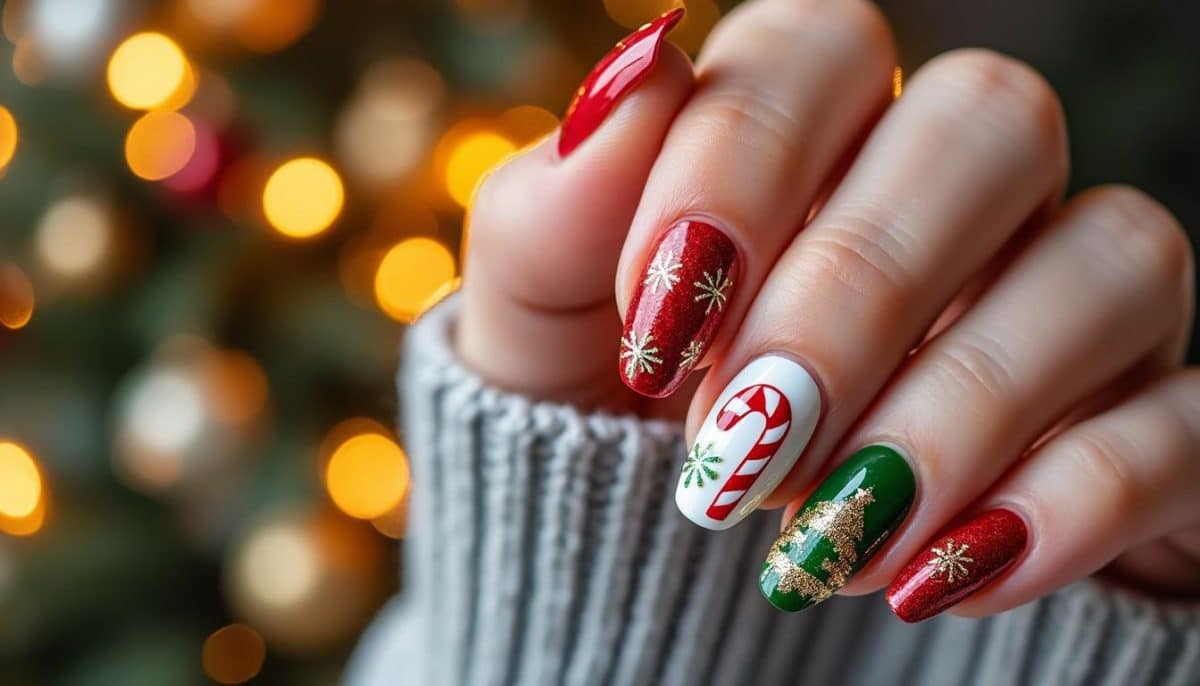
Design 3 — Rudolph & Candy Stripe 🦌
Begin with a muted almond canvas. Paint one nail with reindeer face using brown, black antlers, and a red glitter nose. Add diagonal red/white stripes on another nail to mimic candy canes. Expect: 30 minutes.
Pro tip: use a matte topcoat on the stripes and glossy on the reindeer to add contrast and depth.
Design 4 — Peppermint Hearts on Pink Frost ❤️
Base coat in soft blush; paint heart shapes with red and white stripes inside. Add a clear glitter accent for shine. This look translates well to short nails and reads cleanly in selfies. Expect: 20–25 minutes.
Design 5 — Frosty Blue Sparkle ❄️
Soft pink base with icy blue glitter French tips and delicate black antler outlines on an accent nail. Finish with a thin white snowflake detail. Expect: 30 minutes.
These five tutorials prioritize speed and impact; pick one, set a 45-minute timer, and follow the steps for a polished holiday manicure. Pin for later! Save for reference!
To read Christmas Nails Green: Festive Emerald Manicure Ideas
5 Step-by-Step Techniques for Professional-Looking Christmas Nail Art
Main takeaway: Master five core techniques—stamping, striping, dotting, layered glitter, and micro-painting—to reproduce complex holiday scenes with beginner tools 🎨. Each technique includes exact steps, timing, and common pitfalls to avoid.
Technique first, then details: learn stamping for repeat patterns, striping for gift-wrap lines, dotting for berries and peppermint, layered glitter for depth, and fine brush painting for characters. These replace expensive salon tools and yield consistent results.
Stamping — repeatable patterns in minutes
Outcome up front: use stamping to get crisp snowflakes, tiny trees, or candy-cane stripes in under 10 minutes per nail. Use a quality stamper from MoYou London or an affordable Born Pretty plate.
Steps: apply thick polish to the plate, scrape once at a 45° angle, pick up with the stamper, then roll onto nail. Clean the plate between uses to avoid smudging. Common mistake: too-thin polish produces streaky images—use slightly thicker formulas for sharper impressions.
Striping tape and liner brushes for precise lines
Outcome up front: achieve clean gift-wrap ribbons and candy stripes with striping tape or a 0.5mm liner brush. Tape delivers perfectly straight lines; a brush gives fluid control for hand-painted bows.
Application tip: cure a thin topcoat before applying tape when using gel; it prevents lifting. For regular polish, wait 30–60 seconds so the polish is tacky but not wet, then apply tape and paint over for crisp edges.
Dotting tool magic for berries and ornaments
Outcome up front: dotting tools create uniformly sized berries and tiny baubles in 2–3 minutes per nail. Use multiple-sized dotting tools for layered effects.
To read Neutral Christmas Nails: Versatile Holiday Manicures
Technique: load a dotting tool with polish, press lightly, and lift straight up. For layered look, let the first dot dry before adding a smaller contrasting dot on top.
Layered glitter & flake placement
Outcome up front: place glitter strategically to mimic twinkling lights without overloading the nail. Use chunkier glitter sparingly on accent nails and micro-glitter for full coverage.
Method: apply a lotion-thin clear base, press glitter into the tacky layer, seal with two coats of topcoat. For flakes, use tweezers to place each piece—this creates a hand-painted look that reflects light differently across angles.
Micro-painting for characters and scenes
Outcome up front: with a 0.1mm brush, create small Santa faces, gingerbread details, or a snowy village. Use thinned acrylic paint or highly pigmented nail paint for control.
Practice on a fake nail first and build the image from large shapes to details. Keep a damp sponge towel nearby to wipe the brush between colors to avoid muddy lines. This technique converts simple designs into memorable, photograph-ready nails.
Mastering these five techniques enables consistent, salon-caliber holiday nails at home or for clients. Follow technique, then practice, then combine for layered, professional results. Key insight: technique + patience beats expensive tools.
5 Budget-Friendly Product Picks and Brand Tips for Christmas Nail Art
Main point first: choose three core products—base/top coat, two color polishes, and one glitter or stamping tool—and supplement with affordable brands to stay under $25 per look 💸. Mixing premium and drugstore choices gives durability with style.
To read Christmas Nails Winter: Cold Weather Designs
Why this matters now: in 2025, seasonal polish collections often sell out fast. Planning 45–60 days ahead secures trending shades and limited-edition glitters without rush shipping.
Top product roles and cost breakdown
Base & topcoat: use a durable base like CND and a high-gloss topcoat from Essie or Sally Hansen. Budget estimate: $8–$15 for both if bought during holiday promos.
Main colors: pick a classic red, emerald green, and a neutral blush. Affordable options include Sally Hansen or KISS polishes that deliver high pigment for under $6 per bottle. For special glitter, ILNP and China Glaze have standout formulas—buy one statement glitter to carry across multiple designs.
Tool choices that save time and money
Stamping kit: a starter set from Born Pretty or MoYou London costs around $10–$25 and replaces the need for freehand perfection. Add a small liner brush for $3–$5.
Why pro mixes matter: combining an affordable base with one premium glitter often yields the best photos and wear time. This hybrid approach is perfect for creatives on a budget.
Where to learn the exact steps
Resource first: follow step-by-step guides and galleries to visualize results. For curated photo inspiration, the gallery at Nail Designs Spot offers examples to match to your chosen palette.
For how-to breakdowns that emphasize glitter and sparkles, reference the seasonal walkthrough at Melissa Jane Lee.
To read Nails Christmas Designs: Complete Inspiration Gallery
Quick shopping checklist and substitutions
Checklist: base coat, topcoat, two color polishes, one glitter, a liner brush, dotting tool, and a stamping plate. Substitute: use a bobby pin for dotting or a toothpick for micro-lines in a pinch.
Final budgeting tip: shop bundle deals and look for holiday sets from OPI or China Glaze that include mini sizes—these are great for trying new colors without the full price.
Final insight: with three smart purchases and one statement glitter, a polished holiday set is achievable and repeatable across multiple looks.
5 Shape & Color Combinations to Match Every Holiday Outfit and Event
Direct answer: match nail shape and palette to the event: short square with emerald and nude for office parties, almond with glitter and red for cocktail evenings, and soft rounded blush with tiny gingerbread for family gatherings 🎁. Each combo explains why it works, exact color codes, and styling notes.
Begin with the effect: nails should complement outfits and accessories, not fight them. Choosing the right shape increases wearability and photo appeal.
Short square + glossy emerald (office friendly)
Outcome first: short square nails in a glossy emerald read as chic and practical. Pair with a matte nude accent to keep the look professional.
Color guidance: pick a deep emerald akin to classic holiday wreaths. Brands like Essie offer reliable shades that match jewel-toned winter fabrics.
Almond + red glitter (party standout)
Outcome first: almond-shaped nails with red glitter tips and a single sparkly accent nail catch lights under event lighting. This silhouette flatters long fingers and shows off rings.
Styling tip: match to metallic shoes or a sequined clutch for cohesive holiday imagery. Use ILNP glitter for intense shimmer in photos.
Blush rounded + gingerbread sketch (family cozy)
Outcome first: a soft, rounded silhouette with hand-painted gingerbread or holly reads warm and nostalgic. This look pairs with knitwear and leather boots.
Practical note: rounded nails reduce snagging on sweaters and hold up better for hands-on holiday tasks.
Short square + frosty blue French (winter formal)
Outcome first: frosty blue French tips on short square nails make a subtle statement for formal dinners. Keep accents minimal—tiny snowflake on one nail is enough.
Aesthetic note: combine with silver jewelry and cooler-toned makeup to create a cohesive winter palette.
Almond + multicolor playful set (youthful gatherings)
Outcome first: alternate red, green, blush, and glitter across nails for a lively, photo-friendly set. Add candy cane stripes or peppermint hearts to create a story across the hand.
Where to find more playful ideas: browse lively mixes and tutorials at Country Living’s holiday nail ideas or the playful gallery at HubPages Style.
Key insight: shape directs durability; palette directs mood. Choose both intentionally to make nails an accessory that elevates every outfit.
5 Pro Tips for Longevity, Removal, and When to Book a Nail Tech
Main point first: maximize wear with step timing, protective topcoats, and proper removal to avoid damage — plan salon appointments 7–10 days before key events for fresh growth control 💅. These pro tips reduce chips and preserve nail health.
Start by preventing: base coat, thin color layers, and two thin topcoat layers beat a single thick coat every time. Thin layers cure faster and adhere better, less likely to peel during event prep.
Longevity hacks for at-home gels and regular polish
Result first: for gel-like wear without a lamp, use high-quality base and topcoat, allow each thin layer to dry fully, and finish with a sealing swipe on the free edge. This prevents tip lifting and extends life by 3–5 days.
Use brands like CND for base strength and OPI topcoats for glossy finish. For quick fixes, keep a matching polish bottle and a toothpick for repair dots.
Safe removal without damage
Result first: acetone soak (10–15 minutes) for glitter and gel is effective; follow with gentle buffing and cuticle oil to restore moisture. Avoid forcing or scraping polish off raw nails.
Aftercare: apply a nourishing oil and a strengthening treatment from Nailtopia or a protein-based formula to rebuild layers if nails feel weak.
When to DIY vs. when to book a tech
Quick rule: choose DIY for simple accents and stamping; book a pro for complex 3D elements, sculpted extensions, or if there is nail damage. Schedule appointments 7–10 days before the event to allow for quick touch-ups if needed.
Salon tip: communicate photos of the desired look to your tech in advance. Use an image reference from a gallery like Nailorae’s holiday ideas or a step tutorial at Nails Consulting to set expectations.
Travel and gift-season considerations
Result first: plan travel-friendly nails: choose shorter shapes and matte finishes for minimal maintenance. Pack a mini repair kit (topcoat, small file, matching polish) for immediate fixes on the go.
For gifting: a DIY nail set makes a thoughtful stocking stuffer; include a small selection of mini polishes and a stamping plate for personalization.
Final insight: with proper timing, a small toolkit, and a decision tree for DIY vs pro work, holiday nails stay beautiful and healthy throughout the season. 🎄
For further step-by-step visuals, explore extra tutorials and pictorial galleries to match any skill level, including guides found at Mets Minor League Blog and curated inspiration at Her Style Code. Save for reference!