
Show index Hide index
- 5 Glam Themes to Start Your Christmas Tree Styling: Choose a Cohesive Vision Fast
- 5 Lighting Techniques That Make Any Tree Sparkle Like a Pro
- 5 Rhinestone & Oversized Ornament Styling Secrets for High-Impact Sparkle
- 5 Texture & Layering Techniques: Ribbons, Garlands, and Picks That Add Depth
- 5 Under-Tree Styling & Presentation Tips That Seal the Look

5 Glam Themes to Start Your Christmas Tree Styling: Choose a Cohesive Vision Fast
Main benefit: Pick a clear theme first to make every decorating decision fast and cohesive. Choosing a theme prevents mismatched décor and saves time when shopping and arranging.
Visualize the final scene before buying anything. For a show-stopping result, decide between options like EverGreen Elegance (deep emeralds and gold), GlitterGlow (champagne and crystal rhinestones), and TwinkleTree Designs (icy blues and silver). Each theme directs ornament choices, ribbon, and under-tree styling so the finished tree reads like a designed tableau.
For example, stylist Clara—a boutique interiors consultant—picks a theme and lists three key elements: color palette, three focal ornaments, and one texture (ribbon, garland, or picks). That focused approach reduces decision fatigue and ensures a magazine-ready outcome within a few hours of decorating.
Budget and time matters: a signature rhinestone ornament cluster can cost between $15–$50 depending on size, while basic warm white LED lights are often under $25. Commit to the theme by buying quality lights first, then add three statement ornaments and supporting accents for depth.
Practical steps: sketch the tree placement and mark the viewing angles. If the tree stands in a living room corner visible from the hallway, prioritize front-facing sparkle with a slightly off-center large ornament. This small planning step mirrors professional decorators’ workflows found in resources like how to style a stunning Christmas tree and speeds setup significantly.
Theme examples with quick how-to: for Ornament Oasis, mix warm metals and matte finishes and weave a beaded garland; for Holiday Harmony, choose a two-tone palette and ribbon loops for texture; for Yuletide Charm go rustic with cotton sprigs and pine picks for a cozy feel. Each theme has a clear shopping focus, so time spent decorating stays under two to three hours once supplies are gathered.
To read Christmas Ornament Crafts: DIY Projects for All Ages
Clara’s case study: a municipal café wanted a tree to match its brand. The brief was luxury but approachable. The chosen theme combined Branch Bliss elements—soft ribbon and botanical picks—with one oversized rhinestone focal piece. Guests commented on the tree’s Festive Flair, and the café’s photos performed strongly on social media for a week after installation.
Common mistake to avoid: mixing three or more unrelated color families. Instead, refine to two dominant colors and one accent to keep the eye moving. This simple constraint is the fastest route to a professional look and creates content that is highly “pinnable” for holiday inspiration—Save for reference! 🎄
Final insight: pick your theme first, buy high-impact lighting and one oversized ornament second, then layer textures. That order produces a cohesive, glamorous result without endless shopping or second-guessing.
5 Lighting Techniques That Make Any Tree Sparkle Like a Pro
Main benefit: Proper lighting transforms a tree from flat to luminous; layer lights for depth and consistent glow. Start with lights before ornaments to ensure sparkle shows through.
Professional decorators always insert lights deep into branches first. Clara places strings in a trunk-to-tip zig-zag pattern to avoid edge-only illumination. This creates internal depth so ornaments—especially rhinestone pieces—reflect light from within, not just the surface.
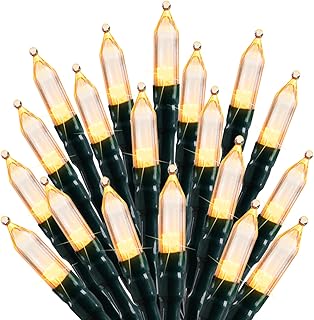
Use warm white LEDs for a timeless look and energy efficiency. LEDs run cool, last longer, and produce consistent color temperature that complements metallics and glass. Aim for roughly 100 lights per vertical foot on artificial trees for a dense, glowing effect; reduce to 60–80 per foot for a softer twinkle.
For maximum sparkle, layer two types of lights: a base of warm white LEDs woven deep and a finer string of micro warm-white or twinkle lights on the outer branches. The base provides steady illumination, while the micro lights add scintillation on the tips where rhinestone ornaments catch and multiply the glow.
To read Christmas Characters: Popular Figures for Decorating
Practical how-to: measure tree height and calculate light length before buying. For a 7-foot tree, plan 700–900 warm white LEDs for a full coverage look. Clara wraps lights around the trunk area too, which adds a subtle inner glow and helps create a silhouette at night.
Lighting troubleshooting: if lights appear patchy, check tension and spacing—looser wiring tends to bunch. Replace faulty sections immediately; one dark strand can create a visual hole that distracts from the entire design. Resources like professional decorating tips explain spacing and light layering in practical detail.
Energy tip: use smart plugs or timers to schedule the tree to glow during prime viewing hours—typically late afternoon to evening. This saves electricity and increases perceived value during guest hours without extra effort.
Final insight: layer a steady base of warm LEDs with a top layer of micro twinkle lights, weave lights trunk-to-tip, and test before decorating to achieve a consistent, photograph-ready sparkle every time. TwinkleTree Designs comes alive with layered lighting. ✨
Short transition: the next section explains how to use rhinestones and oversized ornaments to exploit that layered light and create focal drama.
5 Rhinestone & Oversized Ornament Styling Secrets for High-Impact Sparkle
Main benefit: Strategic rhinestone and large ornaments yield maximal glamour with minimal quantity. Use three rules of placement to create balance and drama.
Rule one: position rhinestone ornaments near light sources so each facet reflects and multiplies; this creates the perception of many more ornaments than actually present. Clara groups rhinestone pieces in clusters of three at staggered heights to build visual depth and movement.
To read Retro Christmas: Vintage-Inspired Holiday Decoration Ideas
Rule two: employ the triangle placement technique for statement ornaments. Place the largest ornament at a primary focal point—front and slightly off-center—then balance with two supporting pieces forming a visual triangle. This is the same compositional rule designers use in window displays and is recommended by authorities like how to decorate like a pro.
Rule three: mix finishes and sizes. Pair a Luminous Giant Ornament (about 10 inches) with smaller rhinestone globes and glossy baubles to avoid monotony. The contrast of matte to mirror-like finishes multiplies perceived texture and keeps the eye engaged from every angle.
How to hang heavy ornaments cleanly: use short ornament hooks clipped close to the top of the ornament to make pieces sit flush on branches. This “growing from the tree” illusion looks deliberate and professional and is a simple fix that reduces awkward dangling.
Budget note: a high-quality rhinestone set can be the single best investment for glam décor. One oversized piece combined with a few rhinestone clusters often replaces the need for dozens of generic baubles. For inspiration and product ideas, check curated visuals at 2025 designer Christmas tree ideas.
Styling example: Clara installed a tree with a center rhinestone cluster lit by an inner string of micro LEDs. Guests remarked on the “endless sparkle” effect, which was achieved with less than a dozen premium pieces rather than 100 small ornaments.
Final insight: prioritize placement over quantity—three well-placed rhinestone clusters and one oversized focal ornament will deliver a luxe look that photographs beautifully and stands out on social media. SparkleSpruce techniques rely on light+facet synergy. 💎
5 Texture & Layering Techniques: Ribbons, Garlands, and Picks That Add Depth
Main benefit: Texture creates dimensional interest and keeps shimmer from feeling flat. Use ribbon, garlands, and floral picks in a layered approach to add movement and tactile contrast.
To read Christmas Wood Crafts: Rustic DIY Projects
Start with wired ribbon to control shape. Clara cuts 30-inch loops, folds them, and secures with floral wire to create soft poufs that tuck deep into branches. This adds body and avoids an overly linear garland look. Wired ribbon is essential—non-wired ribbon collapses and loses form after just one season.
Next, weave bead garlands or crystal picks for reflective interest. Tuck them into the branches so they catch light without dominating the view. Mixing beaded textures with matte ribbons and glossy baubles creates a three-dimensional effect that reads well in photography and real life.
Botanical picks—cotton, pine, or eucalyptus—introduce natural texture and pair especially well with a theme like Yuletide Charm. Trim larger picks into smaller stems and insert them at varying depths to mimic natural sprigs, avoiding the “stuck-on” look of oversized cuttings.
Placement strategy: heavier, denser textures near the bottom of the tree anchor the composition while lighter, glittering picks and sprays toward the top draw the eye upward. This inverted balance supports the tree shape and prevents a top-heavy feel.
How to achieve designer ribbon movement: form a loose diamond or cascading pattern around the tree, anchoring ribbon loops every 12–18 inches. This creates rhythm and makes the eye travel around the tree, replicating professional techniques described in guides like how to decorate a Christmas tree.
Case study: a small showroom transformed a basic artificial tree by adding three textures: metallic ribbon, matte glass ornaments, and crystal picks. The result read expensive without increasing the ornament count dramatically, proving that texture layering is a high-impact, budget-friendly tactic.
Final insight: wired ribbon, beaded garlands, and trimmed floral picks layered from deepest branches outward create a lush, cohesive tree that holds photographic detail. This Tinsel Trends approach elevates basic ornaments into a curated display. 🎀
To read Christmas Garland: DIY and Buying Guide
5 Under-Tree Styling & Presentation Tips That Seal the Look
Main benefit: The base of the tree completes the story and makes the entire display feel intentional. Style the skirt, presents, and adjacent decor to amplify the theme and create a full-room impact.
Choose a tree skirt that matches your theme: plush faux fur for GlitterGlow, burlap for rustic Yuletide Charm, or a metallic pleated skirt for EverGreen Elegance. A quality skirt anchors the visual weight and hides the stand, instantly elevating the presentation.
Coordinate gift wrap colors and textures with ornaments to create a cohesive vignette. Use two wrapping papers and one accent ribbon color to avoid a cluttered base. Clara often wraps three mock presents for showrooms to frame the tree and provide scale without crowding walkways.
Add prop pillows or rhinestone-trimmed cushions nearby for a boutique, photographed-ready scene. This staging trick increases perceived value and encourages visitors to linger—and to photograph the tree for social sharing.
Styling tip: place one mirrored tray with a cluster of small rhinestone ornaments and a battery tealight to reflect tree light onto the floor. This creates a soft glow under the tree and photographs beautifully in low light. It’s a simple prop with high visual return.
Plan timing: start shopping and themed prep 45–60 days ahead for the best selection and calm setup. This interval allows time for custom ribbon choices and any special-order rhinestone pieces, and avoids last-minute compromises that dilute the vision.
Resourceful readers can find step-by-step professional approaches and detailed troubleshooting at sources like professional decorating tips from Balsam Hill and practical how-to guides at expert tips and tricks.
Final insight: under-tree styling completes the narrative and converts a pretty tree into a cohesive room centerpiece. Coordinate skirts, wrap, and props to match the theme and make every angle photo-ready. Festive Flair matters as much at the base as at the treetop. 🎁