
Show index Hide index
- 5 Quick Picks for Cricut Vinyl Halloween Window Silhouettes — Best Tools and Materials
- Deep Dive: Why Oracal, Siser and Window Cling Win for Cricut Vinyl Halloween Window Silhouettes
- Why Oracal 651 is the go-to for long-lasting silhouetted windows
- Why Window Cling is best for renters and repeat design play
- Why Siser EasyPSV and Expressions Vinyl matter for layered silhouettes and accents
- Materials, Tools, and File Prep for Crisp Cricut Vinyl Halloween Window Silhouettes
- Essential tools and compatible cutters
- File sources, SVG prep and font choices
- Saving material and mat optimization
- Step-by-Step Workflow, Placement Techniques, and Creative Ideas for Halloween Window Silhouettes
- Image selection and editing workflow
- Layout and sizing for different window types
- Application, layering, and lighting for maximum curb appeal
- Buying Considerations, Compatibility, Installation Requirements, and Final Recommendation
- What to check before buying vinyl and supplies
- Common mistakes and quick fixes
- Compatibility and installation requirements
Cricut Vinyl Halloween Window Silhouettes deliver high-impact spooky scenes with minimal effort, ideal for seasonal decorators and crafty homeowners who want crisp black silhouettes or colorful window clings that catch porch light. This guide focuses solely on making striking window silhouettes with Cricut using vinyl, window cling, and layered techniques that work on small or large panes. Expect practical tips on materials like Oracal and Expressions Vinyl, troubleshooting for tricky glass surfaces, and time-saving layout strategies that preserve vinyl and speed up assembly. Save this for your Halloween plan — pin for later! 🎃


5 Quick Picks for Cricut Vinyl Halloween Window Silhouettes — Best Tools and Materials
Quick answer first: The best Cricut vinyl Halloween window silhouettes produce bold shapes, stick reliably to glass, and remove cleanly when the season ends.
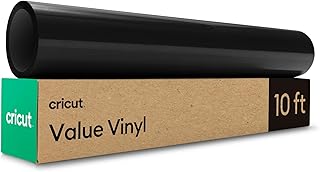
The best Cricut vinyl Halloween window silhouettes are: Cricut Permanent Vinyl (Oracal 651 Black), Removable Window Cling Sheets, and Siser EasyPSV for window-safe decals.
These selections solve core silhouette problems by offering contrast, easy weeding, and low-residue removal for glass surfaces, addressing adhesion, reusability, and durability for both indoor and porch-facing windows.
Quick Answer: For an all-around winner choose Oracal 651 Black Permanent Vinyl for crisp silhouettes and weather resistance on exterior-facing windows; for renters choose removable Window Cling for reuse and zero residue; for quick multi-color accents choose Siser EasyPSV that weeds fast and layers cleanly.
Top recommendation: Oracal 651 Permanent Vinyl, price range approximately $8–$15 per 12″×24″ roll depending on retailer and color availability; ideal for front windows that see porch light and mild weather exposure. ⭐
To read Sally Nightmare Before Christmas: Costume and Makeup Guide
Runner-up: Reusable Window Cling Sheets, budget around $6–$12 per pack of multiple sizes, perfect for renters and kids’ rooms where frequent repositioning is needed. ✨
Budget pick: Expressions Vinyl Removable, price near $4–$8 per sheet, good for temporary silhouettes on interior windows and practice cuts before committing to larger rolls. 💸
Each option brings a clear spec: Oracal offers permanent adhesion and weather resistance; Siser is vinyl engineered for smooth weeding and multilayer graphics; Window Cling avoids adhesives entirely for reusable decor. These choices match different homeowner constraints like rental rules or porch exposure. For downloadable silhouette files browse curated SVGs on Etsy at Etsy Cricut SVG Halloween window silhouette for ready-to-cut art. 🎃
Latest Spooky Halloween Projection Videos
Discover amazing Halloween projection ideas for your spooky windows!


Keep scrolling for something spooky...

Create Your Own Halloween Projection Magic!
Transform your windows into spooky Halloween displays with professional projection equipment. Perfect for creating the same eerie atmosphere as our kawaii monster videos!
🎭 Affiliate link - Support our spooky content creation!
This quick-picks section connects to deeper how-tos and material trade-offs addressed next, with image examples and step-by-step techniques for both Cricut and Silhouette users.
Deep Dive: Why Oracal, Siser and Window Cling Win for Cricut Vinyl Halloween Window Silhouettes
This deep dive explains why each material excels for Halloween window silhouettes, including practical limitations and real scenarios that determine the best choice for a project.
Why Oracal 651 is the go-to for long-lasting silhouetted windows
Oracal 651 is a cast calendared vinyl known for a strong adhesive that withstands humidity and porch breezes, making it the primary choice when silhouettes face outward on display windows. This vinyl’s opacity produces a crisp black silhouette against interior lighting, and its durability suits projects meant to last the entire autumn season. For anyone planning an outdoor-facing silhouette, Oracal’s weather resistance reduces edge lift and curling, which is a common failure mode for thinner, cheaper vinyls.
Spec and use case: Oracal 651 typically ships in 12″ and 24″ widths that fit standard Cricut cutting mats, and it cuts cleanly on a Cricut Maker or Explore series; use a standard fine-point blade and a green cutting mat for smooth edges. Limitation: removal can leave residue on older glass with coatings, so test a corner and consider Expressions Vinyl Removable for delicate surfaces.
Price and availability: Oracal 651 ranges from $8–$20 per roll in 2025 depending on width and vendor, and it’s commonly available via Amazon, craft stores, and specialty vinyl shops referenced on vinyl inspiration pages like Vinyl Cutting Machines Halloween projects. Edge-case scenario: for tall bay windows, choose 24″ rolls to minimize seams.
Why Window Cling is best for renters and repeat design play
Window Cling products are non-adhesive sheets that cling via static and are perfect for frequent repositioning, kid-friendly decoration swaps, and surfaces where adhesive is forbidden. The main advantage is reusability without residue, making window cling ideal for interior bedroom windows or seasonal displays that change each week.
To read Fake Glass Shards Halloween Safe Props
Spec and use case: clings come in matte or glossy finish; matte reduces glare against porch lights while glossy increases contrast at night. Limitation: clings typically require very clean glass and may slip on textured or low-emissivity coatings. Scenario: place cling silhouettes on the inside of a high-traffic window where weather and adhesive concerns are primary.
Resources: step-by-step cling tutorials and project videos are available in Visual Guides such as the Cricut blog at Cricut DIY vinyl window silhouettes and in community posts like NeliDesign window silhouettes tutorial.
Why Siser EasyPSV and Expressions Vinyl matter for layered silhouettes and accents
Siser EasyPSV and Expressions Vinyl simplify layering and color accents for silhouettes that need eyes, hats, or moon shapes layered over black shapes. Their thin profile makes stacking less bulky and reduces bubbling when applied to glass. Use Siser for fine details like spider legs or facial features that require delicate weeding.
Limitation and price: specialty vinyl often costs more per sheet but saves time in weeding; budget crafters should test small designs with affordable Expressions Vinyl before buying larger rolls. For multi-pane projects, select consistent brands to ensure similar adhesive strength and removeability across the composition.
Closing insight: material choice depends on the display scenario — choose Oracal for weather-exposed silhouettes, Window Cling for renter-friendly reuse, and Siser for layered, colorful accents; next section covers tools, file prep, and saving material strategies. 🔍
Materials, Tools, and File Prep for Crisp Cricut Vinyl Halloween Window Silhouettes
This section covers the precise tools and file preparations that ensure smooth cuts and minimal vinyl waste for Halloween window silhouettes using a Cricut or Silhouette machine.
Essential tools and compatible cutters
Use a Cricut Maker or Explore series for complex silhouettes, and a Brother ScanNCut or Silhouette Cameo for alternate workflows that favor built-in scanners or print-and-cut. Cutting blade type should match the vinyl: standard fine-point blade for Oracal and Siser, deep-cut blade rarely needed unless working with thicker adhesive-backed cardstock.
To read Broken Mirrors Halloween Special Effect
Mat selection matters: green 12″×12″ mats work for most cuts; for large window graphics, a 12″×24″ green mat reduces seams. A weeding tool, clear transfer tape, and a soft squeegee ensure bubble-free application and precise alignment on glass.
File sources, SVG prep and font choices
Choose high-contrast silhouette SVGs to avoid detail loss; font-based moon or phrase elements should be converted to paths prior to cutting. For curated silhouette packs and fonts see community sources and marketplaces such as Etsy and font resources like Spooktacular Halloween Cricut window silhouettes font. Avoid images with complex gradients when the goal is a single-color silhouette.
Preparation steps in Cricut Design Space include uploading the SVG, selecting “Save as cut image”, removing background noise, and using the “attach” and “flatten” functions appropriately when mixing vinyl with printable elements. For step-by-step walkthroughs consult video guides at this tutorial and community blogs like Burton Avenue.
Saving material and mat optimization
Optimize placement to minimize waste by combining small silhouette elements on a single mat and rotating pieces when needed, mirroring the strategy found in Design Space tips and fit tricks. For thriftier crafting, align multiple windows’ small decals on one sheet of Expressions Vinyl, and move objects between mats to reduce scrap — this saves both cost and time when preparing a multi-window display.
Practical example: when crafting a row of four small 8″ bats for pantry windows, nest them tightly and cut on a single 12″ wide strip to use one roll foot of vinyl instead of multiple sheets. If a window has reflective glass or window film, prefer Window Cling to avoid residue and performance drop.
Practical insight: matching cutter capabilities, mat size, and vinyl type to the window dimensions prevents last-minute trips to the store and keeps silhouette edges crisp for dramatic porch-viewing. ✂️
Step-by-Step Workflow, Placement Techniques, and Creative Ideas for Halloween Window Silhouettes
This section outlines a complete workflow from image selection to final application, covering layout tricks, layered scene composition, and renter-friendly swaps for Cricut vinyl Halloween window silhouettes.
To read Decorative Stones Halloween Luminous Pebbles
Image selection and editing workflow
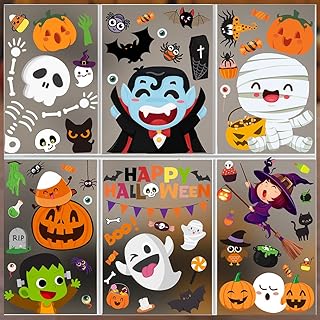
Select SVGs with strong negative space and few thin interior lines to ensure reliable cuts and easy weeding for silhouettes meant to be seen from the street. Search terms like “silhouette”, “bat silhouette SVG”, or “haunted house cut file” return usable results on marketplaces and inspiration boards such as Pinterest Halloween window silhouettes.
When using raster images, convert to black-and-white and use the trace or remove background tools in Design Space to create clean cut paths; if necessary edit nodes in a vector editor before uploading. Real-world tip: enlarge key elements like a witch’s hat or cat tail by 25% to preserve detail when viewed from outdoors.
Layout and sizing for different window types
Measure glass panes precisely; a tall kitchen window may need vertical silhouettes like elongated tree branches, while a wide living room window benefits from a panoramic haunted skyline. For small panes under 18″, prefer simple motifs like bats, pumpkins, or moons; for large picture windows use layered silhouettes for depth and shadow play.
Example scenario: for a 48″ wide front window, plan a triptych of three 14″ silhouettes spaced evenly with a center focal point to balance porch light. If a window has mullions, plan to cut around the muntins or position silhouettes to avoid awkward splits in design.
Application, layering, and lighting for maximum curb appeal
Clean glass with alcohol and microfiber cloth prior to application for best adhesion and to avoid trapped dust showing as halos under light. For layered scenes, apply the background layer first (black) then add colored accents like moon glow using thin Siser vinyl, ensuring each layer is firmly squeegeed to avoid lifting.
Lighting tip: place warm LED string lights or battery candles behind silhouettes to create silhouette contrast without heat risk; for projection effects consult projector options and resources like battery Halloween projectors under $200 for adding moving shadows behind static vinyl silhouettes.
Creative idea: transform a carved pumpkin look by applying vinyl stencils to faux pumpkins using Permament Vinyl or removable vinyl for fun displays that match window silhouettes across the façade. For more project inspiration and varied techniques consult project roundups at Burton Avenue and Create Craft Love. 🎨
Closing insight: careful measurement, layered application, and purposeful lighting transform simple vinyl silhouettes into high-impact curb appeal displays that are easy to swap or store after Halloween. 🕯️
Buying Considerations, Compatibility, Installation Requirements, and Final Recommendation
This section focuses on what to check before purchasing materials for Cricut vinyl Halloween window silhouettes, common mistakes to avoid, and final purchase guidance with clear calls to action and an Amazon link to the top pick.
What to check before buying vinyl and supplies
Confirm window glass type and coating; low-E or tinted glass can reduce adhesive performance and favor Window Cling or interior application only. Check cutter compatibility with intended vinyl width, and choose mat sizes that match your planned silhouette dimensions to avoid extra seams. Verify blade sharpness and have replacement blades on hand for clean cuts when handling intricate silhouettes.
Also confirm adhesive permanence: choose Permanent Vinyl like Oracal 651 for outdoor-exposed windows, and removable products from Expressions Vinyl for temporary or rented spaces to avoid damage and warranty issues.
Common mistakes and quick fixes
Avoid cutting extremely thin lines for silhouettes viewed from a distance; thin lines can tear during transfer. To fix lifting corners on permanent vinyl, reheat with a hairdryer briefly and press down with a squeegee. For misaligned layers, use transfer tape to lift and reapply carefully, or cut new small accent pieces to hide seams.
Another frequent error is poor mat placement leading to wasted vinyl; refine mat nesting in Design Space and move pieces between mats to utilize leftover scraps efficiently, as detailed in community tips at Vinyl Cutting Machines.
Compatibility and installation requirements
Ensure your cutting machine firmware and software are updated for the best file handling, and match blade type (standard blade for medium vinyl, deep-cut rarely needed). For large-scale installations, plan for lifts or scaffolding and position decals from the inside where feasible to protect vinyl from weather and vandals.
If layering multiple vinyl brands, test a small area for adhesion compatibility before full application; differing adhesive chemistries can cause separation or bubbling over time.
Final recommendation: For most decorators seeking a balance of durability and cost, the top pick is Oracal 651 Permanent Vinyl for crisp, long-lasting silhouette results. Purchase now via Amazon or local craft stores for seasonal delivery and check accessory extras like transfer tape and a 12″×24″ mat.

Final insight: choosing the right vinyl and preparing the workspace ahead of time prevents common pitfalls and ensures Halloween window silhouettes look professionally staged and are simple to remove after the season.
Useful additional resources and inspiration include tutorials and galleries at NeliDesign, font packs at Font You Need, and curated project lists at Burton Avenue.
Related practical references: neuchcup Halloween window silhouettes, neuchcup small window ideas, neuchcup window boxes with light, neuchcup curtain lights waterproof, and neuchcup Halloween projectors under $200 for combined silhouette and projection setups.