Show index Hide index
- 1. Quick Answer: Best Spectacular Halloween Facade Under $200 — Top Picks and Fast Plan
- 2. Deep Dive: Why These Facade Solutions Win Under $200 and How to Maximize Impact
- 3. Buying Considerations: What to Check Before Building a Halloween Facade Under $200
- 4. Practical Builds and Visual Plans: Three Weekend-Focused Facade Projects Under $200
- 5. Final Recommendation & Next Steps for a Spectacular Halloween Facade Under $200


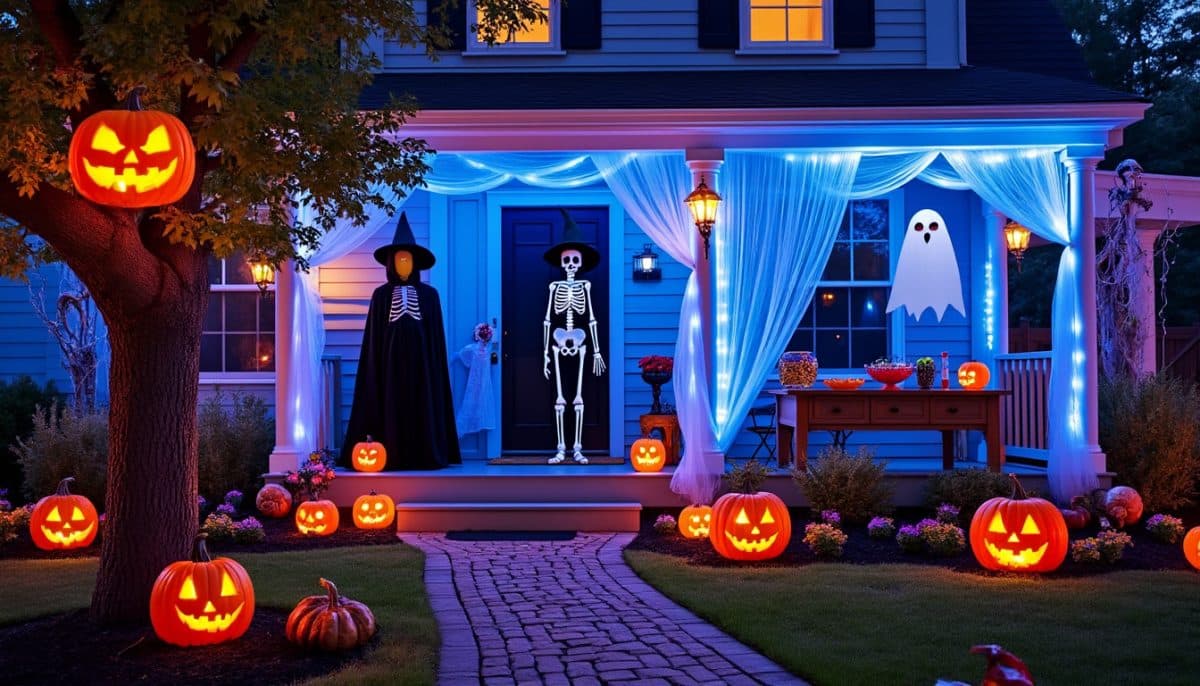
Spectacular Halloween Facade Under 200 Dollars brings step-by-step, wallet-friendly strategies for turning an ordinary house front into a show-stopping haunted scene without breaking the bank. This briefing focuses on practical kits, materials, and realistic projects that cost less than $200, with clear buying cues and retailer options from Spirit Halloween to Home Depot. Short, actionable paragraphs help plan a dramatic reveal in 2–6 evenings. 🎃
1. Quick Answer: Best Spectacular Halloween Facade Under $200 — Top Picks and Fast Plan
The best Spectacular Halloween Facade Under $200 are: DIY Foam Panel Facade Kit, Etsy Custom Facade Runner, and Projection + Silhouette Combo.
The best choices solve three common problems for budget facades: low cost, dramatic visual impact, and easy weekend installation. The DIY Foam Panel Facade Kit delivers texture and depth at roughly $80–$140 for materials from Home Depot or Lowe’s. The Etsy Custom Facade Runner offers unique styles and can be found under $200 on some sellers on Etsy. The Projection + Silhouette Combo uses a 1080p Halloween projector and vinyl cutouts for a zero-construction façade that reads well from the curb, typically priced $70–$170 depending on the projector and decal quality.
Top recommendation: Foam Panel Facade Kit — price around $120, suitable for 8–12 ft wide entryways, textured finish, paints well. 🛠️
Runner-up: Etsy Custom Facade Runner — price varies but often $80–$180, perfect for unique period facades or themed cottages. 🎭
Budget pick: Projection + Silhouette Combo — projector $70–$130, printable silhouettes under $20; no structural changes, instant effect. 💡
To read Adhesive Rhinestones Halloween Decorative Applications
Each option matches a typical suburban scenario: homeowners with small porches, apartment entryways, or block parties can choose accordingly. For quick shopping, compare materials at stores like Target, Walmart, Michael’s, and Joann Fabrics for trims and craft supplies. For specialty props and mask accents, check Horror Dome for inspiration and scaled pieces that can inform budget builds. 🔍
Practical example: an 8-foot-wide foam panel set painted in three tones with faux-weathering and a fog machine creates a cinematic façade in an evening with two people helping; total under $150 if tools are already on hand. Save for reference! 📌
[purchase_shortcode_placeholder]
Key takeaway: for under $200, prioritize texture (foam), lighting (LEDs or projector), and focal accents (door frames, shutters). 🎃
2. Deep Dive: Why These Facade Solutions Win Under $200 and How to Maximize Impact
Understanding why specific approaches outperform others under a tight budget informs the right choice for each property. The core advantages for the DIY Foam Panel Facade Kit are surface realism and paintability. Foam insulation sheets and hot-wire-cut foam allow sculpting of window frames, shutters, and crumbling stone textures that photograph well at dusk. This method beats flat banners or cheap inflatables because depth creates believable shadow and highlights that last through several Halloweens with basic weatherproofing. 🌫️
Practical specs: a 2″ foam insulation board from Home Depot or Lowe’s costs roughly $10–$20 each; two to six sheets cover most small facades. Adhesive, a few 2×4 supports, and latex exterior paint add another $40–$80. The result is modular sections that store flat and can be reused or repainted for different themes. Hot Wire Foam Factory galleries show professional and amateur foam projects that demonstrate scalability and finishing techniques — check the gallery for visual references at Hot Wire Foam Factory gallery. ✂️
The Etsy Custom Facade Runner is advantageous for themed authenticity when time or tool access is limited. Many sellers offer painted vinyl or fabric façade panels that mimic brick, Tudor, or Victorian facades and can be swapped quickly. Etsy listings often include dimensions; be sure to compare returns policies and shipping times to ensure arrival before the event. Use the Etsy marketplace to find sellers offering pre-distressed finishes or custom window cutouts that fit porch lights and door hardware. Find custom options on Etsy. 🖼️
To read Fake Diamonds Halloween Table Decorations
Projection-based facades win on speed and flexibility. A small 1080p projector paired with looping silhouette footage transforms any flat surface without carpentry. Projectors from Amazon Basics or affordable brands at Target and Walmart can be paired with printable vinyl silhouettes from craft stores like Michael’s or Joann Fabrics. Projector setups require a dark throwing arc (8–20 ft depending on lumen output) and a power source, but avoid structural work and store compactly off-season. For projector inspiration and DIY tips, explore curated project examples and cheap-decor roundups on sites like Bored Panda. 🎥
Limitations and trade-offs: foam requires basic tool safety and weatherproofing if exposed; vinyl runners can flutter in wind without weight or grommets; projectors depend on darkness and stable mounting. Price ranges in 2025 remain competitive: expect material costs to climb slightly, so plan for a 10–15% buffer on quoted prices. When storage is limited, choose foldable or rollable options like vinyl runners or modular foam panels that disassemble. This balance of cost, reusability, and impact justifies top recommendations. Final insight: pick the method that directly addresses the main constraint—time, tools, or climate—and the décor will read expensive even on a small budget. 👻
3. Buying Considerations: What to Check Before Building a Halloween Facade Under $200
Before committing to a facade route, check local rules, entryway measurements, and power availability. Porch height, door swing, and neighbor sightlines dictate whether a foam panel, vinyl runner, or projection approach is feasible. Many communities have specific guidelines for attachments to houses and sidewalks, so verify with the HOA or local ordinances if the façade will extend into public right-of-way. This prevents last-minute removals or fines and keeps the project under budget. ⚖️
Material compatibility matters: exterior-grade latex paints adhere well to foam and vinyl; avoid solvent-based coatings on foam unless sealed correctly, as some adhesives will melt rigid foam. For fasteners, use construction adhesive for foam-to-wall applications and grommets with bungee cords for vinyl. Wind ratings are important for vinyl runners—if the neighborhood faces frequent gusts, add counterweights and reinforced edges from supplies found at Home Depot or Lowe’s. For decorative trim and props, stores like Target, Walmart, and Wayfair offer time-saving accent pieces that keep the project within the $200 cap. 🧷
Tool checklist: a utility knife, small circular saw or handsaw for 2×4 supports, hot-wire cutter for foam if available, staple gun for fabric edges, and an electric drill for mounting brackets. Borrow or rent tools if needed to maintain the budget. For lightweight façade panels, snaps or magnetic catches reduce damage to siding and allow seasonal removal. Keep a materials contingency of $20–$30 for unexpected fasteners or paint touch-ups.
Common mistakes to avoid include overbuilding (too heavy or too permanent), choosing high-gloss paints that reflect and flatten texture, and ignoring drainage near the base of panels which can trap moisture and cause early wear. Compatibility issues also arise with outdoor lighting: warm LED string lights hide wiring and heat issues better than incandescent strings. If animatronics or fog machines are planned, ensure a grounded outdoor outlet within 20–30 ft or obtain a weather-rated extension cord and power strip with a GFCI. For inspired supply lists and low-cost hacks, consult curated starter packs and safety checklists at resources such as Halloween Home Starter Pack and Halloween Safety Checklist. 🛒
Consider storage and reuse: modular foam panels and vinyl runners fold or stack; label each piece for reuse the next year. This amortizes the initial outlay over multiple seasons and keeps long-term cost-per-year low. Final insight: a little pre-planning around measurements and power saves both money and late-night troubleshooting. 🔌
To read Fake Glass Shards Halloween Safe Props
4. Practical Builds and Visual Plans: Three Weekend-Focused Facade Projects Under $200
Concrete project plans help translate the top picks into actionable weekend tasks. Project A: Weathered Cottage Foam Facade uses 4–6 foam insulation sheets, a set of 2×4 supports, exterior latex paints (three tones), and LED uplights. Timeline: two evenings for cutting and initial assembly, one evening for painting and distressing. Cost estimate: foam $40–$80, paints and adhesives $30–$50, lighting $20–$40 — total ~$120. This project produces convincing depth and stores flat for off-season. 🛠️
Project B: Victorian Runner from Etsy selects a pre-printed canvas or vinyl facade sized to the porch (measure twice). Timeline: one afternoon for hanging with grommets and weights. Cost estimate: runner $80–$180 depending on custom options, reinforcement materials $10–$20. This is ideal for themed parties or quick events where authenticity and pattern detail matter. Choose fabrics treated for outdoor use or add a waterproofing spray if the event risks light rain. For inspiration and pattern types, browse curated galleries like Pinterest Halloween Facades. 🖼️
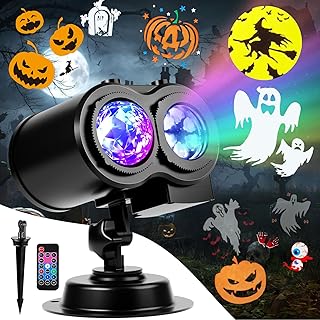
Project C: Projection + Silhouette Combo requires a compact 1080p projector, a projector screen or matte white vinyl, and silhouette cutouts. Timeline: one evening for mounting and mapping the projection. Cost estimate: budget projector $70–$130 (search for reliable lumen counts), screen material $10–$30, printed silhouettes or stencils $5–$20. This method is the fastest for dramatic motion and sound sync but requires darkness to be most effective. A portable fog machine and directional uplight elevate the effect for under $40 extra. For projector choices and ideas, review compact projector options like those listed at Halloween Projectors 1080p. 🎬
Each project includes a simple supply mapping: primary material, secondary finish (paint or print), lighting, and fasteners. Tools can be borrowed from local community tool libraries to keep costs down. For decorative flourishes and SFX makeup accents, consider sourcing masks and silicone pieces from specialty suppliers like the Horror Dome to add theatrical faces peeking from windows — check their facade collections for prop inspiration: Horror Dome Facades. 🧟♀️
Example scenario: a narrow rowhouse entryway benefits more from a projection-based solution due to limited depth, while a detached home with a shallow porch will gain the most from layered foam panels and string lights. Final insight: match the project approach to the physical constraints first, then layer lighting and accents for maximum perceived value. ✨
5. Final Recommendation & Next Steps for a Spectacular Halloween Facade Under $200
Top pick recap: the DIY Foam Panel Facade Kit offers the best balance of realism, reusability, and cost control for most suburban properties under $200. The foam route allows tailored texture, photogenic lighting, and modular storage, and performs well when paired with inexpensive LED uplights and a fog machine. ✨
Clear next step: measure the facade opening, choose one of the three project outlines above, and source core materials from Home Depot, Lowe’s, or online retailers. For quick accessory finds, check Spirit Halloween, Party City, Target, and Walmart. Use craft stores like Michael’s and Joann Fabrics for trim, and explore specialty props at Wayfair or the Horror Dome for stand-out accents. 🛒
To read Broken Mirrors Halloween Special Effect
Click to shop a practical set of components on Amazon: Shop facade components on Amazon. This link leads to a curated search for project essentials such as foam boards, weatherproof paints, LED uplights, and mounting hardware to keep the build under budget.
Additional resources for creative inspiration and tutorials are useful while planning: find budget DIY galleries at DeMilked, cheap-decor lists at Bored Panda, full-how-to writeups on Instructables Haunted Facade, and foam artistry galleries at Hot Wire Foam Factory. For themed product pages that show finish levels, check Mystique facades at Haunted Props and inspiration posts on DIY community threads like the Witch Cottage series on HalloweenForum: Witch Cottage thread. 🎯
Local accessory and niche purchases are available through curated links for convenience, including starter packs, projector guides, lighting, and seasonal treats at the following helpful pages: starter pack, projector guide, string lights, pumpkin carving kits, and entryway ideas. 🍬
Final insight: prioritize texture, lighting, and a single strong focal point to make a facade read as spectacular even with modest spending — build once with reuse in mind, and the impact will compound for seasons to come. 🎃