Show index Hide index
- 1. Quick Picks and Short Verdicts for Pumpkin Carving Stencils and Templates
- 2. How to Choose Pumpkin Carving Stencils by Complexity, Skill & Template Type
- 3. Step-by-Step: Using Pumpkin Carving Templates from Print to Porch Display
- 4. Creative Themes, Displays and Pinterest-Ready Ideas for Pumpkin Stencils
- 5. Advanced Carving, Preservation, and Event Planning for Complex Templates


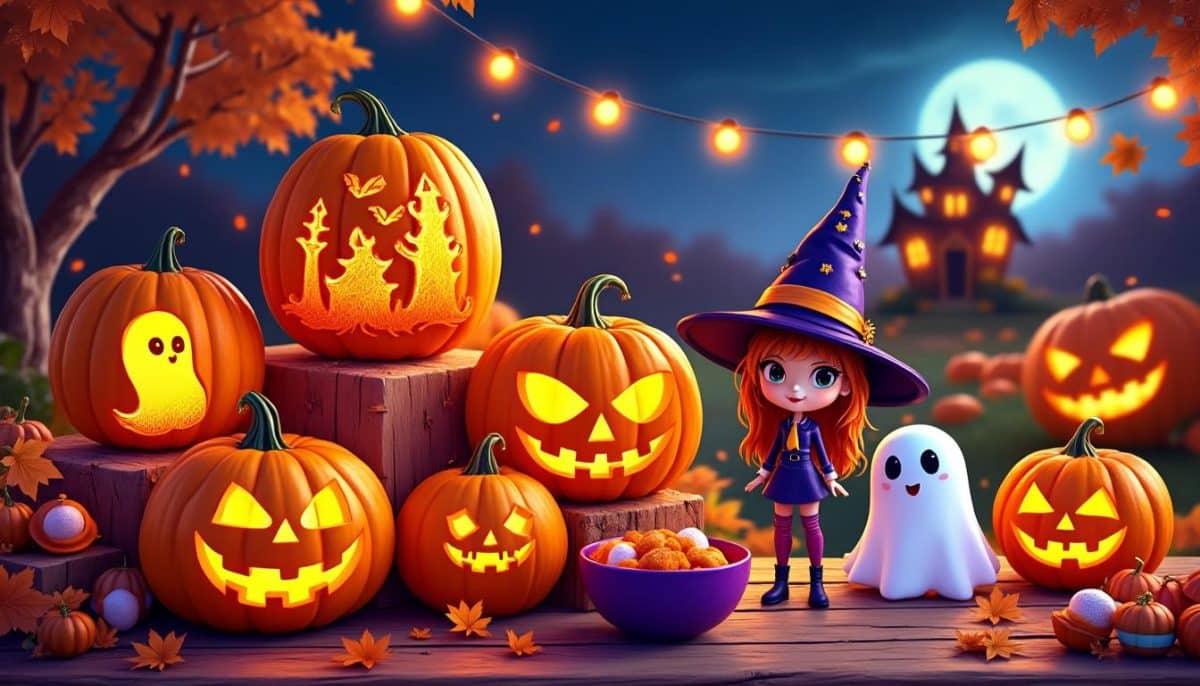
Pumpkin Carving Stencils and Templates Halloween Complexity — quick guide for makers looking to level up seasonal decor. The best stencil collections and template sources are listed first to save time and effort. The best Pumpkin Carving Stencils and Templates Halloween Complexity are: Drew & Jonathan 100 Free Stencils, Martha Stewart Halloween Templates, and PumpkinLady premium patterns. 🎃✨
1. Quick Picks and Short Verdicts for Pumpkin Carving Stencils and Templates
Opening: This section delivers the essential picks and why they matter for carving complexity and visual impact. Read the top recommendations immediately, then move on to hands-on details. The best collections are chosen for range, print quality, and usability for both family-friendly Carving Party sessions and advanced Pumpkin Masters competitions. 🔍
The best Pumpkin Carving Stencils and Templates Halloween Complexity are: Drew & Jonathan 100 Free Stencils, Martha Stewart Halloween Templates, and PumpkinLady premium patterns. These three hit different needs: mass variety, refined designer patterns, and premium detail for expert carvers.
Quick Answer (short): Top recommendation: Drew & Jonathan 100 Free Stencils — price: free to download; best for families and events. Runner-up: Martha Stewart Halloween Templates — price: free, curated designer patterns ideal for elevated porch displays. Budget pick: FirstPrintable / free PDFs — price: free, best for one-off quick prints.
Top picks at a glance: Drew & Jonathan offers a broad pack for mass carving and Carving Party planning; Martha Stewart Halloween provides polished designs for an upscale Halloween Haunters look; PumpkinLady sells advanced pattern packs for intricate Spooktacular Creations and Pumpkin Masters-level projects. Each affords a different balance of time, skill, and Pumpkin Wow. 🎯
Latest Spooky Halloween Projection Videos
Discover amazing Halloween projection ideas for your spooky windows!
To read Sally Nightmare Before Christmas: Costume and Makeup Guide


Keep scrolling for something spooky...

Create Your Own Halloween Projection Magic!
Transform your windows into spooky Halloween displays with professional projection equipment. Perfect for creating the same eerie atmosphere as our kawaii monster videos!
🎭 Affiliate link - Support our spooky content creation!
Deep Dive (expanded short): Drew & Jonathan’s set includes 100 high-resolution PDFs that fit US letter and A4, making printing straightforward for community events. Martha Stewart’s templates include classic silhouettes and modern takes that simplify complex shading through layered carving. PumpkinLady sells premium transfers and paid tutorials that work well with advanced carving tools and wet-foam preservation techniques. For free alternatives, see RealSimple’s curated list and BHG’s stencil collection for kid-friendly options.
This site contains affiliate links to products. Purchases made through links may generate a commission at no extra cost to the buyer.
Key insight: For multi-level Carving Party planning, mix a bulk free pack with one premium PumpkinLady design to offer both easy and challenging options. 📌 Save for reference!
To read Christmas Templates for DIY Projects and Printables
2. How to Choose Pumpkin Carving Stencils by Complexity, Skill & Template Type
Opening: Choosing templates is about matching stencil complexity to carver skill, display goals, and time available. This section explains how to evaluate stencils for beginner-friendly practice or for ambitious Pumpkin Masters contests. 🧭
Answering the main question: pick templates based on line density, negative-space reliance, and required tool set. Simple designs (classic faces, bats, witch hats) suit children and casual Carving Party setups. Intermediate designs (owls, haunted houses, Frankenstein) need steady hands and a basic kit. Advanced templates (dragons, intricate skulls, Zombie Pumpkins scenes) require specialty tools, layered shading patterns, and often paid transfers like those on PumpkinLady.
Why these criteria matter: a template with many internal islands or thin connecting bridges will collapse without precise poking and sawing; this influences material waste and the final Pumpkin Wow. For practical evaluation, examine the PDF at full size: are lines continuous, are edge joins broad enough, and does the template include transfer hole coordinates? If not, the design is riskier for a night display.
Practical example: For a neighborhood display inspired by Halloween Haunters, choose Martha Stewart Halloween templates for polished silhouettes and pair them with LED flicker lights for safety. If organizing a community Carving Party, use Drew & Jonathan’s free pack to let kids select quick patterns such as Classic Jack-O’-Lantern and Silly Face, while reserving a few complex stencils for experienced volunteers to demonstrate advanced techniques.
Compatibility issues to check: PDF sizing (US letter versus A4), printer ink density, transfer method (poke-through versus carbon copy), and whether the template was designed for round surfaces. Many templates adapt well to both A4 and US letter — for instance, the Drew & Jonathan collection and RealSimple’s curated stencils explictly note compatibility. Templates from Martha Stewart Halloween emphasize aesthetic balance for porch photography, while PumpkinLady offers paid transfers sized for large gourds.
Common mistakes to avoid: choosing a highly detailed template without practicing transfer holes, skipping a trial carve on a scrap pumpkin, and underestimating the need for preserving cut walks. For quick, safe ideas, RealSimple and BHG offer tested beginner-to-intermediate patterns with clear transfer steps.
If a scenario arises where time is limited (e.g., prepping 10 pumpkins in 90 minutes for a block party), prioritize templates with bold, wide outlines and avoid webs or very thin bridge points. For a staged evening display with close-up photography, favor layered shading templates that create Pumpkin Wow under directional lighting.
To read Nightmare Before Christmas Party Planning Guide
Key insight: match one easy, one intermediate, and one advanced template to each Carving Party kit to keep speed, learning, and spectacle balanced. 🎃
3. Step-by-Step: Using Pumpkin Carving Templates from Print to Porch Display
Opening: This procedural section translates templates into polished jack-o’-lanterns with safety, accuracy, and minimal waste. Clear steps align with the complexity of the chosen design. 🛠️
Immediate answer: print the template at scale, secure it to the pumpkin, transfer the pattern using a poking tool, carve with matched tools, and light safely. Each step requires specific checks depending on whether the template is simple or complex. For example, thin bridges in Spider Web or Dragon templates demand a slower, saw-like carving motion and often a wet-carve technique to keep the rind stable.
Transfer techniques explained: the poke-through method requires small, evenly spaced holes and is the most reliable for scaled PDF templates like those on FirstPrintable. Carbon paper transfer works on very large gourds where a single printout won’t fit; PumpkinLady sells transfer sets designed for multi-page alignment. For multilayer shading, use a combination of surface scraping and partial-depth cuts — this approach is common in Martha Stewart templates and advanced patterns from HGTV’s advanced carving gallery (HGTV).
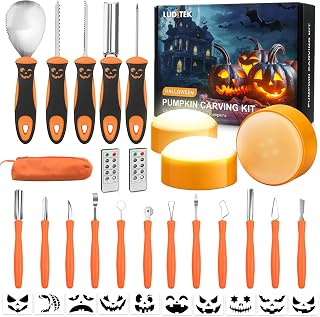
Tool matching: a basic set includes a serrated saw, scooping tool, and poking stylus; upgrade to a Dremel or precision linoleum cutter for StoneyKins-level detail. When tackling Zombie Pumpkins or a detailed owl in the moon, a rotary tool allows controlled shading while preserving structure. Replace open flame candles with battery-powered LED lights for displays that will be left unattended; LED inserts retain glow without thinning the rind from heat.
Time and cost estimates: a simple stencil like the Classic Jack-O’-Lantern takes 15–25 minutes and $0–$5 if existing tools are used; an intermediate haunted-house scene can take 45–90 minutes with basic tools; an advanced dragon or skull can require 2–4 hours and a $20–$60 tool upgrade. For group events, budget $2–$6 per participant for printable templates and supplies when using free PDFs from Drew & Jonathan or GoodHousekeeping’s printable pack (Good Housekeeping).
Real scenario: a community Carving Party hosted by the StoneyKins coop used Drew & Jonathan templates for kids and one PumpkinLady paid transfer for an adult demo; the result balanced speed and spectacle while teaching layered shading techniques to new carvers. For event organizers wanting decor continuity, pick a theme (e.g., witches & potions or Movie Monsters) and source 8–12 matching templates from RealSimple and Martha Stewart to create a cohesive porch display.
To read Fake Glass Shards Halloween Safe Props
Pro tip: always test-carve a scrap ridge from the pumpkin’s backside to gauge rind thickness and adjust blade depth. This reduces the risk of losing thin detail lines on the final piece.
Key insight: proper transfer method and tool choice make complexity manageable; invest time in pre-flight checks to avoid last-minute carving collapses. 🔧
4. Creative Themes, Displays and Pinterest-Ready Ideas for Pumpkin Stencils
Opening: This section focuses on creative application of stencils to build visual stories and Pin-friendly displays. Emphasis is on transformation, measured planning, and seasonal marketing for social shares. 📸
Answering the creative brief: use themed clusters to create scenes that scale—combine Haunted House, Black Cat, and Potion Bottles templates to form a vignette, or line up Zombie Pumpkins for a graveyard effect. For community events, a Carving Party can assign design roles: kids handle silly faces while advanced carvers produce the Spooktacular Creations. This approach invites participation and yields high-engagement visuals for Pinterest and local media.
Examples of visual groupings: a front-porch “Witch’s Mantle” display using Witch Hat and Witch Shoes stencils paired with painted pumpkins and LED candles; a “Forest at Dusk” group featuring Wolf Howling and Owl in the Moon for alleyway setups; a “Monster Row” with Frankenstein and Scary Jack-O’-Lantern for a bold curb appeal. Each theme benefits from consistent lighting and varied pumpkin sizes for depth.
Supply and staging checklist with time and cost: choose three main stencils for a theme, 6–10 pumpkins in varied sizes, LED inserts ($5–$15 per set), and spray-seal or petroleum jelly for preservation if outdoor. For DIY painted accents, include non-toxic acrylics and metallic finishes. Sources like RealSimple and Drew & Jonathan provide thematic compilations that can be mixed and matched to keep costs down while maximizing visual impact.
Pinterest optimization tips: front-load keywords in the photo title (e.g., “5 Easy Pumpkin Carving Templates That Actually Work”), include supply lists in the pin description, and add time estimates like “15–45 minutes” to set realistic expectations. Encourage saves by asking “Pin for later!” and include a clear call to action to download the template pack.
To read Broken Mirrors Halloween Special Effect
Real-world case: a small boutique named FunWorld staged a “Create-A-Pumpkin” workshop that paired a free Drew & Jonathan kit for children with a Martha Stewart demo station for adult attendees; the resulting event content gained local press because of themed staging and a consistent color palette. For branded tie-ins, reference iconic collections like Martha Stewart Halloween to lend credibility while showcasing local creativity.
Key insight: themed clusters with varied complexity increase participation and social shares—mix free packs with one designer template to maximize both accessibility and visual drama. 📌
5. Advanced Carving, Preservation, and Event Planning for Complex Templates
Opening: Advanced carvers and event planners will find techniques to preserve designs, manage logistics, and scale complex templates across many pumpkins. This section addresses materials, scheduling, and display longevity. 🗓️
Answer to the advanced question: use sealing, proper lighting, and rotation to keep intricate carvings intact over multiple nights. Complex templates like Dragon, Skull, and detailed Spider Web require controlled humidity, cool storage, and avoidance of direct heat from candles. LED solutions and sealed display cases extend life and protect delicate bridges.
Techniques for longevity: after carving, rinse the pumpkin with a diluted bleach solution (one tablespoon bleach per quart of water) to slow mold, then apply a light coat of petroleum jelly to cut edges. For high-traffic displays, place carved pumpkins on elevated platforms and use battery-powered LEDs that emit minimal heat. For competition-level entries, consider foam-backed inserts to reinforce thin sections; this approach is common among top Pumpkin Masters teams in community fairs.
Event logistics: when planning a workshop or partitioned Carving Party, schedule 15–30 minute slots per pumpkin for simple stencils, 45–90 minutes for intermediate, and 90–240 minutes for advanced templates. Provide templates ahead of time via downloadable links (for example, the extensive 500+ stencil archives at Celebrating-Halloween and the free printable packs found at FirstPrintable).
Budget planning: for a community event of 30 participants, expect pumpkin costs of $120–$180, tool rental or purchase of $100–$200, and LED inserts of $60–$120. Take advantage of free PDF packs and use one premium PumpkinLady demo to teach advanced skills without a large outlay. For inspiration, browse curated galleries at RealSimple, Martha Stewart Halloween, and the Drew & Jonathan collection to craft a balanced event program.
Real scenario: a local festival used staged rotations: a kid-friendly tent with simple Drew & Jonathan stencils, a demonstration area for advanced Pumpkin Masters enthusiasts, and a preservation station offering quick sealing and LED installation. That practical split ensured the creative output lasted through a holiday weekend and produced shareable moments for social media and local press.
Compatibility considerations: ensure supply lists include spare transfer paper, tape, and replacement saw blades. Verify that printable templates are scaled correctly and test the largest design on a mock gourd to confirm fit. For cross-cultural or multilingual events, provide template instructions with iconography rather than long text for faster comprehension.
Key insight: combining free mass templates with one or two premium transfers, proper preservation steps, and LED lighting maximizes display longevity and audience impact for both casual Carving Parties and competitive Pumpkin Masters exhibits. 🏆
Related resources and extra inspiration: explore free and paid template libraries at PumpkinLady, Drew & Jonathan, RealSimple, Martha Stewart Halloween, and BHG.
Additional creative links for patterns, tools, and porch ideas: pumpkin-carving-ideas, creative-pumpkin-ideas, pumpkin-carving-kits-templates, pumpkin-painting-porch-ideas, and free-pumpkin-templates.
Final actionable tip: pick one free pack for volume, one designer template for spectacle, and one tool upgrade to broaden the range of achievable complexity — then schedule the carve around cool evening hours for best preservation and Pumpkin Wow. 🎃🔥