Show index Hide index
- 5 Easy Thanksgiving Nail Looks That Actually Work for Your Manicure
- 4 Budget-Friendly Short Nail Ideas for Thanksgiving Under $20
- 5 Luxe Touches: Metallics, Glitter, and Chocolate Hues for Turkey Day Glam
- 3 Quick Steps to Create a Pumpkin Pie Gradient and Frost-Bitten Apple Sparkle
- 5 Timing and Prep Tips to Keep Your Thanksgiving Manicure Fresh Through Leftovers


5 Easy Thanksgiving Nail Looks That Actually Work for Your Manicure
Main takeaway: Choose one clear theme—earthy, metallic, or dessert-inspired—and commit to two coordinating shades for a cohesive Thanksgiving manicure. 🎯
Start with the result: a manicure that complements autumn outfits and holiday photos while surviving prep, cooking, and quite possibly pie cutting. The most reliable approach is to pick a dominant color plus one accent: for example, pumpkin orange with gold flecks, or plum with a subtle matte topcoat. Sources such as InStyle’s Thanksgiving manicures show how simple dual-tone schemes photograph beautifully on the table.
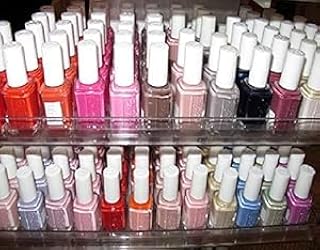
The classic Thanksgiving palette includes burnt ambers, wine reds, olive greens, and chocolate browns. For a low-effort approach that still looks salon-fresh, apply two thin coats of a solid shade and save the detail for one accent nail. Recommended polishes include Essie for creamy neutrals, OPI for pigmented wines, and Sally Hansen for budget-friendly pops. For an inspiration gallery that mixes subtlety with statement, check curated picks at CraftsyHacks’ Thanksgiving nail ideas.
Practical execution: prep nails with a 60-second buff and a quick swipe of CND Vinylux base for better adhesion. Apply two coats of your chosen shade—allow 2 minutes of drying between coats—and finish with a fast-dry topcoat. When adding an accent, use a toothpick or a fine brush to paint a tiny leaf or crescent moon near the cuticle; this keeps the design durable and low-stress. For short nails, opt for darker, glossy shades like China Glaze cranberry or Zoya deep browns to elongate the nail visually.
Design breakdowns that actually help: the fawn manicure is a neutral choice that looks intentional with matte finishes; the plum manicure reads festive and pairs well with gold rings; the dirty martini green balances rustic and chic; the pumpkin pie orange is perfect for a statement without being neon; and cabernet red makes a sophisticated table-ready Bold choice. Visual guides that combine these shades with step-by-step photos are available on inspiration sites like Glamour’s best Thanksgiving nail designs.
Example scenario: Sarah, a weekend DIY host, chose Essie’s Never Skip a Beat on all fingers and added a single gold-dusted accent using a Butter London micro-glitter. The result was photo-ready, lasted through handwashing, and required less than 20 minutes of active work. For more seasonal examples and quick how-tos that suit busy hosts, visit HelloBeautiful’s Thanksgiving nail ideas. 🔥
To read Christmas Nails Designs: Complete Tutorial Collection
Key insight: nail longevity is less about complicated art and more about solid prep, correct layering, and a single accent that ties the whole look to Thanksgiving colors. Save this tip for later and turn a simple polish change into a memorable manicure. 📌
4 Budget-Friendly Short Nail Ideas for Thanksgiving Under $20
Main takeaway: Short nails can be holiday-ready with the right color and technique; professional-looking results are attainable under $20 with smart product choices. 💸
Start with the decisive answer: select two dependable drugstore brands and a quick-dry topcoat. For under $20, kits from Sally Hansen and China Glaze deliver rich pigments without the price tag of salon lacquers. A single bottle of Sally Hansen’s Spill the Liber-tea or a compact China Glaze shade can transform short nails into an elegant holiday accent.
Technique matters more than having every brush in the drawer. For short nails, begin with a ridge-filling base or a light buff to smooth the plate. Apply a thin first coat, cure or air-dry for one minute, then a slightly thicker second coat to seal color. Top with a glossy coat from Orly or a quick-dry option from CND Vinylux to avoid smudges while preparing dishes. A budget breakdown: two drugstore polishes ($6–$10 each) + topcoat ($4–$8) = under $25; buying single minis or travel sets frequently keeps total under $20.
Short nail design examples that save time: a single-tone chocolate brown that flatters warm skin tones; a tiny gold dot near the cuticle for an upscale touch; or a negative-space crescent with a matte finish. Avoid heavy embellishments that catch on fabric and cutlery. Instead, choose adhesive foil strips or a micro-glitter accent on one nail to mimic luxe looks without professional tools.
For inspiration and real-world examples, browse collections that favor short, practical manis such as the compact edit at MSN’s Thanksgiving nail ideas. Practical proof comes from DIY hosts who prefer short nails for cooking: they pick deep, forgiving colors like OPI‘s Malaga Wine or Zoya tobacco tones to mask chips and maintain a polished look through the meal prep.
Case study: a fictional weekend crafter named Alex created a quick set with Essie fawn as base and used a single strip of OLIVE & JUNE gold sticker on the ring finger; the total cost was under $15 and lasted five days with minimal touch-ups. Pro tip: plan color two nights before Thanksgiving so chips after dishwashing can be corrected in one swift coat rather than a full redo.
To read Christmas French Tips: Classic Manicure with a Twist
Key insight: prioritizing pigment quality and a strong topcoat yields salon-style results on a budget. Save the expensive polishes for longer events; everyday holiday looks shine when basic technique and stain-resistant shades are used. 📌
5 Luxe Touches: Metallics, Glitter, and Chocolate Hues for Turkey Day Glam
Main takeaway: Add one luxe element—metallic, chrome, or deep chocolate—to create a manicure that reads upscale without requiring advanced nail art skills. ✨
Begin with the desired outcome: a manicure that complements fine table settings and holiday outfits. Metallics like gold or warm bronze instantly elevate a basic base color. Use a gold micro-glitter dab on an accent nail or a thin gold stripe along the free edge for an effect that sparkles in photos. Mineral-based glitter lacquers and brands like Butter London or ILNP deliver fine, reflective particles that read luxurious without bulk.
Chocolate and mocha tones suit Thanksgiving’s dessert-heavy vibe. A rich, glossy chocolate manicure from brands such as Essie No To-Do or OPI creates a mature, sophisticated look that pairs well with earth-toned outfits. To avoid a flat appearance, alternate gloss and matte finishes—one or two nails matte, others glossy—to add depth and intrigue.
Techniques for luxe finishes: for chrome, start with a black or dark brown base, cure completely, then rub a chrome powder (available in small kits) over a tacky topcoat for intense shine. For glitter, use a sponge to apply pigment to the accent nail—this increases density without wasting product. When applying metallic striping, use the thinnest striping brush and seal edges with a robust topcoat to prevent peeling.
Brand pairings that work: ILNP for holographic shimmer, Butter London for micro-glitters, and Zoya for deep, cream-covered browns. If stickers or nail charms are desired, Olive & June offers user-friendly decals that adhere well without salon adhesives. For curated galleries highlighting metallic trends and how they pair with autumnal shades, visit visual collections like Allure’s Thanksgiving manicures and editorial roundups on Glamour.
Practical example: a host named Clara chose a cabernet base with a single gold foil accent on the middle finger. The application required one thin foiled strip and a glossy topcoat; no elaborate tools or long drying sessions were necessary. This approach preserved the luxury look while being resilient to handwashing during prep.
To read Christmas Nails Almond: Shape-Specific Design Ideas
Common mistakes to avoid: applying metallics over an unsealed surface, using heavy glitters on all nails, and skipping the edge seal. Each error increases chipping risk. The final insight: one well-placed metallic or chocolate accent transforms a simple polish into a statement manicure—opt for balance and restraint to keep hands looking refined. 📌
3 Quick Steps to Create a Pumpkin Pie Gradient and Frost-Bitten Apple Sparkle
Main takeaway: Two well-practiced techniques—a gradient for pumpkin hues and a holographic dust for frosted pink—deliver standout nails in under 30 minutes. 🍁
Start with the outcome: a gradient that echoes baked pumpkin tones, and a shimmering pink that suggests frost on apple skins. For the gradient, select a dark burnt orange (such as Essie Burnt Orange) and a lighter squash yellow (think Sally Hansen Spill the Liber-tea). For frost-bitten pink, choose a deep raspberry base and a holographic topcoat from ILNP or China Glaze.
Step 1 — Prep and base: file to the desired shape and lightly buff to remove shine. Apply a quick-dry base and then one thin coat of the lighter shade for an even canvas. This creates a smooth surface for blending and prevents patchy gradients.
Step 2 — Gradient technique: use a small cosmetic sponge, dab alternating stripes of the two chosen polishes onto the sponge, then press gently onto the nail in a rolling motion for 10–15 seconds. Repeat until opacity is even. A cleanup brush dipped in acetone removes excess polish around cuticles. Practice on a spare nail tip for two attempts before starting all fingers.
Step 3 — Frost-bitten sparkle: for the pink look, apply two coats of a deep raspberry polish and while tacky, press a micro-holographic pigment (ILNP Nexus works well) with a sponge. Seal with two layers of topcoat for dimension and durability.
Time and cost estimates: expect 20–30 minutes active time for both techniques when practiced, and about $10–$25 for pigments or sponges if not already owned. Avoid the common error of over-layering, which causes bubbling and slow drying. For visual step sequences and variations that adapt these techniques to short nails, refer to galleries like Women.com’s Thanksgiving nail ideas and creative examples at Green Wedding Shoes.
To read Simple Christmas Nail Designs: Quick and Easy Tutorials
Illustrative case: a craft fair vendor showcased the gradient technique in a 15-minute demo booth, using Butter London micro-glitter to top a single accent nail. Customers left with salon-worthy gradients that matched their autumnal accessories. Final insight: these two techniques scale from minimal to ornate depending on how many nails receive the effect—start with one accent nail if time is tight. 📌
5 Timing and Prep Tips to Keep Your Thanksgiving Manicure Fresh Through Leftovers
Main takeaway: Schedule and protect: get a gel or full redo 2–3 days before Thanksgiving, and plan touch-ups instead of total redos. ⏰
Begin with the quick answer: timing is the secret to a chip-free holiday manicure. For gel or acrylic, booking an appointment 48–72 hours before the event provides peak shine and allows any minor wear to be handled with a single touch-up. Editorial advice from seasonal roundups suggests leaving a buffer so the polish settles fully and resists last-minute damage—this is echoed in advice on inspiration sites like Mirelle’s Thanksgiving nails 2025.
Prep steps to follow: hydrate cuticles daily starting one week prior, wear gloves while handling harsh cleaners, and avoid picking at nails or using them as tools. Use a base coat with strengthening properties such as one from Orly or CND Vinylux—these add resilience to natural nails and provide a better adhesion surface for polish.
Protective habits make a difference: when cooking, slip on thin food-safe gloves during heavy-duty tasks like handling raw turkey or scrubbing pans. For hosts who prefer not to wear gloves during family time, reserve a single hand for food prep and use the other for presentation and photos. If a chip occurs, apply a thin coat of the same shade on the affected nail and reseal with topcoat for a near-invisible fix.
Plan ahead with fall event calendars: if hosting events or photo sessions across several weekends, aim to schedule your main manicure for the biggest event and use neutral touch-up shades for others. This method keeps costs down and maintains manicure quality. For long-term mani planning and to see how trends evolve into December, consult visual trend pieces like What’s My Shape’s 2025 picks.
Example strategy: a fictional maker named Jordan keeps a “manicure kit” with mini bottles of Essie, a spare topcoat, a small file, and a non-acetone polish remover. When a chip happens, a quick spot-fix restores presentation without requiring a full redo and keeps hands photo-ready for hosting. Final key insight: resilience beats complexity—choose durable products, schedule smartly, and protect nails during messy tasks for Thanksgiving success. 📌
To read Holiday Nails Winter Christmas: Seasonal Design Ideas
Next steps: Save this article for reference and pin the color combos that match the Thanksgiving outfit planned—there is power in preparation and one decisive accent. 📌
Halloween nail designs resource
Thanksgiving nail designs ideas
Pumpkin decor and nail color pairing
Family-friendly holiday nail themes
Foliage color palettes for nails