
Show index Hide index
- 5 Simple Christmas Wreaths DIY Ideas That Actually Work — choose a style and start now
- 3 Budget-Friendly Wreath Bases and How to Choose Them — pick the right foundation for durable results
- 4 Step-by-Step Tutorial for Attaching Greenery and Accents — actionable wiring and gluing techniques
- 5 Time-Saving Tools, Display Ideas, and Preservation Tips for Holiday Decor — finish strong and save for next year
- Related inspiration and next steps
Christmas wreaths DIY delivers an instant upgrade to any home’s holiday decor and this guide opens with clear, actionable directions. 🎄 Start with the easiest option: a full, classic evergreen wreath made on a 14–18 inch base using simple supplies—this yields a polished look in under an hour. The paragraphs below present step-first instructions, why each choice matters, and precise next steps so readers can begin crafting immediately.
5 Simple Christmas Wreaths DIY Ideas That Actually Work — choose a style and start now
Pick a recognizable style first: choose classic evergreen, modern minimalist, rustic grapevine, ornament-covered, or foraged natural. Each style has a clear first move that determines materials and technique. For classic evergreen, start by securing a 14–18 inch wire frame and gathering 20–30 short clippings of pine or fir; for a minimalist look, plan for a 10–12 inch foam ring and 6-8 large faux stems. ✂️
Decide budget and longevity up front. Fresh greenery costs less but needs watering and a cool display spot; artificial stems cost more but last season after season. The best action is to match base type to longevity goal: wire frames suit fresh stems, foam rings suit faux materials, and grapevine adds instant rustic texture with minimal wiring. This choice prevents wasted purchases and saves time during assembly.
Follow a simple timeline for each style: shopping (30–60 minutes), prep (15–25 minutes), assembly (30–60 minutes), finish (10–15 minutes). These windows make the project approachable even with busy schedules and help plan ahead for holiday deadlines—plan 45–60 days in advance if making multiple wreaths for gifts. 📌
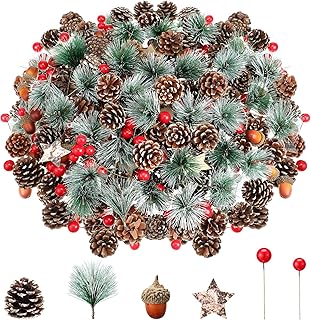
Examples show what to expect. For a farmhouse grapevine wreath, tuck in 6 pinecones, 3 clusters of faux red berries, and a 3-inch wired ribbon bow; spacing and balance create a designer look without expensive supplies. For an ornament wreath, wire 12 lightweight shatterproof ornaments to a foam ring in balanced groupings of three. These specific counts and placements yield immediate, repeatable results.
Seasonal adaptations are practical. Switch color palettes to match home decor—use champagne and blush bulbs for a modern scheme, or deep reds and golds for a traditional feel. For a scented wreath, include clove-studded orange slices or cinnamon sticks wired behind larger elements; scent lasts longer when materials are attached near the center where the wreath sits warmer outdoors.
To read DIY Christmas Decorations Easy: Simple Projects Anyone Can Do
Quick troubleshooting tips prevent second-guessing: if decorations droop, reattach heavier items closer to the base and reinforce with a small loop of floral wire. If a section looks sparse, tuck in a short sprig at a 45° angle and wire it down; overlapping stems hide the mechanics. These fixes are fast and reliable—use them immediately when assembling.
Emma, a local café owner used as an example thread, chose the ornament-covered option for her small shop—this decision created high visual impact with a low budget and doubled as a social-media prop. Her strategy: one focal cluster near the bottom and three smaller clusters spaced evenly, which increased foot-traffic and customer photos. That outcome shows how a single stylistic choice can influence both appearance and practical benefits for small spaces. 🎁
Key insight: choose the style first, match the base to your longevity goal, and follow the timing windows to finish a polished wreath quickly.
3 Budget-Friendly Wreath Bases and How to Choose Them — pick the right foundation for durable results
Start with the base decision: a correct foundation prevents sagging and reduces rework. Wire frames, grapevine rings, and foam forms are the three most practical choices for most DIYers. Each option has a specific strength and a clear selection rule: pick wire for fresh greenery, grapevine for rustic assembly without much wiring, and foam for lightweight faux elements. 🛠️
Why wire frames excel: they hold stems tightly when wrapped with floral wire and can endure heavier accents if wired correctly. Wire frames are ideal when using evergreen clippings like pine, fir, or cedar. For fresh-work, wire frames let greenery breathe and dry naturally without trapping moisture; they also make it easy to keep stems angled consistently to create a unified texture across the wreath.
Grapevine rings win for instant character. Their woven structure allows sprigs and ornaments to be tucked into gaps without heavy wiring, so assembly time shortens. Grapevine stands up to rough handling, making it perfect for outdoor doors exposed to wind. Choose a 14–18 inch grapevine for a front door statement or 10–12 inch for porch accents—this matching of size to location ensures scale looks intentional.
Foam forms suit faux-heavy designs. Foam rings are lightweight and allow hot glue or straight pins to secure ornaments and ribbons quickly. If the goal is year-after-year reuse, foam with artificial stems is the most time-saving route. Use a wrapped burlap or ribbon base layer to hide the foam’s color and provide a neat backdrop for arranged accents.
To read Christmas Crafts DIY: Handmade Projects Tutorial
Practical measurements and checks: always inspect the base for cracks or loose wire before starting. For a full, balanced wreath, aim for a 14–18 inch diameter when decorating a main entry door and 10–12 inches for smaller interior doors. Count on 20–30 fresh clippings for a full 14–18 inch evergreen wreath and 12–18 faux branches for a similarly dense artificial wreath. These numbers guide shopping and reduce mid-project trips for more materials.
Examples illustrate choices: a seaside cottage used foam forms with faux eucalyptus to avoid salt damage, while a mountain cabin preferred grapevine with foraged spruce and pinecones. Each example tied base selection to environmental constraints, demonstrating why the base choice affects longevity and performance. 🌲
For step-by-step reference videos and visual cues, the step-by-step video guide and tutorials like Pioneer Woman wreath tutorial show base prep techniques in real time. Watching these clips before purchasing saves time and ensures the correct base arrives for the chosen style.
Key insight: match base type to materials and display conditions to prevent sagging, extend lifespan, and minimize assembly time.
4 Step-by-Step Tutorial for Attaching Greenery and Accents — actionable wiring and gluing techniques
Begin with greenery first: attach foliage to the base before adding ornaments to ensure a unified silhouette. Trim branches into 4–8 inch pieces for easier handling, then angle each piece in the same direction and secure with floral wire at the stem-to-base junction. This method produces a natural, layered look and avoids bulky knots showing through the greenery.
Technique matters: loop the floral wire twice around the stem and the frame, twist snugly, and tuck the loose wire ends under the last wrapped coils. For heavier items like pinecones, anchor an initial short length of wire to the stem, push the pinecone stem toward the frame, and wrap tightly with additional wire. These exact steps stop elements from shifting during transport or weather exposure.
Use hot glue selectively. Hot glue works best for lightweight decorative bits—mini ornaments, faux berries, and ribbon loops. Apply a pea-sized dab and hold the piece until the glue sets, then add a discreet wire anchor for outdoor displays. The combination of adhesive plus wire prevents fall-off while keeping the visible surface clean and polished.
To read Christmas Craft Ideas: Inspiration for All Ages
Balance through spacing is essential. Place three visual weight points at approximately the 4, 8, and 12 o’clock positions for a medium wreath; adjust slightly for asymmetrical designs. Fill gaps with smaller sprigs or a cluster of berries to maintain a cohesive visual flow. This spacing rule creates an eye-pleasing rhythm and avoids over-crowding a single side.
Examples of themes translate technique into immediate steps. For a jingle bell wreath, group five bells and wire them together as a mini cluster before attaching; this creates one secure unit that can be wired as a single element. For a foraged wreath that includes dried orange slices, pre-drill small holes and use floral wire to thread slices, preventing breakage and preserving shape.
Pro tips reduce rework: work in clockwise sections so stems naturally overlap; check the wreath from arm’s length periodically to spot bald areas; and use wide wired ribbon last to avoid flattening. These pro moves speed assembly and result in a professional finish. ✨
For photos and alternate step patterns, consult tutorials like Handy Little Me’s guide and visual idea sets at ClipArtHive which offer variations that can be adapted to personal style. Saving a tutorial is helpful—Pin for later! 📌
Key insight: attach greenery first, secure heavy pieces with wire close to the base, and finish with glue for small accents to ensure a durable, balanced wreath.
5 Time-Saving Tools, Display Ideas, and Preservation Tips for Holiday Decor — finish strong and save for next year
Choose tools that speed every step: floral wire, wire cutters, sharp pruning shears, a hot glue gun, and wide wired ribbon are the core kit. Each tool has a direct action: pruning shears cut clean stems for better attachment, wire cutters trim neatly without fraying, and wired ribbon shapes easily for bows that hold their curve. Having these on hand avoids interruptions and produces neater results. ✂️
Quick assembly hacks cut time dramatically. Pre-bundle three to five clipped stems and wire them into small bunches before attaching to the frame; this reduces individual wiring time and creates even texture more quickly. For decorative accents, prepare clusters at a workbench, then wire each cluster to the wreath—this batch method is efficient for multiple wreaths or gift-making.
To read Christmas Decor DIY: Handmade Decorations on a Budget
Display choices amplify impact. Use a sturdy over-the-door hook for main entries, and choose a clear fishing line loop for a floating look on interior doors. For porch installations, attach a weatherproof ribbon and secure the wreath to a metal hook behind the door to prevent wind damage. These display specifics protect the wreath and keep it looking fresh across the season.
Storage and preservation are practical steps often skipped. For fresh wreaths, mist lightly and store in a cool, dark place before hanging to retain freshness. For artificial or mixed-material wreaths, store flat in a large box with tissue paper layers to protect delicate ornaments; label the box with the wreath size and contents to make next-season decorating faster. These concrete storage actions extend life and keep decorations organized.
Examples of reuse: Emma repurposed last year’s ornament cluster as a centerpiece ring paired with LED votive candles for a table display, saving money and creating continuity in holiday styling. This approach shows how small edits can transform a front-door piece into an indoor focal point, maximizing the value of each creation. 💡
For step-by-step assembled demonstrations and extra inspiration, review the easy walkthrough at StoneGable easy wreath guide and the practical how-to at Family Handyman simple wreath. These references pair well with the techniques above when planning a weekend craft session.
Key insight: invest in the right tools, use batch-prep techniques to save time, and store wreaths correctly to preserve them for future seasons.
Related inspiration and next steps
For more themed ideas and door-centric decor inspiration, browse curated boards and guides such as Christmas wreaths DIY guide and seasonal door ideas at Christmas door decorations. These resources complement the hands-on steps above and make planning a creative, organized holiday craft session more accessible. Save and share these steps—Pin for later! 🎄