
Show index Hide index
- 5 Easy DIY Christmas Cards That Actually Work Fast — Quick handmade greetings for busy holidays
- Core supplies and setup for batch card making
- Templates and themes that scale well
- 5 Festive Designs for Personalized Cards — creative handmade greetings that feel custom
- Step-by-step personalization options
- Design examples that carry personality
- 5 Techniques to Add Texture and Shine — paper crafting tips for standout holiday crafts
- How to combine embossing, metallics, and die-cuts
- Practical embossing tips and time-saving shortcuts
- 5 Kid-Friendly DIY Christmas Cards — holiday crafts that kids will love to make and mail
- Step-by-step kid-friendly workflow
- Turning kid cards into keepsakes and gifts
- 5 Ways to Mail and Protect Handmade Greetings — shipping tips for holiday cards and decorations
- Postage, timing, and cost-saving measures
- Presentation and final touches that matter


5 Easy DIY Christmas Cards That Actually Work Fast — Quick handmade greetings for busy holidays
Make meaningful DIY Christmas cards in under 20 minutes each by using a repeatable layout and a small set of quality craft supplies. Start with a simple folded card base, add a textured background, a focal die-cut or stamp, and finish with a stamped sentiment — this reliable sequence produces polished results every time.
Use the time estimate: 15–20 minutes per card for streamlined production. Select one background technique — dry embossing, patterned paper, or watercolor wash — and apply it across a batch to save setup time and maintain a cohesive look. This approach is perfect for mass-producing cards for friends, colleagues, or a handmade holiday set to sell.
Core supplies and setup for batch card making
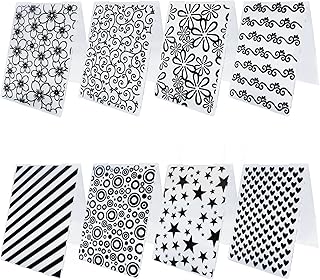
Essential supplies: quality cardstock, a paper trimmer, adhesive, an embossing folder or patterned paper, basic stamps or dies, and a set of markers or watercolors. These choices minimize variety and speed up assembly.
Organize supplies into three labeled trays: background pieces, focal elements, and sentiments. This assembly-line system keeps hands moving and reduces decision fatigue. For beginners, detailed tutorials that walk through similar workflows can be found at a 10-cards-in-20-minutes tutorial, which demonstrates a classic timed layout.
Templates and themes that scale well
Choose a theme that suits recipients — classic wreaths for traditionalists, whimsical animals for families, or minimalist winter scenes for modern friends. For themed inspiration and dozens of layouts to adapt, consult the curated gallery at Country Living’s Christmas card ideas.
Pair a single background technique with three focal variations to get visual variety without extra complexity. For example, use one embossed background and alternate focal pieces: a die-cut tree, a stamped polar bear, and a metallic snowflake. This yields a cohesive stack of cards that still feel unique to each recipient.
To read Homemade Christmas Cards: Personal Touch Ideas
Every paragraph above leads with the main action, then gives the how and why. The final insight: optimize one repeatable method for speed and polish, and the batch will feel crafted, not rushed. 🎄✨
5 Festive Designs for Personalized Cards — creative handmade greetings that feel custom
Personalization makes DIY Christmas cards memorable by connecting the card to the recipient’s story: favorite pet, a hobby, or a shared memory. Start by listing three personal touches to include per person, then assign one to the card design as a focal or sentiment.
Practical personalization techniques include substituting stamped animals to match pets, selecting color palettes that reflect recipient tastes, and adding a tiny photograph inside the fold. For pet-centric designs and playful ideas that translate well to stamps, see the animal-themed projects at All That Scrapbook’s DIY greeting cards.
Step-by-step personalization options
Decide the personalization level first: simple (one element), moderate (two elements), or deluxe (photo + embellishments). For simple personalization, switch a generic tree die for a stamped dog or cat head. For moderate, match the ink color to the recipient’s favorite sweater hue.
Use inexpensive printed photo strips inside cards for a deluxe touch: print wallet-size photos at home or via an online lab, trim to fit, and attach with a small photo corner. This method adds high perceived value while staying ultra-affordable. For simple themed templates that make pet and kid cards easy, explore child-friendly and animal-centric concepts at handmade Christmas cards.
Design examples that carry personality
Example one: a dog-lover card with a stamped mailbox scene and a colored pup, finished with a punny sentiment. Example two: a cozy winter card with a tiny inserted map marking the recipient’s hometown for sentimental value. Example three: a minimalist monochrome card with a single metallic snowflake and embossed name initial for an elegant, modern feel.
Emphasize quick wins: pre-cut photo pockets, reuse die cuts across multiple recipients, and prepare a small inventory of stamped images to color on demand. For inspiration on minimal and cozy winter scenes, review watercolor-friendly layouts at The Spruce Crafts.
To read Simple Christmas Cards: Quick DIY Ideas
Final insight: a single, focused personal touch elevates any DIY card into a cherished keepsake. 🎁💌
5 Techniques to Add Texture and Shine — paper crafting tips for standout holiday crafts
Texture and shine signal quality and create tactile delight on a handmade greeting. Use embossing folders, metallic cardstock, layered die-cuts, and sequins judiciously to give cards that professional feel without complicated steps.
Start with one textured base per batch: a knit sweater embossing for cozy cards, a linen texture for modern cards, or a starburst pattern for bold designs. Embossed backgrounds add depth and photograph beautifully for social sharing, increasing the chance the design will be saved on Pinterest.
How to combine embossing, metallics, and die-cuts
First, emboss the background piece and trim it to the card front. Next, adhere a die-cut focal element — a tree, wreath, or animal — using foam tape for dimension. Finish with a small metallic accent or a strip of foil for contrast. If unfamiliar with embossing, tutorials that guide through similar embossing projects are helpful; consider techniques shown at this timed embossing tutorial.
Metallics can be used sparingly to avoid an overly flashy look. A single metallic snowflake or a thin foil edge on the sentiment is sufficient to add luxury. For die-cut snowflakes and metallic paper usage, explore patterns and cutting ideas showcased at a patterned paper diagonal gate-fold project.
Practical embossing tips and time-saving shortcuts
Run multiple panels through the embossing machine at once to speed production. Preload die-cut shapes into a small container so they’re ready when the embossed panels come out. Keep adhesive in a fine-tip runner for precise application and less waste.
For budget-conscious texture, consider textured cardstock packs or embossed cardstock sheets that eliminate the need for an embossing machine. These ready-made sheets save time and maintain a handmade aesthetic. See product categories and creative ideas for metallic and textured looks at Martha Stewart’s paper crafting ideas.
To read Homemade Christmas Cards: Templates to Print and Customize
Final insight: focus texture on one panel and reserve metallics for accents — that combination reads high-end while staying DIY-friendly. ✨📬
5 Kid-Friendly DIY Christmas Cards — holiday crafts that kids will love to make and mail
Kids can produce charming DIY Christmas cards with minimal adult setup by using stamps, stickers, pre-cut shapes, and safe adhesives. Prepare a kid-friendly workstation with washable markers, foam stickers, and simple stencil shapes to create a fun assembly that yields great-looking results.
Choose easy themes: handprint trees, fingerprint ornaments, or collage gingerbread houses made from colored paper. Provide templates for cutting and large, simple stamps to prevent frustration and to keep projects moving. For curated children’s craft ideas that translate into mail-ready greeting cards, visit Christmas crafts for kids.
Step-by-step kid-friendly workflow
Set up three stations: background painting, character/stamp application, and sentiments/assembly. Limit each child to one card design at a time and offer quick-dry glue sticks to reduce waiting. Offer pre-cut envelopes or envelope liners for a professional final touch that kids will be proud to send.
Use safe tools: rounded scissors, low-toxicity glue, and child-safe glitter alternatives such as glitter foam stickers. These choices make the project less messy and more sustainable. For more easy craft templates and kid-centric design prompts, browse the easy seasonal templates at Christmas easy crafts.
Turning kid cards into keepsakes and gifts
Encourage kids to write a short message inside the card. For recipients who are grandparents or far-away family, include a date and a tiny photo of the child to make the card a keepsake. Consider creating small sets of matching cards to sell at school fundraisers or to gift with handmade cookies.
Send kid-made cards early: allow at least three weeks for mailing during the holiday rush. Use reinforced envelopes when cards include glued-on elements. For ideas on how to present kid-made card sets with festive wrapping, explore DIY decor and packaging inspiration at Christmas DIY decor.
To read Christmas Cards Handmade: Personal Touches That Matter
Final insight: with the right prep and safe tools, children can create heartfelt, mail-ready cards that delight both giver and receiver. 🎨📮
5 Ways to Mail and Protect Handmade Greetings — shipping tips for holiday cards and decorations
Protect handmade greeting cards in transit by using padded envelopes, card sleeves, and strategic placement of embellishments. Reinforce raised elements with a layer of tissue paper before slipping into an envelope to avoid crushing during sorting and delivery.
Select envelopes sized to fit the card snugly without bending. When cards have dimensional elements like foam tape or layered die-cuts, choose a rigid mailer or place a thin piece of cardboard behind the card. These small protective steps dramatically reduce damage during postal handling.
Postage, timing, and cost-saving measures
Buy postage and mail early — aim for mailing 3–4 weeks before the holiday to account for postal delays. Consider bulk-rate options at local post offices when sending dozens of cards to save money. For inspiration on card traditions and timing, review seasonal guidance at The Pioneer Woman’s DIY card ideas.
When including small add-ons like confetti or glitter, encapsulate them in a pocket or laminate a small window to contain loose bits. Alternatively, use printed patterned paper to emulate glittery effects without the mess. For templates and printable designs that avoid extra bulk, explore downloadable templates at Christmas cards templates.
Presentation and final touches that matter
Include a brief care note on thicker cards: advise recipients to open carefully and store flat. For cards intended as keepsakes, add a small insert describing the materials used and a personal note about the design choice — this elevates perceived value for gift-giving and display.
Seal envelopes neatly and consider a custom stamp or wax seal for an extra-special finish that signals care from the moment the envelope is seen. For more shipping and packaging ideas tailored to handmade cards, review craft-specific packaging guides at Stampin’ Savvy’s holiday collection.
To read Christmas PJs: Comfortable Holiday Sleepwear
Final insight: a small investment in protective packaging and early mailing ensures handmade greetings arrive as intended and are cherished by recipients. 📬🎁