
Show index Hide index
- 1. Quick Picks for DIY Fog Chiller Halloween Components — Fast Overview and Best Buys
- 2. 2-Step to Full Assembly: Materials, Measurements and How Each Component Works
- 3. 3 Troubleshooting and Testing Protocols — Get the Low-Lying Fog Right Every Time
- 4. 4 Safety Standards, Electrical Setup and Mistakes to Avoid for Halloween Builds
- 5. 5 Styling, Finishing Touches and Buying Considerations — From Crypt Shell to Painted Ruin


1. Quick Picks for DIY Fog Chiller Halloween Components — Fast Overview and Best Buys
Opening: For a DIY fog chiller that produces deep, ground-hugging fog for Halloween displays, focus first on airflow control, cooling medium, and airtight connections. Measure your space, choose components rated for moisture exposure, and plan ventilation to keep guests safe and effects consistent. 🎃
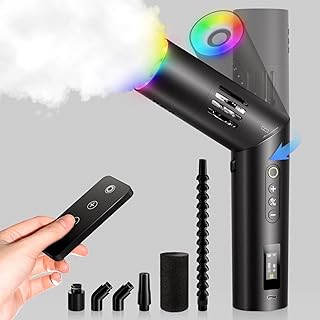
Answer — The best DIY Fog Chiller Halloween Components are: Chauvet DJ fog machine paired with a cooler-based PVC chiller, Antari compact smoke unit with gel-pack chill system, and a budget setup using Froggy’s Fog fluid with a perforated PVC drain-tube chiller.
Quick Answer: The top recommendation is a Chauvet DJ fog machine combined with a well-sealed cooler chiller using perforated PVC and frozen gel packs — expect prices around $120–$250 for the machine and $20–$60 for chiller parts. The runner-up is an Antari unit when space is tight and quick warm-up time matters, typically $150–$300. The budget pick pairs Froggy’s Fog fluid with standard 48-quart cooler modification and basic PVC fittings for under $80. Each recommendation ties directly to producing low-lying fog for Halloween sets by prioritizing cooling residence time, seal integrity, and safe dry ice/gel pack handling. ✔️
[pause for context]
Latest Spooky Halloween Projection Videos
Discover amazing Halloween projection ideas for your spooky windows!


Keep scrolling for something spooky...

Create Your Own Halloween Projection Magic!
Transform your windows into spooky Halloween displays with professional projection equipment. Perfect for creating the same eerie atmosphere as our kawaii monster videos!
🎭 Affiliate link - Support our spooky content creation!
Deep Dive (start): The reason the Chauvet DJ pairing wins for most DIY haunters is a balance of output control and heater stability that keeps fog flow steady into a cooler chiller chamber, improving residence time so the fog cools by the target 15–20°F at the exit. Commercial brands like American DJ, Antari, and FogWorx also provide reliable output, but the DIY chiller design is what converts warm fog into low-lying fog by increasing dwell time around the cooling medium. In tight indoor scenes, an Antari compact unit paired with gel packs fits under props and needs less ventilation clearance than larger glycol systems, making it useful for smaller crypts built from plywood and foam. For budget builds, Froggy’s Fog fluid is viscosity-friendly with many hobby machines and reduces clog risk when compared to scented additives or homemade blends — always avoid adding scents directly to fog fluid to protect heater elements. Brands like Rockville and VIVOSUN supply affordable pumps and inline fans that can be adapted for controlled airflow through a chiller, while accessories from AGPTEK and Theefun offer inexpensive thermometers and remote power switches to make monitoring simpler. ⚠️
Key specs at a glance: target exit temperature drop of 15–20°F, perforated drain tube with holes every 2 inches, inlet positioned 2 inches from cooler bottom and outlet 4 inches from top, and ice/gel-pack bath fully submerging the drain tube for efficient heat transfer.
2. 2-Step to Full Assembly: Materials, Measurements and How Each Component Works
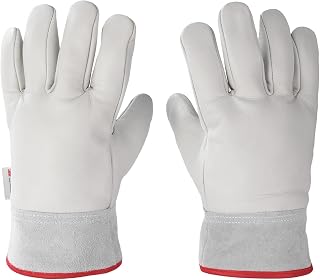
Materials and core components: Constructing a functional DIY fog chiller for Halloween begins with a rigid cooler with a tight-fitting lid, PVC piping (2–3 inch recommended), a perforated drain tube, foam board insulation, silicone sealant, exterior foam coat, and weatherproof electrical tape. Include a fog machine from trusted brands like Chauvet DJ, Antari, or American DJ, Froggy’s Fog or FogWorx fluid that matches the machine, and safety gear such as insulated gloves and safety glasses. A digital infrared thermometer is essential to verify the fog exit temperature. 🔧
Construction basics and measurements: Start with placement: for a crypt-style chiller use outer dimensions around 50″ L x 30″ D x 30″ H for a mid-sized build; for simple cooler-chillers a 48-quart cooler is common. Cut an inlet hole approximately 2 inches from the cooler base and an outlet hole near the top about 4 inches from the lid so fog passes upward through the cooling bath. Use a hole saw matching the PVC diameter for clean penetrations and apply silicone caulk around each pipe to ensure airtight seals. The drain tube inside the cooler should be perforated with 1/8-inch holes every 2 inches and cemented to the inlet pipe so fog bubbles through the cooling medium rather than bypassing it. 🛠️
To read Thanksgiving Centerpieces: DIY Ideas for Your Table
Why these parts matter: The cooler provides insulation to keep coolant temperatures low and increase the fog’s contact time with the chilling surface. The perforated drain tube turns a steady stream of warm vapor into many tiny plumes that exchange heat rapidly with ice or gel packs. PVC elbows recombine and direct the cooled fog to the exit while preventing backflow; flexible dryer vent hose can join the fog machine to the inlet but never seal to the machine directly — oxygen must enter the machine area to avoid heater strain. Use mesh to hold ice away from the pipe intake while allowing coolant to flow freely; screws secure mesh and keep ice from blockages. 🧊
Examples and adaptations: For a crypt build from plywood and 2×2 framing, cut two plywood internal panels roughly 32 1/2″ x 48″ to separate the chiller chamber and fog machine compartment, and notch them to fit middle supports. Build a fog machine platform using a 7″ short plywood piece and a 21″ longer piece to cradle the unit, reinforced with a 12″ crossbeam where ice will sit adjacent. Attach 1″ EPS foam lining cut to fit sidewalls (e.g., 29″ x 30 1/2″ ends and 50″ x 30 1/2″ sides) and seal with expanding foam or exterior foam coat for weatherproofing. For portable setups, choose a cooler method to keep the footprint small and moving easy. 🎯
Costs and sourcing: A decent fog machine from Chauvet DJ or Antari ranges $120–$300 depending on output, while hardware store PVC, mesh, screws, sealant and a cooler typically total $40–$120. Dry ice or gel packs add recurring costs: expect $5–$20 per event depending on runtime, and plan to swap packs every 10–20 minutes for sustained low fog. For more assembly variations and visual guides see resources like this chiller walkthrough and the crypt-focused tutorial at Meta Drive Manor gallery. Final insight: prioritize airtight pipe seals and accurate hole placement to ensure thermal efficiency and consistent fog behavior. 💡
3. 3 Troubleshooting and Testing Protocols — Get the Low-Lying Fog Right Every Time
Testing sequence to validate performance: After assembly, run a sequence of controlled tests to confirm cooling efficiency: start with only gel packs or ice in the chamber and pulse the fog machine at low output to verify fog passes through the perforated tube and exits at a measurable temperature drop. Use an infrared thermometer at the chiller exit and record the delta relative to ambient; a well-performing unit will show a drop of 15–20°F. If the drop is less, increase cooling mass or improve insulation to raise residence time. 🔍
Diagnosing common problems: If fog rises instead of hugging the ground, check ice levels and ensure the drain tube is fully submerged and unobstructed. Weak fog output often traces back to blocked tubing, low fluid levels in the fog machine, or an undersized machine for the chiller volume. Rapid ice melt signals poor insulation or excessive warm-air infiltration; add foam board insulation and seal gaps with silicone or expanding foam. Condensation backup and drainage can clog the system; ensure drainage holes in the chiller base and avoid standing water around electrical elements. Each diagnostic step targets a measurable cause tied directly to chiller thermodynamics. 🧰
Real-world scenario guidance: For backyard graveyard displays on a windy evening, position the chiller downwind of the viewing area and install windbreaks or temporary panels to protect the fog flow. For indoor haunted houses with tight corridors, size the chiller smaller so the fog machine’s output and the chiller’s volume align; an oversized cooler can cause long warm-up time and waste dry ice. In a community theater setting where runtime must be long, consider a hybrid approach: run a glycol-based commercial fogger intermittently to sustain base haze and deploy the DIY chiller for low-lying fog bursts during key moments. Adaptation to context guarantees the visual result matches the intended scene. 🎭
Measuring performance over time: Track temperature differentials during runs to catch thermal efficiency decay; a loss beyond 40–50°F between input and output indicates a leak, blocked flow, or insufficient coolant. Test fog longevity: homemade dry ice fog will typically persist for 5–15 minutes per charge, whereas commercial glycol systems maintain haze for 30–60 minutes. Schedule coolant swaps and test recharges in advance to avoid lulls during live displays. Final diagnostic insight: prioritize incremental adjustments and test after each change to isolate improvements. ✅
To read Sally Nightmare Before Christmas: Costume and Makeup Guide
4. 4 Safety Standards, Electrical Setup and Mistakes to Avoid for Halloween Builds
Electrical safety essentials: Because a DIY fog chiller places water and condensed moisture near electrical devices, GFCI-protected outlets are mandatory for both the fog machine and any ancillary pumps or fans. Ensure all power cords remain elevated and away from potential drips, and never operate a fog machine with visible insulation damage. Use weatherproof electrical tape and sealed junctions where power enters the chiller area. Confirm grounding on all units, and test GFCI outlets before every event. These steps directly reduce the risk of shock and are non-negotiable for safe operation. ⚡
Handling cooling media and PPE: Dry ice requires insulated gloves and eye protection because it can cause frostbite within seconds; similarly, frozen gel packs should be handled with care to prevent cold burns. Use masks if space ventilation is limited, and keep performers or guests aware when fog is deployed to avoid surprise disorientation. Avoid toxic coolants — never use antifreeze or chemical refrigerants — and place coolant in a mesh or tray to prevent large chunks from obstructing flow. Safety equipment and correct handling protect both people and equipment. 🧤
Ventilation and health considerations: Operate the chiller only in adequately ventilated spaces to avoid fog buildup that could reduce visibility or aggravate respiratory conditions. Commercial fluids from brands like Froggy’s Fog and FogWorx are formulated for stage use, but still require ventilation management. If deploying fog for extended runs in 2025 events where sensitivity to air quality is higher, post event signage and staffing are recommended so guests who are sensitive can avoid dense fog areas. A final operational habit: always have fresh water and a fan on standby to clear the area quickly if needed. 🌬️
Common mistakes that break the setup: Sealing the dryer vent hose directly to the fog machine is a frequent error; restrict that practice because heaters need access to oxygen. Underestimating drainage leads to standing water and electrical hazards, so always drill drainage holes and test the drain path before live use. Relying on ambient ice alone without insulation will melt packs quickly; add foam board layers, and consider salt only if dry ice isn’t available, recognizing salt lowers freezing point but changes humidity dynamics. A practical tip: tape and silicone are inexpensive insurance against leaks and slippage. Final safety insight: treat the chiller like a piece of stage equipment — test, document, and follow a checklist before every show. 🔒
5. 5 Styling, Finishing Touches and Buying Considerations — From Crypt Shell to Painted Ruin
Building the crypt shell and interior layout: Use a 2×2 frame with plywood base and top sized to your chiller or cooler dimensions, and add interior supports cut to snugly fit the fog machine and ice chamber. For a robust crypt, cut top and bottom frames from 2x2s at 48″ and 30″ lengths and secure a 50″ x 30″ plywood base with drainage holes where ice melts will exit. Inside supports of 24″ ends and 44″ sides create the platform that holds the fog machine and separates the ice chamber, and a 12″ crossbeam adds reinforcement under heavy gel-pack loads. These structural choices ensure the chiller performs without sagging or misalignment. 🪚
Finishing and weatherproofing techniques: Attach 1″ pink EPS foam panels to sides and ends and seal gaps with hot foam or exterior foam coat to prevent warm air infiltration. To get realistic stone texture, spray water on foam and use a heat gun to create dimples for a weathered effect; add plaster-like layers using Hot Wire Foam Factory Exterior Foam Coat and cure for at least five days before painting. Use a sea sponge and layered gray paints for an aged look, then wash with antiquing glaze and water to simulate water damage. Adding half skulls and full skull molds with rigid casting foam gives tactile detail and masks seams around pipes. 🎨
Buying considerations and brand matching: When choosing a fog machine, balance output and duty cycle: Chauvet DJ and Antari are reliable for repeated runs, while smaller units from American DJ or budget models can pair well with a smaller chiller. Choose fluids from Froggy’s Fog, FogWorx, or Spirit Halloween-approved products to avoid clogging heaters. For fans and inline pumps, consider Rockville or VIVOSUN parts for robust airflow control. Check compatibility between fluid viscosity and machine manual before purchase to avoid voiding warranties. Pricing and availability often vary by season, so buy early — plan 45–60 days ahead to secure supplies for peak Halloween demand. 🛒
To read Christmas Cards: 15 DIY Ideas That Impress
Final recommendation and call to action: For a tackle-any-haunt top pick, choose a Chauvet DJ fog machine teamed with a well-sealed cooler chiller using perforated PVC and gel packs; it balances output, control, and safety. For detailed build inspiration and step-by-step visuals visit the comprehensive guides at Instructables, JMARTs Haunt, and Wicked Makers. Ready to buy parts? Check current Amazon options for fog machines and safety gloves to get started today. 🔗 Watch a demo video.