
Show index Hide index


Opening (50 words) — The best Christmas gift wrapping techniques that look professional are those that combine quality materials, precise tools, and a few finishing tricks that hide flaws and highlight details. 🎁 The best methods use thick, durable paper, strong invisible adhesives, crisp cuts, and structured ribbon. These solve the common problem of sloppy seams and limp bows by focusing on materials, tools, and workflow.
5 Essential Tools and Materials for Wrapping Christmas Gifts Like a Pro
Answer: The best tools and materials are: high-quality wrapping paper from reliable sources, a clear strong tape (double-sided or gift-wrap specific), razor-sharp scissors, wire-edged ribbon about 1½ inches, and a reliable tape dispenser. ✂️ These items directly address the usual problems: torn paper, visible tape, frayed edges, and floppy bows.
Quick Answer (100 words) — For immediate upgrades, choose heavy-weight paper (look at Paper Source, Hallmark, or Rifle Paper Co. for premium patterns), swap generic tape for Scotch GiftWrap Tape or a clear double-faced option for invisible seams, and use Westcott-style sharp scissors for clean cuts. Add a mid-width wire-edged ribbon to give structure to bows. These changes typically cut wrapping time by 20–40% because fewer fixes are needed mid-wrap. 📌 Pin for later!
Deep Dive (300+ words) — Problem: Cheap paper tears, tape peels, and ribbons collapse. Solution: upgrade each variable.
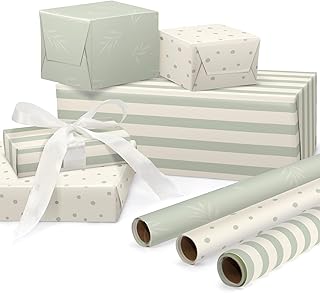
Start with paper. Cheap rolls are tempting, but thin stock rips and shows tape creases. Trusted specialty retailers like Paper Source and stores like Hallmark stock heavier stocks and reliable prints. For a reusable and luxe feel, consider stone-based recyclable papers (crushed stone or marble blends)—they’re thicker, crease less, and often can be reused across gifts.
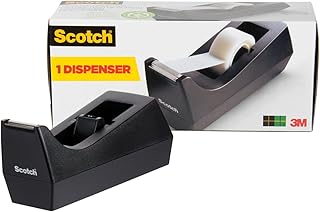
Tape matters more than most assume. Standard office tape struggles on textured, glitter, or coated stock. A double-faced option—often called Supertape or similar—lets tape hide beneath folds. For flat papers, opt for Scotch GiftWrap Tape with clear seams. A weighted dispenser is a small splurge that speeds work and avoids chasing rolls across the table.
To read Christmas Ornament Crafts: DIY Projects for All Ages
Scissors are another weak link. Dull blades create jagged edges and slow the process. Mid-priced titanium-bonded scissors cut smoothly and keep the edge for years. The cut technique matters too: place the paper between open blades and “zip” in one motion for a clean line, not choppy snips.
Ribbon choices shape perception. A 1½-inch wire-edged ribbon looks pro on most packages because the wire creates crisp loops and holds shape. Brands like Sugar Paper and Celebrate It (Michaels) and even Costco’s Kirkland brand supply strong wired ribbon in large quantities. Wire also supports creative placements—off-center bows, layered ribbons, or integrated ornaments.
Finally, small extras like sturdy tissue paper (Costco, Hallmark), stick-on gift tags (Target’s seasonal sets), small wreath pick-ins from craft stores, and stringing a small ornament into a knot elevate the presentation without adding hours. Consider The Container Store or Joann Fabrics for storage and embellishments.
Real-life test: a fictional neighbor, Harper, wrapped ten varied gifts in under two hours after swapping cheap tape and scissors for the recommended gear. Fewer frustrated re-wraps, crisper edges, and gifts that stacked evenly under the tree. 🌟 Insight: invest first in tape and scissors — the rest compounds the improvement.
5 Practical Folding and Seaming Techniques That Hide Flaws
Opening (50 words) — The best folding and seaming techniques are those that produce tight corners and invisible joins without specialized tools. The right crease, tuck, and tape placement removes messy gaps and guarantees that packages look machine-wrapped. These techniques are accessible and repeatable on any gift size. 🎀
Answer: The best folding techniques are: measured paper overhang, deliberate corner tucks, perimeter double-folds, underside double-faced tape application, and edge burnishing with a bone folder or the back of a butter knife. Why these solve the problem: they create clean lines, hide adhesive, and prevent paper puckering.
Quick Answer (100 words) — Measure twice, cut once. Leave 1–2 inches of overlap beyond the opposite edge for neat seams. For ends, fold the long edge to form two sharp triangles, then press flat to create crisp corners. Place double-faced tape on the underside of the seam so no adhesive shows. Use a bone folder or the dull edge of scissors to burnish creases. These steps reduce rework and produce a gift that looks like it came from a boutique.
To read Christmas Cracker Toffee: Addictive Recipe to Try
Deep Dive (400+ words) — Start by prepping: clear at least three feet of paper to roll out and a flat cutting surface. Use the gift box as the measuring stick. Place the box centered on the paper, leave 1–2 inches of extra paper on the short ends to fold in cleanly, and 1–2 inches of overlap on the long seam.
Seam technique matters: put tape on the reverse side of the paper and press that seam flat against the box edge. This hides the tape and allows for a perfectly straight seam without visible glue lines. When working with textured or glitter paper, pick a tape designed for that finish—some tapes fail to grip glitter or satin sheens. Strong adhesives like the earlier-referenced Supertape prevent peeling even on textured stocks.
For the corners, imagine folding like wrapping a present for a high-end store. Fold the long side in toward the center, pinch to make a 45-degree triangle at each end, fold the triangle neatly down, and then fold the remaining flap up and secure underneath. Avoid folding the opposite direction; a single, confident motion yields fewer creases.
Burnishing the seam makes a visible difference. Use a bone folder, credit card, or butter-knife edge to smooth tape and edges so the light doesn’t catch an uneven fold. If the package will travel, add a second small piece of tape under the corner flaps to reduce stress at the fold.
Box lining is an additional pro trick: line a rigid gift box with two layers of patterned tissue (a matte and a glitter sheet) to create a reveal. Use *stick-on tags* or small seasonal stickers to lock tissue ends so the interior looks intentional when opened.
A case study: fictional neighbor Harper struggled with lumpy corners until switching to the underside tape method and the bone folder. The result: consistent corners and fewer tears when moving gifts around. ✂️ Final insight: mastering a single reliable corner fold pays off across every size and shape.
5 Embellishment Strategies to Make Gifts Feel Luxurious Without Breaking the Bank
Opening (50 words) — The best embellishment strategies pair a single strong focal accessory with subtle supporting pieces. A wire-edged ribbon bow plus a small ornament or sprig of faux berries reads luxurious. These solutions add perceived value with minimal cost and effort. 🎁
To read Christmas Table Decor: Create a Stunning Holiday Setting
Answer: The best embellishments are: a 1½-inch wire-edged ribbon, a small ornament or cookie cutter as a tag, a sprig of faux berries from the wreath aisle, layered tissue inside boxes, and a stick-on festive tag. They solve the problem of dull packages by adding texture, height, and a clear focal point.
Quick Answer (100 words) — Invest in quality ribbon—you’ll use less and get more impact. Tie a central bow using wired ribbon, tuck in a faux berry sprig or a small ornament at the knot, and attach a stick-on tag for easy labeling. Use complementary tissue inside boxes for a surprise reveal. These small embellishments elevate gifting, transforming simple paper and tape into a curated experience. Save receipts for reuse and buy ribbon in bulk from a place like Joann Fabrics or check seasonal packs at Crate and Barrel and Sugar Paper.
Deep Dive (400+ words) — Embellishment decisions should start with scale. A bulky ornament on a tiny jewelry box throws proportions off. Use a 1½-inch ribbon for most standard boxes; it provides structure while staying in scale. The wire inside the ribbon is essential: it creates crisp loops and holds shapes that look intentional rather than limp.
Creative additions beyond ribbon can be found in unexpected aisles. Faux berry sprigs or mini-wreath picks in the floral/wreath aisle of craft stores make luxe touches. They’re inexpensive and look custom. For culinary recipients, a tied-on small cookie cutter or wooden spoon is both decorative and practical.
Stick-on tags beat tie-on tags for speed and neatness. Target, Hallmark, and many craft suppliers sell sticker tag sheets that attach cleanly and won’t slip off. They also often include extra themed stickers to secure tissue folds inside boxes.
Tissue layering inside boxes delivers an unboxing moment. Try one glitter tissue over a matte base in complementary colors—this creates contrast without competing with the exterior wrap. Seal the fold with a small festive sticker for a tidy interior finish.
Pro tip: shop discount and outlet stores for embellishments. Overstock shops like HomeGoods or HomeSense, and seasonal bins at Martha Stewart collaborations, often have premium pieces at a fraction of boutique cost. For patterned specialty paper and ribbons, Rifle Paper Co. and Papyrus are go-to brands for statement prints.
To read Christmas Home Decor: Room-by-Room Styling Guide
Example: the fictional neighbor Harper added a small metal tree cookie cutter under the ribbon knot for a family member who bakes. The recipient kept the cookie cutter on display. The extra thought turned wrapping into part of the gift itself. 🌟 Final insight: embellishments should always add function or a keepsake value to maximize perceived value.
5 Workflow, Workspace, and Storage Hacks to Wrap Faster and Cleaner
Opening (50 words) — The best wrapping workflow setups remove friction: a designated surface, clear storage bins, weighted tape dispensers, and a staging area for completed gifts. These steps stop last-minute chaos and prevent holiday-back pain. 🧰
Answer: The best workflow hacks are: set up a 3-foot roll-out area, store supplies in clear stackable bins, use an L-shaped table arrangement if space allows, adopt weighted dispensers, and create a calming wrapping playlist or simple décor to make wrapping enjoyable. These tactics reduce time and stress by keeping everything accessible and visible.
Quick Answer (100 words) — Clear the highest available table and roll out at least three feet of paper. Use clear bins for ribbon, tape, and tags so items are visible at a glance. If room permits, two 6-foot tables in an L shape keep supplies within reach and allow stacking completed gifts to the side. The Container Store and similar shops sell ideal storage, while weighted dispensers keep tape in place. Add seasonal ambiance—simple lighting or music makes the job sustainable. Save for reference and plan 45–60 days ahead for big lists. 📌
Deep Dive (400+ words) — Workspace ergonomics are crucial. Many wrap crouched on the floor — a surefire way to end the night sore. A table at waist height with a non-slip mat avoids bending and creates a professional feel. If space is tight, fold-out tables work well; a pair configured in an L shape keeps cutters, tape, and ribbon within arm’s reach.
Storage reduces friction. Clear, stackable bins let the wrapper see stock levels at a glance and protect delicate ribbons. Label each bin by category—ribbons, paper rolls, tape, tags, ornaments. Brands like The Container Store make organizers suited to seasonal supplies.
Tape dispensers matter: choose a heavy base or rubber-foot dispenser to stay put and speed one-handed tearing. Keep a small pair of scissors dedicated to ribbon trimming on a lanyard or magnet strip so they never disappear. A ribbon spool holder (or simple dowel) prevents tangles and allows single-handed ribbon cuts.
To read Christmas Characters: Popular Figures for Decorating
Time management tips: wrap in batches—all similar-sized gifts together. This minimizes measuring time and allows repeatable motions. Plan supplies ahead: schedule a shopping run to retailers like Joann Fabrics, Crate and Barrel, or discount outlets for seasonal finds. For inspiration or quick how-tos, consult curated guides such as the one from Hallmark or Better Homes & Gardens for step-by-step visuals and time-saving methods (see anchors below).
Fictional example: Harper assembles a “wrap station” in early December, with labeled bins and a playlist. That simple setup turned a frantic Christmas Eve into a relaxed 2-hour wrapping session with hot cocoa and music. 🎶 Insight: a small investment in organization saves hours and transforms wrapping into a ritual rather than a chore.
Further reading and quick references: consult practical tutorials and inspiration galleries for additional step-by-step visuals and creative ideas. See the curated how-to from Hallmark’s gift-wrapping guide, a fast visual list of tricks at Cozy DIY Home, and practical tips from Better Homes & Gardens. For step-by-step technique, review this detailed walkthrough at Merchifies, and for inspiration from established editors, check Martha Stewart’s guide.
Seasonal shopping links and niche ideas: browse curated ideas for DIY ornaments and small keepsakes like homemade Christmas gifts or pick décor motifs at vintage Christmas decorating. For easy family activities that pair with gifting, see Christmas family games. Save these resources and Pin for later! 📌
Additional inspiration across publications: read curated tips from Country Living’s wrap tips, practical pro tricks from gift-wrap guru Carrie Larson, and a concise tutorial roundup at Cottage in the Mitten. For a product-focused perspective, see a recent Wirecutter overview at The New York Times Wirecutter.
Last insight: treat wrapping as a gift itself — the care put into materials, tools, and space shows, and recipients notice the difference. 🌟