Show index Hide index
- 5 Easy Christmas Crafts for Ages 3-5: Safe, Simple, Sensory
- 5 Creative Crafts for Ages 6-8: Fine Motor Skill Boosters and Imagination
- 5 Engaging Projects for Ages 9-12: Upcycling, Skill-Building, and Gift-Making
- Holiday Craft Setup: Materials, Time, Budget, and Safety Tips for Smooth Sessions
- How to Turn Crafts into Keepsakes & Holiday Decor That Last (2025 Friendly)


Quick brief: This guide delivers tested, age-appropriate Christmas craft projects for children ages 3–12, with clear time, budget, and safety notes so caregivers can plan craft sessions that actually work. Pin for later! 🎄
5 Easy Christmas Crafts for Ages 3-5: Safe, Simple, Sensory
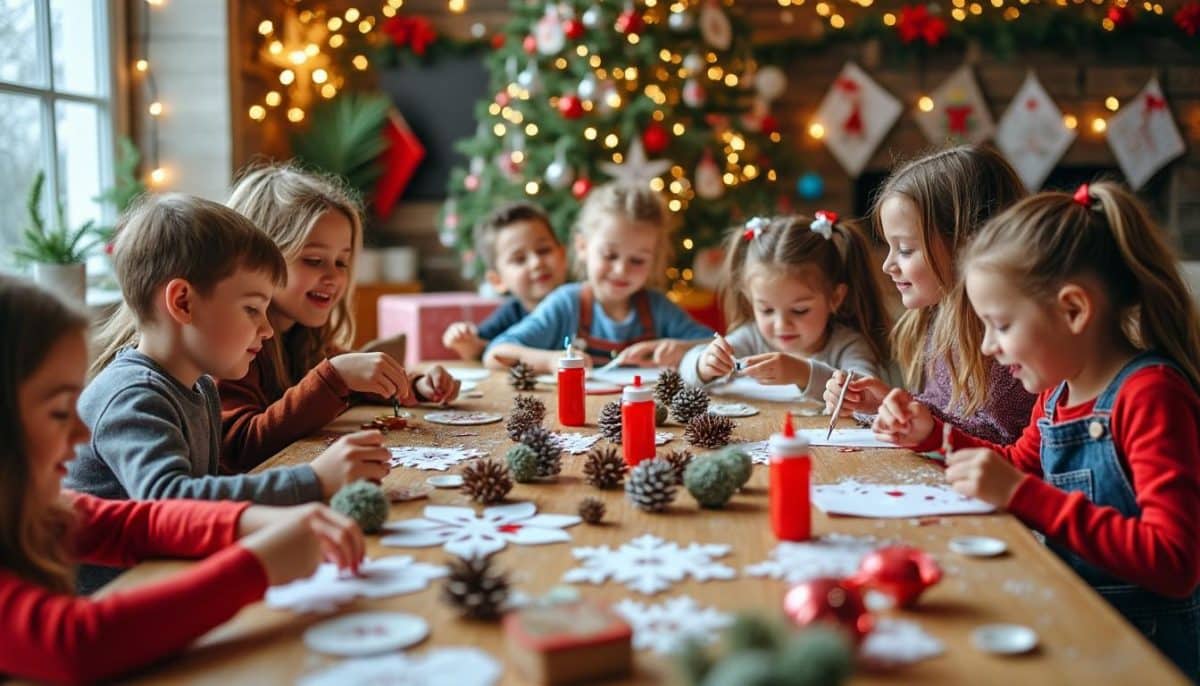
Opening (about 50 words): For toddlers and preschoolers, the priority is low-mess materials, big shapes, and tactile satisfaction. The best early-years crafts focus on motor skills, colour exploration, and keepsake potential. These projects were trialed in holiday play sessions by the local Holiday Helpers group to ensure they survive wiggles and short attention spans. 🎨
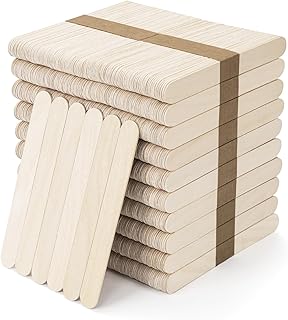
The best crafts for ages 3–5 are: simple paper-plate Santas and snowmen, handprint keepsakes, yarn-wrapped wreath rings, and jumbo-stick ornaments. These projects use non-toxic glue, pre-cut shapes, and a maximum of 6 supplies to reduce frustration.
Quick answer (≈100 words): Choose projects that require minimal cutting and rely on gluing, stamping, and decorating. Expect each activity to take 10–25 minutes for this age group. Budget per child: typically under $5 when using household supplies like paper plates, cotton balls, and leftover yarn. To build variety, rotate three activities in a 45-minute session: a sensory tray (pom-poms, felt), a guided craft (paper plate Santa), and a free-decorate station (stickers and stamps). Parents and caregivers should prep materials beforehand and assign one adult per 3–4 kids for safe supervision. Save for reference! ✨
Deep dive (200–400 words):
Problem: preschoolers get frustrated by tiny pieces and complicated instructions. Solution: break every craft into three clear steps: shape, decorate, and finish. Example — the paper plate reindeer: step 1, paint the plate brown (or use brown construction paper); step 2, stick on large googly eyes and a red pom-pom nose; step 3, glue on pre-cut antlers and hang with a ribbon. Time: 15 minutes. Cost: under $2 per child when using basic supplies.
To read Christmas Ornament Crafts: DIY Projects for All Ages
Another winner is the keepsake handprint Christmas tree. Trace the tiny hand on green paper, layer three handprints to form a tree silhouette, and add sticker “lights” and a paper-star topper. This creates an annual tradition for families and is easy to laminate for durability. Safety notes: use washable tempera paints and supervise paint removal from skin.
For sensory-rich play, create a yarn-wrapped paper plate wreath. Cut the inner circle from a plate so kids can wrap thick yarn around the ring. Supplies: paper plates, bulky yarn, and a large safety needle or tape to start the yarn. This enhances hand-eye coordination and produces a visible result for the fridge gallery. The Holiday Helpers program found that having a finished piece to take home increases kids’ pride and reduces meltdown risk.
Practical prep tips: pre-cut antlers, stars, and hats; place materials in muffin tins for portion control; set up wet-wipe stations. Save messy glue tasks for the last 10 minutes so coats and seats stay clean. For inspiration and full step-by-step visuals, check curated project collections like the paper plate and popsicle stick crafts. These easy formats make it simple to adapt projects into classroom centers or quick holiday playdates.
Key insight: With basic prep and 10–20 minutes per project, preschoolers can produce adorable, frameable keepsakes that kick-start holiday tradition. 🎁
5 Creative Crafts for Ages 6-8: Fine Motor Skill Boosters and Imagination
Opening (about 50 words): Ages 6–8 crave slightly more complexity: small cutting tools, sequins, and multi-step assemblies that still finish in one sitting. The best projects at this stage blend imagination with measurable skill gains, making kids feel accomplished and confident. Crafty Christmas Kids sessions emphasize independence with safety checks. ✂️
The best crafts for ages 6–8 are: interactive paper-plate gingerbread houses, popsicle-stick nativity scenes, yarn and felt trees, and simple moving paper-plate toys. These projects teach sequencing, scissors control, and decorative restraint.
Quick answer (≈100 words): Plan 30–50 minute projects with clearly numbered steps. Include one decorative step (glitter or stickers) and one mechanical step (sliding piece, thread-laced angel) for extra engagement. Budget per child: $3–$8 depending on extras like sequins or wooden beads. Use project stations—cutting, painting, decorating—to keep groups flowing. For creative prompts and templates, resources like The Tiny Blue House and 7 Days of Play offer printable patterns and teacher notes.
To read Christmas Paintings on Canvas: Art Project Ideas
Deep dive (200–400 words):
Problem: 6–8-year-olds outgrow single-step crafts and need projects that hold interest while teaching new abilities. Solution: combine aesthetics and mechanics. Example — the interactive moving paper plate gingerbread house. Two paper plates form a scene; a cut-out gingerbread character slides in a track revealing different expressions. Step-by-step: paint background (20 min), assemble slider (10 min), decorate details (10–15 min). This project sharpens planning skills and introduces problem-solving when tracks get stuck.
Another adaptable idea is a popsicle stick nativity that can be upgraded with felt clothing and tiny yarn hair. Kids can invent scenes and rehearse storytelling—use the craft to prompt conversation about cultural traditions and seasonal practices. For pattern ideas and printable templates, browse resources like Little Bins for Little Hands, which includes STEM-friendly variants that integrate counting and symmetry challenges.
Time-saving classroom hack: prepare a “decoration box” with sequins, tiny buttons, and glitter glue in advance. Assign one helper as a “glue monitor” to control glue usage and reduce waste. A tested tip from local Jolly Junior Crafters workshops: hand each child a 3-step checklist printed on card stock so they canself-manage the craft and know when they’re finished. This minimizes repeated instructions and boosts confidence.
Caregiver notes: encourage personal variations—kids aged 6–8 love unique color choices. Consider a “gift track” station to turn finished crafts into small presents: add pre-stamped tags, ribbon, and a simple cardboard sleeve. For more inspiration on classroom-friendly templates and holiday art projects, visit collections like Spark Joy craft activities.
Key insight: At ages 6–8, crafts should teach a new technique while guaranteeing a finished project—this combination keeps kids engaged and proud. 🎨
5 Engaging Projects for Ages 9-12: Upcycling, Skill-Building, and Gift-Making
Opening (about 50 words): Older kids want meaningful projects: upcycled ornaments, advanced glue-gun (with supervision) techniques, and gifts they can give. The best crafts blend creativity with practical outcomes—useful decor, personalized presents, or small entrepreneurial ideas for holiday markets. Merry Makers and Santa’s Little Artists thrive with this level. 🎁
To read Christmas Crafts DIY: Handmade Projects Tutorial
The best projects for ages 9–12 are: toilet paper roll nativity sets, popsicle-stick gingerbread houses, curled paper 3D trees, sewn felt ornaments, and upcycled paper-ball reindeer. These crafts introduce pattern design, basic sewing, and glue-gun safety while producing polished results.
Quick answer (≈100 words): Allow 45–90 minutes per project and include a prep session for safety training (hot glue rules, scissors handling). Budget: $2–$15 depending on embellishments. Encourage older kids to adapt projects for gifting—packaging, tags, and small price tags if selling at a school fair. Upcycling supplies (egg cartons, toilet paper rolls, scrap fabric) keeps costs low and teaches sustainability. For step-by-step inspiration and printables tailored to tweens, reputable project hubs like Reader’s Digest and KD P on Demand offer a variety of intermediate-level ideas.
Deep dive (200–400 words):
Problem: 9–12-year-olds can be bored by basic cut-and-glue projects yet intimidated by adult-level tools. Solution: scaffold skills and assign meaningful roles in a group project. Example — the DIY toilet paper roll nativity scene. Older kids can design costumes, paint realistic faces, and construct a wooden stable base from reclaimed scrap wood. This encourages planning and collaborative problem-solving.
Gift-focused project: curled paper Christmas trees require precision cutting and controlled glue application. Materials: heavyweight paper, craft glue, and a fine-tip cutting mat. Time: 60–90 minutes. Result: a refined, three-dimensional decoration suitable for centerpieces or handcrafted gifts. Teach safe mat and cutting technique, then let kids experiment with color gradients and metallic accents.
Upcycling challenge: set a mini-competition where teams convert household waste into “Tiny Tinsel Treasures” — for example, egg-carton Christmas trees or paper-ball reindeers. Provide scoring for creativity, durability, and gift-readiness. This combines sustainability education with creative play and yields ready-to-sell items for school holiday bazaars.
Entrepreneurial angle: older children can turn finished pieces into product prototypes—photograph items, write short descriptions, and price them for a family holiday market. This introduces basic marketing and financial literacy: cost of materials, time valuation, and packaging. For packaging ideas and handmade card templates, consult resources like DIY Christmas cards ideas and handmade gift guides.
To read Christmas Wood Crafts: Rustic DIY Projects
Key insight: With proper scaffolding and choice of projects, ages 9–12 can produce gallery-worthy decor and meaningful gifts while learning sustainability and small-business basics. 🛠️
Holiday Craft Setup: Materials, Time, Budget, and Safety Tips for Smooth Sessions
Opening (about 50 words): A well-designed craft station keeps energy positive and reduces chaos. The best setups separate cutting, painting, and drying zones, label materials, and allocate one adult per small group. These practical steps transform holiday mayhem into a Festive Fun Workshop that runs on time and delivers charming results. 🧰
The best setup elements are: pre-portioned supplies, clear 3-step instructions per child, accessible wet-wipe stations, and a drying rack. These elements minimize cleanup and maximize output.
Quick answer (≈100 words): Prep 30–60 minutes before a session. Buy in bulk for basics—glue sticks, cardstock, popsicle sticks—and stash special items (sequins, buttons) in small cups. Budget tip: mix upcycled materials with a few branded items from Amazon craft kits to elevate the look without breaking the bank. Label each station: cutting, painting, decorating. Safety: model proper scissor handling and keep a first-aid kit visible. For quick printable station signs and teacher notes, check free resources at DIY.org seasonal printables and inspiration at Chique Home Living.
Deep dive (200–400 words):
Problem: workshops derail when materials run out or tools are unsafe. Solution: a compact supply strategy plus clear roles. For a group of 12 children, prep this baseline: 12 paper plates, 12 glue sticks, a shared jar of washable paint, 24 popsicle sticks, and a box of assorted embellishments. Cost estimate: under $40 total for simple sessions. If hosting multiple sessions, invest in sturdy storage totes and label them by project name.
Station layout idea: place cutting/assembly at one table with safety scissors, while painting and drying happens at a second table. A third “sparkle and finishing” table holds stickers, ribbon, and sequins. Assign a teen volunteer as Elf Express Creations assistant to ferry wet items to a drying rack, which prevents smudges and keeps finished work pristine.
To read DIY Christmas Decor: Budget-Friendly Projects
Time management: schedule 45–60 minute blocks—10 minutes setup/intro, 25–35 minutes making, 10–15 minutes finishing and cleanup. Use a visible timer and play holiday music to keep momentum. When hosting multi-age groups, rotate younger children through simpler tasks while older kids tackle detailed steps. Document projects and share photos with families afterward to increase engagement—this also drives future participation in your Snowflake Studios events.
Common mistakes to avoid: overloading little hands with tiny beads, insufficient glue for heavier materials, and forgetting to pre-cut tricky shapes. Pro tip: create a “repair kit” with extra glue, replacement ribbons, and spare googly eyes for happy endings. For deeper checklists on supplies and classroom management, browse guides like seasonal classroom crafts and community roundups on Parade’s craft picks.
Key insight: Thoughtful prep, clear stations, and a small crew of helpers turn chaotic craft time into an efficient and joyful Festive Fun Workshop. 🧵
How to Turn Crafts into Keepsakes & Holiday Decor That Last (2025 Friendly)
Opening (about 50 words): Turning a craft into a keepsake requires simple finishing touches: sealing, labeling with dates, and choosing display methods that protect fragile pieces. The best keepsakes are wearable, frameable, or ready for shelf display and carry memories across years for family traditions. Yuletide Youngsters love seeing their work preserved. 📦
The best finishing steps are: sealing with a clear spray, laminating flat pieces, adding hanging loops, and photographing each item with a date tag. These steps ensure longevity and build a holiday archive.
Quick answer (≈100 words): Invest 10–20 minutes per finished craft to make it display-ready. Use a low-VOC clear sealer for painted items and laminate flat paper art for fridge durability. Add a small sticker on the back with the child’s name and year so that each ornament becomes a family heirloom. For gift-ready ideas, pair a decorated ornament with a handmade card—templates and gift-wrap tips can be found at resources such as Christmas kids crafts ideas and ornament upcycling guides.
Deep dive (200–400 words):
Problem: many homemade crafts are cherished for a season and then discarded. Solution: focus on durability and story. Example — turning a popsicle-stick gingerbread house into a long-term decoration: reinforce the back with a cardboard brace, seal painted surfaces with a matte varnish, and add a hook for hanging. Attach a small label: “Maya, Age 7 — 2025” (use the family or group naming convention you prefer) so the piece tells its story every year.
Collect and store: create a labeled storage box for ornaments—use tissue paper separators and acid-free bags for delicate items. For framed pieces like handprint trees, place a small date sticker on the back of the frame and keep digital copies by photographing each piece against neutral light. These images work beautifully for printed holiday cards or a digital yearbook for the Merry Makers circle.
Gift packaging: elevate homemade gifts with simple, consistent branding—kraft boxes, twine, and a printed tag. Offer a short product note such as “Handmade by your Mini Merry Maker — Save for next year!” This not only adds charm but also communicates care and value to recipients.
Community showcase idea: arrange a local “Tiny Tinsel Treasures” pop-up where children display and sell their crafts. This teaches presentation and pricing while celebrating creativity. For technical how-tos on turning crafts into marketable products, check guides like Tiny Blue House tutorials and DIY marketplaces that support small creators.
Key insight: With a few finishing touches—sealing, labeling, and thoughtful storage—child-made crafts become treasured keepsakes and meaningful gifts that last beyond the season. 🎁 Save for reference!