
Show index Hide index
- 1. Budget Halloween Costuming Basics: Fast Last-Minute DIY That Actually Work
- 2. Premium Accessories That Transform Costumes: Masks, Wigs, and Prosthetics
- 3. Crafting and Upcycling Techniques for Costumes That Look Expensive on a Budget
- 4. Tech, Projection, and Lighting: Make Costumes and Sets Cinematic
- 5. Shopping Strategy, Safety, and Seasonal Planning for Costumers and Hosts


Pro Halloween Costuming Budget Basics and Premium Accessories explores fast, reliable costume solutions and high-impact accessories for hosts, cosplayers, and last-minute partygoers. This guide pairs quick DIY tricks with professional-grade add-ons from top vendors, balancing thrift-store ingenuity with premium buys from specialty makers. Expect clear cost brackets, where to shop, and safety-minded installation tips for every setup. 🎃
1. Budget Halloween Costuming Basics: Fast Last-Minute DIY That Actually Work
Opening: When time is short and the calendar reads “Halloween,” the best last-minute transformations come from easy wardrobe reps, purposeful props, and hair-and-makeup pivots that change the whole vibe in under an hour. This section lays out practical, tested ideas that rely on items already at home or available cheaply. ⏱️
Answer — Best quick costumes: The best last-minute costumes are: Cat’s Pajamas, Identity Thief, and Night Sky. These three win for simplicity, recognizability, and rapid execution using common household items. Each addresses a common last-minute problem: lack of costume clothing, missing accessories, or insufficient prep time.
Why these solve the problem: Cat’s Pajamas only needs pajamas and a headband; Identity Thief exploits nametags and a trench coat for instant visual clarity; Night Sky uses black clothing and battery LEDs for a cinematic effect that reads well on camera and in crowds.
Quick Answer: Top recommendation: Night Sky — uses black base clothing, a $12 battery LED string, and metallic star stickers; visually dramatic with minimal setup. Runner-up: Identity Thief — nametag stickers and an overcoat; under $10 and hilariously effective. Budget pick: Cat’s Pajamas — reuses PJs and a DIY headband for <$5. Each option takes 10–20 minutes to assemble and photographs well under party lighting.
Latest Spooky Halloween Projection Videos
Discover amazing Halloween projection ideas for your spooky windows!


Keep scrolling for something spooky...

Create Your Own Halloween Projection Magic!
Transform your windows into spooky Halloween displays with professional projection equipment. Perfect for creating the same eerie atmosphere as our kawaii monster videos!
🎭 Affiliate link - Support our spooky content creation!
Deep Dive — Why each costume wins: The Night Sky costume is winning because it leverages contrast: black fabric absorbs ambient light while LEDs and reflective stickers pop. Use battery-operated micro LED strings tucked into a scarf or sewn into the hem; choose warm white or cool blue depending on the event. This look scales—wear a fitted black tee for office parties or a flowing black cape for outdoor trick-or-treating. Limitations include battery life (choose fresh AAAs) and potential snagging on accessories. For indoor photography, a 6–8 ft throw on LEDs gives balanced sparkle without overwhelming the sensor. If you have little time and want a big impression, Night Sky is the pick.
Identity Thief capitalizes on instant-read visual cues. Stick multiple blank nametags on a coat with scribbled famous names. Use a cheap trench from a thrift shop or a dark raincoat; add sunglasses for anonymity. This costume is forgiving of fit and lasts all night with no props to manage. Limitations: avoid real personal data when in public spaces and keep the look playful rather than mean.
Cat’s Pajamas is unbeatable for comfort and speed. Put on favorite PJs, craft ears from felt and a headband, and add lightweight makeup whiskers. Parents love this for kids because movement and warmth are preserved. The only real limitation is that some workplaces may request more formal attire; upgrading with a robe or slippers can pivot the look to “themed lounge” rather than “lazy costume.”
To read Decorative Halloween Clocks Stopped Time
Price ranges & availability: These outfits rely on items found at home or sourced for under $20 at retailers like Five Below or quick runs to Party City. For craft supplies, check local dollar stores and online references like Real Simple or The Penny Hoarder for curated ideas and thrift-friendly strategies. If out of time, many Spirit Halloween and Costume SuperCenter locations stock last-minute essentials.
Real scenarios: If commuting to an office party after work, choose Identity Thief for professional ease. If entertaining outdoors, pick Night Sky for visible, camera-friendly impact. If bringing kids to a family event, Cat’s Pajamas keeps comfort and cuteness intact.
Buying considerations: Check battery types before purchasing LEDs, pick washable adhesives for clothing labels, and avoid metal props in crowded venues. Common mistakes include overloading a costume with fragile pieces and choosing makeup colors that clash with lighting. Compatibility with masks, hoods, or glasses is essential—test before leaving the house.
Final recommendation: For a one-hour assembly and maximum payoff, go with Night Sky. Snag LEDs and star stickers on Amazon or at Party City and head out. Shop low-cost picks at Five Below for quick supplies. ✨
2. Premium Accessories That Transform Costumes: Masks, Wigs, and Prosthetics
Opening: High-impact accessories convert simple outfits into show-stopping looks, and knowing which pieces to invest in makes a big difference. Premium masks, realistic prosthetics, and film-grade wigs bring longevity and authenticity to seasonal outfits. 💎
Top accessory categories: Investing in a realistic silicone mask from specialist makers, a wig with hand-tied wefts, and a well-made prosthetic nose or scar kit provides the fastest upgrade path from basic to professional. These items work with thrifted clothing and DIY props to create layered, credible characters.
Why premium matters: High-quality pieces like those from Trick or Treat Studios and Rubie’s Costume Company are engineered for comfort, breathability, and realistic finishes. A movie-grade silicone mask preserves facial detail under party lighting and lasts multiple seasons when cleaned properly. Wigs from specialty vendors hold style and respond to heat styling, enabling accuracy for cosplay or period looks.
To read Fake Halloween Swords and Weapons Safe Foam
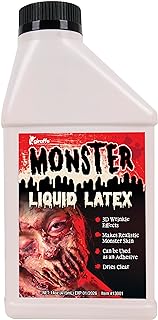
Specs and use cases: A silicone mask often lists thickness (1.0–2.5mm), ventilation ports, and eye-cut options—choose a mid-thickness mask for balance between realism and wearability. Wigs specify cap size and density; human hair or heat-resistant fibers are best for re-styling. Prosthetic pieces usually require spirit gum or medical adhesive and a thin sealer; pick water-based adhesives for indoor wear and medical-grade glue for longer outdoor events.
Price ranges: Expect to pay $30–$150 for high-quality wigs, $60–$300+ for silicone masks, and $15–$80 for prosthetic kits depending on material and artist reputation. Vendors like Costumes.com – Premium Costumes and The Horror Dome stock pro-tier options. Availability often spikes in October; order early for customization.
Practical limitations: Heavy masks affect hearing and breath control; plan for breaks. Prosthetics need prep and removal time; allocate 20–45 minutes for application and 10–15 for clean-up. Wigs should be brushed and stored on a stand to avoid tangles. Test-run the full costume in daylight and under party lighting to check seam lines and color shifts.
Real scenario: A vintage-inspired vampire look pairs a theatrical silicone forehead piece from Trick or Treat Studios with a velvet cape from Costume SuperCenter and a high-density wig. For a haunted-house actor who needs durability, choose smudge-proof makeup and a breathable prosthetic with replaceable adhesive strips. Budget-conscious cosplayers might buy a single quality mask and rotate clothing combinations seasonally.
Where to shop and compare: Brick-and-mortar Party City and Spirit Halloween are good for immediate swaps and fittings. For genre-specific or fandom-authentic pieces, check specialty shops and artisan sellers. Also consult product guides on HalloweenCostumes.com and marketplace feedback for build quality and return policies.
Maintenance and safety: Clean prosthetics with isopropyl or manufacturer-recommended solutions. Store wigs on breathable stands and masks in ventilated containers. Avoid adhesives that irritate sensitive skin; patch-test 24 hours before the event. Electrical elements like built-in LEDs require secure battery compartments—never tape bare wires to fabric.
Final insight: Spending on a single, well-chosen accessory often improves costume credibility far more than purchasing multiple cheap props; pick one transformational piece and build around it for best effect. ✨
To read Easy Non Toxic Halloween Makeup for Kids
3. Crafting and Upcycling Techniques for Costumes That Look Expensive on a Budget
Opening: Upcycling and clever crafting turn ordinary items into standout costumes, often costing less than a single commercial accessory. The following tested methods use household supplies and basic tools to create polished results. ♻️
Core upcycling principles: Scan closets and storage: old bridesmaid dresses, kids’ dress-up boxes, and holiday décor are treasure troves. Focus on silhouette first—shape sells more than texture. A well-cut cardboard prop or a curated cluster of balloons reads better than a mismatched store costume. For inspiration, consult curated lists like Real Simple and economizing roundups at The Penny Hoarder.
Example builds — clear steps and time estimates: The Grapes costume uses 25–40 balloons attached with safety pins to a jumpsuit or sweatshirt; allow 20–30 minutes for inflation and placement. Cost: $8–$15. The Cereal Killer requires an empty cereal box, a paper bowl prop, and a safe kitchen knife or cardboard knife—assemble in 10 minutes and keep prop edges blunt for safety. The Night Sky was covered earlier; budget $12–$25 for LEDs and stickers, 15–30 minutes assembly.
Tools and adhesives: Hot glue is a fast fixer for fabric and foam but can be heavy and rigid; use fabric glue for washable garments. Safety pins and snaps provide reversible fixes for rented or sentimental clothing. For wearable props that move well, stitch seams through a backing fabric to distribute weight and avoid tearing. Battery packs for LED strings should be hidden in a pocket and secured with Velcro.
Makeup and hair hacks: Liquid eyeliner and eyeshadow are the quickest ways to sculpt a character. A deep red lipstick becomes a vampire mouth or a statement retro lip. For hair, texturizing spray and a few bobby pins create instant space buns or braids. Bandanas double as pirate or Rosie the Riveter accessories and are pocket-sized backup choices.
Time-saving preps: Make a “costume kit” box with felt, safety pins, basic adhesives, elastic bands, and spare buttons. Pack a small makeup pouch with key shades and remover wipes. For families or groups, create modular props that fit multiple people—shared capes or interchangeable badges speed up dressing. Guidance and lists for cheap costume inspiration can be found on HerStyleCode, Reader’s Digest, and thrift-forward guides from Creed Leather.
Case study: A neighborhood volunteer needed a group theme for a last-minute block party. Using thrift-store black dresses, battery LED strips, and painted cardboard moons, the team created a cohesive “dark sky” troupe in under 90 minutes. The group won “Most Creative” at the party and spent $60 total—proof that small investments and teamwork yield high visual returns.
To read Halloween Pet Costumes Dogs and Cats
Common mistakes and fixes: Avoid over-gluing fragile fabrics; instead, tack seams with thread for reinforcement. Don’t rely on single-use adhesives for heavy props—mechanical fasteners last longer. Always do a dress rehearsal for movement and visibility, particularly if you’ll be on stairs or uneven terrain.
Final insight: Upcycling rewards creativity and recirculates materials—one well-executed DIY prop can elevate an entire look and keep costs under control. Save these ideas for next year: Pin for later! 📌
4. Tech, Projection, and Lighting: Make Costumes and Sets Cinematic
Opening: Lighting and projection bring costumes to life and create theatrical settings. Affordable tech options—from battery projectors to curtain lights—are must-learns for 2025 decorators and performers. 💡
Why lighting matters: Proper illumination clarifies costume detail and transforms color tones. A cheap but well-placed light can turn a thrift-store cape into a dramatic stage piece. Projection gear and lasers add motion and spectacle to costumes and small haunted displays.
Projectors and how to pick one: For window and yard projection, target units in the $80–$200 range for a good balance of brightness and portability. Check throw distance requirements—many models need 6–15 ft for full-frame projections. For single-person costume enhancements (animated backdrops on a jacket or cape), compact battery projectors perform well; see curated testing on neuchcup.ch/halloween-projectors-under-200. If using projection on fabric, prefer matte materials and avoid highly reflective clothing.
Lighting accessories: Waterproof curtain lights make a quick, safe backdrop for photos and are recommended for outdoor setups—see waterproof ranges at neuchcup.ch/halloween-curtain-lights-waterproof. Solar pathway lights guide guests safely for evening events; pair with battery-powered LED candles for safe ambiance (neuchcup.ch/led-candles-halloween-packs).
Fog and atmosphere: DIY fog machine hacks exist, but commercial units are safer and more consistent. For small, indoor settings, scented fog is a bad idea—opt for unscented fluid and keep ventilation in mind. If using lasers, comply with local safety guidelines and avoid direct eye exposure; consult neuchcup.ch/electrical-safety-halloween for best practices.
Window projection kits and set choices: A window projection kit can create cinematic displays for audiences on sidewalks and streets. Select kits designed for glass or screens and consider a temporary blackout curtain to boost contrast (neuchcup.ch/halloween-window-projection-kit, neuchcup.ch/window-screen-vs-projection). For large inflatables paired with projection, review bulb hour ratings and weather-proofing standards at suppliers like neuchcup.ch/best-halloween-inflatables.
Real scenario: A backyard host wanted a compact haunted corridor. Using a budget projector for shadow loops, waterproof curtain lights, and battery fog at controlled intervals, the host built a walk-through that read like a mini attraction. Total tech spend: below $300 when borrowing extension cords and using existing outdoor hooks. The result: a cinematic feel that made costumes look more dramatic and photos instantly shareable—ideal for social feeds and Pin for later! 📌
Buying considerations: Check lumen ratings and native resolution for clear imagery. Prefer LED projectors for longevity and energy efficiency. Confirm battery options if the event is off-grid and choose IP-rated lights for rainy forecasts. For more supply ideas, browse themed decor and projector films at neuchcup.ch/rear-projection-halloween-films and loop assets at neuchcup.ch/halloween-video-loops.
Final insight: Thoughtful light and projection choices amplify costume detail and set design—spend on one reliable tech piece and the visual return will outstrip buying several cheap accessories. 🎥
5. Shopping Strategy, Safety, and Seasonal Planning for Costumers and Hosts
Opening: Smart shopping, storage, and safety decisions reduce last-minute stress and keep costs down. Plan 45–60 days ahead for best stock and prices, and use tiered sourcing: thrift, mainstream retail, and specialty suppliers. 🛒
Two-tier shopping roadmap: Start with thrift or closet scans to lock a silhouette and base layer. In the 1–2 month window, secure show-stopping accessories from specialty makers like Trick or Treat Studios or Rubie’s Costume Company. In the final 2–10 days, pick up quick essentials—LEDs, adhesive nametags, and makeup—from Party City, Spirit Halloween, or Five Below.
Where to invest and where to save: Save on clothing by repurposing existing garments. Invest in a single long-term piece like a quality wig, mask, or prosthetic that will be reused. For professional-grade costumes, browse The Horror Dome or premium collections at Costumes.com. For budget guidance and last-minute alternatives, consult HalloweenCostumes.com and personal finance angles at Wealthy Woman Finance.
Storage and reuse: Store delicate items in breathable garment bags; masks in ventilated boxes with silica packs. Keep a digital inventory of outfit pieces and repair kits so annual prep is faster. Reuse accessories across themes—dark lace can be vampire, witch, or 1920s flapper with minor tweaks.
Electrical and fire safety: Use UL-listed lights for indoor use, avoid overloaded extension cords, and place fog machines where smoke alarms won’t be obstructed. Consult resources like neuchcup.ch/electrical-safety-halloween for specific best practices. Keep battery packs accessible for quick replacement and never run wires across high-traffic paths without cable covers.
Group and couple coordination: For pairs and trios, match color palettes and a shared prop—this reads instantly on arrival. Explore couple themes and group ideas on planning pages like neuchcup.ch/halloween-couples-costumes and coordinate sizes with plus-size-friendly options at neuchcup.ch/plus-size-halloween-costumes.
Final shopping checklist: Confirm return policies for online specialty shops, check shipping windows for premium masks, and buy adhesives and makeup testers early. If possible, buy one high-quality accessory and a few budget props for layered effect. When time is short, rely on quick-bake solutions: LEDs, headbands, and nametags.
Final insight: A season-aware shopping plan paired with safety-conscious installs reduces stress and yields better results; pick one premium piece, backfill with thrifted or craft elements, and test everything in advance. Save this plan and Pin for later! 📌