
Show index Hide index
- 1. Quick Picks & Fast Answers for Halloween Fog Machine and Low Lying Fog DIY
- 2. DIY Kitty-Litter Chiller: Tools, Parts, and Step-by-Step Build for Ground Fog
- 3. Alternative Low-Lying Fog Methods: Pipe Distribution, Frozen Bottles, and Dry Ice Tradeoffs
- 4. Best Commercial Machines, Brands to Trust, and How to Choose Them for Your DIY Chiller
- 5. Buying Considerations, Installation Checklist, Safety, and Final Recommendation
Concise brief: For creating convincing low-lying fog for Halloween, the fastest path is a targeted setup: a reliable fog machine, a cooling/chiller stage that keeps vapor close to the ground, and an even distribution method to cover a yard or indoor scene. This piece focuses only on practical builds, tested product choices, and step-by-step setups that deliver that ground-hugging roll of fog every homeowner haunt needs. Save this for your Halloween planning—pin for later! 🎃


1. Quick Picks & Fast Answers for Halloween Fog Machine and Low Lying Fog DIY
Opening (quick, 50 words): The best low-lying fog setups combine a dependable fog source and a cooling path to drop the fog’s temperature immediately after output. That makes fog hug the ground instead of rising and evaporating. Here are immediate options to get a spooky yard in minutes. 🔥❄️
Answer — Halloween Fog Machine and Low Lying Fog DIY immediately: The best solutions are: Antari Professional Fogger, Chauvet DJ Compact Fog Machine, Froggy’s Fog Heavy Fogger.
Why these solve the specific problem: Each option pairs a steady fog output with a compatible DIY or commercial chiller option so the vapor cools fast and stays low. Antari-style units offer consistent output for larger haunts, Chauvet DJ models are compact and reliable for decks or porches, and Froggy’s Fog units are known for heavy output that plays well with chillers.
Quick Answer (≈100 words): Top recommendation: Antari Professional Fogger — expect steady output and 1–3 hour runtime depending on the model; typical price range $150–$350. Runner-up: Chauvet DJ Compact Fog Machine — compact and quieter, priced around $80–$180. Budget pick: Froggy’s Fog Heavy Fogger — strong output for its price, often $60–$120. Each option pairs well with a DIY chiller made from an insulated container and ice or frozen bottles, or with a ready-made commercial chiller for faster setup. ⚠️ Check run-time specs and whether the unit has a continuous-on switch before late-night events.
Latest Spooky Halloween Projection Videos
Discover amazing Halloween projection ideas for your spooky windows!


Keep scrolling for something spooky...

Create Your Own Halloween Projection Magic!
Transform your windows into spooky Halloween displays with professional projection equipment. Perfect for creating the same eerie atmosphere as our kawaii monster videos!
🎭 Affiliate link - Support our spooky content creation!
Deep dive (200–400 words): The repeating problem with off-the-shelf fog machines is the heat of the output. A fog machine dissolves fog fluid into airborne droplets using heat, so the cloud comes out warm and buoyant. Cooling that column of vapor within inches of the nozzle is what forces it to sink. The simplest DIY approach is a chiller that forces fog to pass through an ice chamber or across frozen water bottles in a tube. The thrift-friendly chiller made inside a 35 lb kitty-litter tub reproduces the effect of commercial units like the “Cold Fusion Fog Chiller” (commercial cost ~ $130) at roughly $20 in materials. The technique is: feed hot fog into the top of the container, let it percolate through a mesh “shelf” across frozen blocks, then exit lower to the ground. That instant thermal exchange drops the vapor temperature enough to keep it hugging the lawn.
Key setup checks: match the fog output volume to the chiller size; too much fog will overwhelm small ice volumes. Use frozen water bottles rather than loose ice to reduce water runoff and make swapping quick. If the chiller is too small or the fog machine too powerful, the fog may still rise a little; scale the chiller to output. For distribution across a yard, combine a chilled machine with a black landscaping conduit dotted with 1/4 in holes and packed with frozen bottles down the length to scatter fog evenly. That strategy is ideal for cemetery scenes where fog must appear to roll between gravestones rather than pile up at one nozzle. Final insight: match fog volume, cooling capacity, and distribution to get the effect, not just buy the biggest machine. 🎛️
2. DIY Kitty-Litter Chiller: Tools, Parts, and Step-by-Step Build for Ground Fog
Overview: The core principle behind a simple chiller is thermal exchange: force hot fog to contact cold surfaces or cold air so it cools and drops. The easiest tested chiller replicates commercial designs using a plastic container, mesh shelf to hold ice, and a pair of PVC ports for in/out. The whole build can be done with common hardware-store parts for under $25. ⚒️
To read Thanksgiving Centerpieces: DIY Ideas for Your Table
Tools and supplies to collect — this is focused and practical so no unnecessary items are listed. You will need a hand drill, a 2 1/2 in hole saw, a hacksaw for PVC, and wire cutters for mesh. For materials, gather a 35 lb flip-top plastic container, a sheet of mesh (grilling or roofing mesh works), three 2 in PVC couplings, a right-angle 2 in elbow, several short 2 in and 1/2 in PVC runs, and some frozen 16–24 oz water bottles. The build re-creates the internal ‘ice shelf’ using PVC to hold mesh and bottles in place, creating channels so fog falls through cold before exiting the lower port.
Step-by-step assembly (explanatory paragraphs): Mark the bucket where the fog will enter and where cooled fog will exit. Use the hole saw to cut two opposing holes at the same height so the device can be used “either way” depending on your fog machine placement. Fit PVC couplings through the holes and sandwich the bucket sides so you have a tight port seal. Build a simple ‘L’ internal tube so the fog path can be reversed if preferred. Construct an internal shelf out of short PVC segments that lock together, then top with wire mesh to form the ice shelf. Insert frozen bottles onto the shelf; leave an inch or two of clearance below the lid so cold air can accumulate. Close the lid, set the fog machine nozzle into the upper hole, and power up. The fog entering the upper chamber will fall through the mesh and frozen bottles, cooling before it escapes out the lower port and hugs the ground.
Practical notes and tested tips: Frozen water bottles are recommended for cleanliness and quick swaps; use duct tape to seal any small gaps. If planning an evening-long display, keep a cooler of frozen spare bottles nearby for swaps every 30–90 minutes depending on output and chill volume. For minimal mess, orient the exit port slightly upward from the ground level so fog cascades out instead of pooling near the lip. If the fog machine’s controller is manual only, use a fog timer, or tape down the switch for continuous operation; better is to source a unit with a latching on/off control.
Use-case examples: For a sidewalk-yard setup where the machine sits behind bushes, the chiller can be tucked into a wooden crate for camouflage. For indoor haunts claim areas like basements: ensure ventilation and never use dry ice indoors without proper precautions. A community haunt operator replaced a commercial chiller with the kitty-litter version and maintained ground-hugging fog across a 30 ft path by using two identical units alternated every 20 minutes — result: continuous low fog without dry ice costs. ✨
Sources and further readings with tested variations are useful: see a step-by-step printable chiller tutorial at TeediddlyDee and a compact chiller variation on EverydayShortcuts. If a different build speaks to the space constraints, the instructive build at Instructables provides alternative configurations.
3. Alternative Low-Lying Fog Methods: Pipe Distribution, Frozen Bottles, and Dry Ice Tradeoffs
Context and quick principle: Low-lying fog can be created by chilling fog or by using denser-than-air fog methods like dry ice in water. The cold-tube distribution strategy uses frozen bottles inside plastic landscaping conduit to spread chilled fog over wide areas, while dry ice offers dramatic results but carries practical constraints. This section examines those alternatives and when to choose each. 🧊
Plastic conduit with frozen bottles — practical distribution: This method uses black landscaping conduit or flexible plastic pipe with small holes along the top. Fill the conduit with frozen 16–24 oz bottles, tape one end shut, then insert the fog machine nozzle at the open end. When active, fog travels the pipe, cools against the frozen bottles, and escapes through holes as low fog along a length of the yard. This is ideal for straight pathways or rows of gravestones because it spreads the effect rather than concentrating it near the machine. For aesthetics, spray paint the conduit matte black so it blends into mulch or under hedges. Expect initial setup to take 30–60 minutes per run, with frozen bottles swapped every 45–90 minutes depending on weather.
To read Sally Nightmare Before Christmas: Costume and Makeup Guide
Dry ice — speed vs. logistics: Dry ice (solid CO2) in warm water makes thick ground-hugging fog quickly and visually impressively. However, dry ice requires handling precautions (gloves, ventilation), is perishable, and can be costly for extended displays. Dry ice also produces fog that behaves differently: it can be denser and more localized, and it dissipates faster on windy evenings. For large, continuous displays, a fog machine plus chiller is often more practical and safe for residential settings than repeated dry-ice additions.
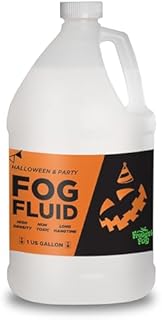
Fog fluid choices: Most DIYers find standard fog fluids are sufficient. The heavier “low-lying” branded fluids can seem attractive but can gum up machines and decrease run time. A gallon of standard fog fluid is typically more cost-effective and less likely to clog pumps; many hobbyists recommend balancing concentration and cleaning frequency. Follow manufacturer cleaning guidance: run a water-vinegar solution periodically to clear fluid residue. For more on fluid chemistry and professional takes, read a practical guide at Flavor365.
Case scenarios and guidance: If the haunt is a single-night front-yard display, dry ice can deliver a spectacular 2–3 hour effect and is worth the extra logistics. For multi-night events or community haunts with volunteers, a chiller plus fog machine provides reliable performance with lower ongoing costs. One neighborhood haunt used a hybrid: dry ice for an initial wave of dense fog at the start of trick-or-treating, then switched to chilled-fog machines to maintain the low-lying look throughout the evening.
Practical mistakes to avoid: Don’t overfill the fog machine reservoir mid-run; spillage can short the unit. Never confine a fog machine in a sealed small room without ventilation. Avoid “heavy” fluids exclusively if the machine lacks manufacturer guidance; regular fluids plus cooling usually outperform sticky heavy fluids in long runs. Final insight: match method to event length, audience, and safety comfort level. 👻
4. Best Commercial Machines, Brands to Trust, and How to Choose Them for Your DIY Chiller
Quick orientation: When looking beyond DIY fog machines, brands matter because mechanical reliability and run-time determine whether a chiller approach will work reliably. Trusted manufacturers include Chauvet DJ, ADJ (American DJ), Antari, and specialty producers like Froggy’s Fog. Less common but useful for accessories and small electronics are brands such as Rockville, Theefun, AGPTEK, TOMOLOO, and Yeesite, which offer complementary gear like controllers, lights, and timers. For Halloween-specific FX gear, look into Halloween FX vendors that bundle fog with props and packaging. 🎯
Brand comparisons and buying notes: Chauvet DJ is a strong pick for users who want a compact, robust unit with good parts support and accessories like DMX control. Antari leans pro-grade and often has higher output and industrial build quality, making it suitable for large yard haunts. Froggy’s Fog is widely respected for dense output at accessible price points, and it pairs nicely with DIY chillers that need a strong supply of vapor. ADJ (American DJ) balances price and features and often has units with latching switches or remote timers.
Which machine for which haunt? For a small porch or indoor scene that needs periodic short bursts, a compact Chauvet DJ unit is ideal. For wide graveyard spreads, pair an Antari or high-output Froggy’s Fog unit with multiple chiller outputs or a long frozen-bottle conduit run. If limited to a budget, a reliable unit with manufacturer-recommended cleaning steps and an on/off latch is better than a more powerful unit that frequently clogs.
To read Christmas Cards: 15 DIY Ideas That Impress
Price ranges and availability in 2025: Entry-level compact units often start around $60–$120. Mid-range dependable machines fall in the $130–$300 bracket. Professional models and specialty units can run $300–$700 and up. Many of these are available via mainstream retailers and Amazon; compare run-time specs and whether the remote or controller is included. For hands-free operation, consider an external interval timer or a unit with continuous-on capability.
Real scenarios: If the haunt has volunteers and needs hands-off operation, pick a machine with a detachable remote or invest in a fog timer and a commercial chiller. If the scene is tight and visually critical—like a stage performance—choose a unit with smoother output and minimal pulsing. For a community trunk-or-treat event, pick smaller units that are less likely to overfill neighbors’ lawns and pair them with shorter chilled conduits so fog doesn’t drift into pedestrian walkways.
Additional reading and comparative builds are available at MOKA SFX and a practical make-and-test write-up at DaneliaDesign. For an economical chiller variation and inspiration, see CraveSomeCreativity. Final insight: brand reputation matters for longevity and parts — invest a little more for a model with documented cleaning and service instructions.
5. Buying Considerations, Installation Checklist, Safety, and Final Recommendation
What to check before buying: Confirm run-time and reservoir capacity so you know how often to refill; check whether the unit has a continuous-on switch or requires a timed remote. Inspect manufacturer cleaning instructions and whether replacement parts or service manuals are available. Measure throw distance: some units need an 8 ft clear path; others are fine tucked behind decor. Check voltage and plug type if running from outdoor outlets and whether an outdoor-rated extension is necessary. Also verify that the machine’s output is compatible with your chosen chiller—too much output for the chiller causes plume rise rather than low fog.
Common mistakes to avoid: Using heavy fluids that are not recommended by the manufacturer can clog pumps; avoid oils or thick additives unless specified. Skimping on ventilation in enclosed spaces creates respiratory discomfort for guests. Over-relying on dry ice for multi-night displays increases cost and logistics. Not securing conduit runs or hiding cables can make the display a trip hazard—plan cable routes and use GFCI-protected exterior outlets.
Compatibility issues and installation requirements: If pairing a fog machine with a DIY chiller, ensure the machine’s nozzle diameter and chiller inlet match or can be adapted with duct tape or ducting connectors. For yard distribution using black landscaping conduit, use 1/4-inch drilled holes every 1–2 ft for even dispersion and test at low output before dark. When using multiple machines for a very wide yard, synchronize cycles manually or via timers so fog output appears steady across the space.
Practical shopping list and time estimates — prepare frozen bottles ahead (freeze 12–24 hours in advance), buy extra fog fluid (a gallon can last multiple nights depending on runtime), and allow one hour for chiller assembly and conduit placement. Expect to swap frozen bottles every 45–90 minutes during events, though cold ambient weather will extend that. For convenience, use frozen water bottles instead of crushed ice; they are easier to manage and reduce runoff. Also explore accessories like pathway solar lanterns and smart-plug timers to automate fog cycles and lighting—see seasonal decor ideas and product lists at pathway lanterns and a Halloween window projection kit at window projection kit.
To read Christmas Wood Crafts from Scrap Lumber
Final recommendation (≈50 words): For most residential haunts, the best overall value is a dependable mid-range fog machine (Antari-style) paired with a DIY kitty-litter chiller built from frozen bottles — cost-effective, tested, and scalable. Ready to shop? Buy a tested fog machine on Amazon and pair it with chiller materials; this combo delivers the most consistent low-lying fog for effort and budget. 🎃
Extra seasonal inspiration: For more haunted yard ideas that pair perfectly with low fog, browse curated lists for best inflatables, window box lights, and Halloween cocktails for adult events. For Halloween prop kits and projection gear, check projection kits and consider smart plugs for timed automation at smart plugs. Save these links and plan 45–60 days ahead to secure supplies—pin for later! 📌