
Show index Hide index
- Blackout Blinds or White Screens: Quick Answer, Top Picks, and Why It Matters for Halloween Projection
- Best Screen Materials for Window Projection: White Screens, Tulle, Chiffon, and AtmosFX Hollusion
- How to Use Roller Blinds and Blackout Curtains as Projector Screens for Halloween Windows
- Setting Up a Halloween Window Projection: 12 Steps, Power Tips, and Equipment Checklist
- Troubleshooting, Creative Hacks, and Shopping Tips for a Window Wonderland Projection

Blackout Blinds or White Screens: Quick Answer, Top Picks, and Why It Matters for Halloween Projection
Opening: For spooky window shows the choice between blackout blinds and white screens decides whether an effect looks like a ghost floating inside the glass or a crisp silhouette against a bright backdrop. 🎃 This section answers that question immediately and lists top gear for a Halloween projection that actually works.
Answer: Blackout Blinds or White Screens Halloween Projection — the best options depend on whether a scene needs rear-transparency or front-facing brightness. The best projector/screen combos for window projection this season are: VIVIDSTORM X35, ViewSonic MI+, and AtmosFX Hollusion + Reaper Brothers material.
The best Blackout Blinds or White Screens Halloween Projection setups are: VIVIDSTORM X35, ViewSonic MI+, and AtmosFX Hollusion. 👻 These choices solve specific problems: VIVIDSTORM offers high contrast for front projection on white screens, ViewSonic is portable and budget-friendly for short-throw window shows, and AtmosFX + Reaper Brothers materials are designed for convincing hologram-like rear projections.
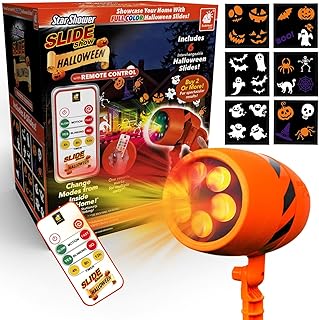
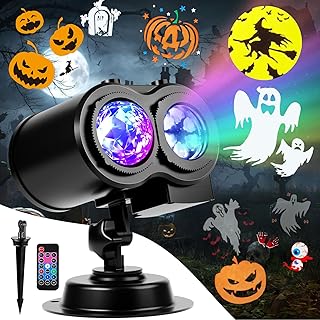
Quick Answer: Top recommendation: VIVIDSTORM X35 (approx. $1,199) — strong contrast and HDR handling for large window displays. Runner-up: ViewSonic MI+ (approx. $399) — compact, bright (1800 lumens+), and easy to loop content from USB. Budget pick: Gemmy / YINUO Mirror-friendly mini projector (around $99–$199) — fine for small porch windows or testing ideas. Each picks a clear strength: brightness, portability, or value. 🕸️
Latest Spooky Halloween Projection Videos
Discover amazing Halloween projection ideas for your spooky windows!


Keep scrolling for something spooky...

Create Your Own Halloween Projection Magic!
Transform your windows into spooky Halloween displays with professional projection equipment. Perfect for creating the same eerie atmosphere as our kawaii monster videos!
🎭 Affiliate link - Support our spooky content creation!
Deep Dive: The VIVIDSTORM X35 wins for front-projection on white screens because its native contrast and color tone mapping keep highlights from blooming on reflective blackout fabrics. It performs well with products sold by ProjectorScreen.com and pairs nicely with Elite Screens fixed-frame fronts. The ViewSonic MI+ is a strong mid-budget pick; it meets the practical Halloween checklist: HD native resolution, HDMI and USB playback, and a loop/repeat function for continuous playback. Gemmy-style mini units or small battery-powered models from brands like AINAAN and YINUO Mirror are useful if the projection distance is under 8 ft and the screen area is small.
Specs and limitations: aim for ≥1800 lumens for yard/window work visible from the sidewalk; projectors below that struggle in ambient streetlight. For rear-projection holograms pick semi-translucent screens (AtmosFX hollusion, chiffon, or frosted shower curtain). Budget projectors sacrifice contrast and throw distance; that’s acceptable for small Hallowindow displays but not for a full front-yard spectacle. ⚠️
Price ranges and availability: VIVIDSTORM and Elite Screens accessories are sold on specialty retailers and often ship on Prime through partners; ViewSonic models are regularly found under $500 during fall sales. For community advice on rear projection fabrics see the Reddit thread testing materials: what material for rear projection in a window?.
Real scenarios: If the plan is a dark foyer window seen from the street where silhouettes should appear to float, choose AtmosFX hollusion or Reaper Brothers material and a compact projector with rear mode. If the plan is a bright white front porch screen visible from 30+ feet, choose a high-lumen front projector like VIVIDSTORM. Final insight: match the projector brightness and input options to the screen type and viewing distance. 🔍
To read Christmas Lights: Indoor Display Ideas That Sparkle
Buying Considerations: Check for loop/repeat playback, HDMI + USB inputs, native HD resolution, and battery options if running without power. Confirm throw distance and whether the projector supports rear projection mode for window-facing installations. Avoid models without stable loop playback or limited input types; those force babysitting during the display. 🔧
Final Recommendation: The top pick for most Halloween window shows is the VIVIDSTORM X35 for contrast and brightness; purchase adapters and a Reaper Brothers or AtmosFX material for convincing holograms. Buy on Amazon or specialty retailers linked above and test with a small frosted shower curtain before committing. 🎯
Best Screen Materials for Window Projection: White Screens, Tulle, Chiffon, and AtmosFX Hollusion
Choosing the right screen material is the central decision for a successful Blackout Blinds or White Screens Halloween Projection. 🎃 The screen determines whether images appear vivid, ghostly, or washed out. This section examines fabric options and how they translate to real street-facing displays.
White screens for front projection: A smooth, matte white surface gives bright, saturated images. Brands like RoseBrand and retailers such as ProjectorScreen.com and Elite Screens sell front-projection fabrics that are engineered for even reflectivity. A front-projection white screen is ideal when the projector is placed inside the yard aiming directly at the screen; for these, aim for a flat, taut surface to avoid texture-caused hotspots.
Tulle and mosquito netting: Tulle is a lightweight, stretchable option that works for gauze-like holograms when placed in a doorframe or window. It’s very affordable and perfect for layered ghost effects, but expect some grain and limited color fidelity; small pixels and weave show up at close range. Mosquito netting is similar but shinier, which creates specular reflections under bright projectors and can break the illusion if streetlights hit the fabric. Try a flashlight test from inside to judge translucence first; many enthusiasts report this method in community guides and threads like the previously linked Reddit discussion.
Platinum chiffon and AtmosFX Hollusion: Chiffon and AtmosFX’s Hollusion materials strike a nice balance between translucence and image quality. Chiffon offers smoother light capture and brighter images than tulle while still allowing the viewer to see through to the interior when backlit. AtmosFX’s Hollusion was designed specifically for Halloween holograms and often appears darker than chiffon, which can be beneficial if the effect relies on high contrast shadows. These fabrics cost more than tulle but produce much more convincing displays for front- and rear-projected illusions.
Reaper Brothers and specialized window fabrics: The Reaper Brothers window projection material is a semi-translucent woven polyester that works well for rear window projection; it minimizes hot-spotting and is available in specific width/height sizes up to 48″ x 72″. For large community displays, their durability and edge finishing reduce setup time and avoid creases that spoil the image.
To read Christmas Market at Home: Recreating the European Experience
Frosted shower curtains and DIY options: A light-colored frosted shower curtain can double as an inexpensive rear-projection screen; it hides the view from passersby while allowing a crisp image when lit from behind. Expect wrinkles and an uneven surface unless stretched; ironing or tensioning will help. For quick props, a white bed sheet works but beware of thickness: heavy fabrics kill brightness and color fidelity.
Practical checks and experiments: Always test materials with the actual projector before final installation. A good trick is to point a bright flashlight through the material to assess translucence and hot-spotting — a method widely recommended in online setup guides like the detailed walkthrough at PointerClicker. If the flashlight beam diffuses evenly, the fabric will likely perform well at night. If the beam creates obvious rings or reflections, choose a different fabric or adjust projector placement.
Costs and trade-offs: Budget screens (tulle, mosquito netting) cost under $20 and are wasteful for repeated use. Mid-range options (chiffon, frosted shower curtain) usually run $20–$60 and offer better optics. Premium materials like AtmosFX hollusion and Reaper Brothers run higher but save time and produce more realistic effects for serious displays. For those testing designs, start cheap and upgrade only when a convincing effect is confirmed. 🔍
Key insight: the screen choice should follow the effect goal — for transparent, ghostly illusions choose chiffon or hollusion; for bright, colorful yard shows choose flat white front-projection fabrics. This decision governs projector selection and placement. 👻
How to Use Roller Blinds and Blackout Curtains as Projector Screens for Halloween Windows
Roller blinds and blackout curtains offer a tempting two-for-one: light control and potential projection surface. ⚠️ This section evaluates whether they can replace a dedicated screen for Blackout Blinds or White Screens Halloween Projection, and how to make them work if chosen.
Can a roller blind be a projector screen? The short answer: yes, with caveats. Roller blinds with a smooth, matte surface can be an acceptable front-projection screen for smaller indoor or porch displays. For best results pick blinds with a neutral color — matte white or neutral grey — and use the back (flatter side) if the fabric has a textured face. Several DIY and AV enthusiasts have tested this and written guides, including The DIY theater community at TheaterDIY and HomeTheaterAcademy’s take on roller blind usage: roller blind as a projector screen.
Blackout blinds for rear projection: standard blackout blinds tend to be thick and highly absorptive, designed to block light rather than reflect it. That helps room darkening, but the material often lacks the reflective qualities required for bright projection. For rear-facing window installations, a semi-translucent material is preferred; however, a high-quality blackout roller will work as a front screen in a darkened environment if it’s smooth and taut.
To read Christmas Mantels: Before and After Transformations
Installation tips: mount the roller blind so it is perfectly flat and wrinkle-free; tension is the enemy of hotspots and texture. Secure edges with low-profile clamps or gaffer tape to avoid light bleed. For rear-projection scenarios, a double-layer technique can work: mount a thin translucent chiffon or shower curtain a few inches in front of the glass, then put the blackout blind behind it to create depth and hide interior clutter. This setup gives a convincing ghostly depth without buying premium hollusion fabric.
Technical compatibility: check throw distance and keystone correction. Roller blinds are often used in tight home settings, so confirm the projector’s throw ratio for the desired screen width. Keystone correction can fix alignment but reduces sharpness; physically align the projector instead. If the projector lacks HDMI or USB loop-playback, plan for a media player or a small laptop; many Halloween projectors are sold with USB/SD loop options for continuous looping, a must-have for unattended displays.
Common mistakes to avoid: using heavily textured blackout blinds that produce a “fabric grain” effect, placing the projector too close (resulting in pixelation), and forgetting ambient streetlights or porch light spill. Also avoid using blinds with shiny coatings; those introduce glare and hotspotting. Reliable DIY guides warn about these mistakes — HomeTheaterGeek has a beginner’s guide about roller blinds and projection that highlights these pitfalls: roller blind as a projector screen.
Case study: a craft designer converted a set of white roller blinds into a 72″ wide screen and used a ViewSonic MI+ at 6 ft throw for neighborhood-facing window scenes. The result: a crisp silhouette effect visible from 20–30 ft, with audio piped to a small Bluetooth speaker. The key changes were using the blind’s smooth back side, clamping the edges for tension, and disabling all indoor lights. This approach saves cost and doubles the blinds’ utility.
Final thought for this section: Roller blinds and blackout curtains can be serviceable projector surfaces if chosen for matte finish and flatness; they’re not a universal replacement for dedicated projection fabric but offer a pragmatic DIY path for seasonal décor. 🛠️
Setting Up a Halloween Window Projection: 12 Steps, Power Tips, and Equipment Checklist
Turning a blank window into a Window Wonderland requires methodical setup and a few well-chosen tools. 🕸️ This section breaks down a practical workflow for the Blackout Blinds or White Screens Halloween Projection and includes product pairings and compatibility checks for a smooth show.
Equipment checklist: a projector (HD native preferred, ≥1800 lumens for outdoor visibility), screen material (AtmosFX hollusion, Reaper Brothers, frosted shower curtain), media player or USB/SD card with loop playback, small external speakers (for a convincing soundtrack), and colored LED uplights to add depth behind the screen. Brands to consider include VIVIDSTORM, ViewSonic, Gemmy, and accessories from ProjectorScreen.com and Elite Screens. For ideas on content and loops consider bundles sold by AtmosFX and community content sources like Ricky’s Halloween projections.
To read Christmas Decorations That Double as Storage Solutions
12 practical steps (expanded): 1) Measure the window and plan for a screen slightly smaller than the glass to hide edges. 2) Select the right material: chiffon/hollusion for rear holograms, flat white for front projection. 3) Hem or tape edges to prevent fraying and create a clean silhouette. 4) Clip or clamp the fabric to a simple frame or tension line; avoid sagging. 5) Position the projector — measure throw distance against the projector’s ratio. 6) Lock down projector height on a tripod and angle it for minimal keystone use. 7) Connect media: load MP4s or AtmosFX DVDs and test loop/repeat. 8) Add an external speaker and test audio levels. 9) Set up subtle LED uplights behind the screen to add eerie glow without washing the projection. 10) Turn off or shield nearby lights to maximize contrast. 11) Run a full test for 15 minutes to ensure repeat loops and playback stability. 12) Secure cables and weatherproof outdoor setups with gaffer tape and protective covers. For a step-by-step illustrated guide see PointerClicker setup guide and the community tutorial videos.
Power and battery: If power access is limited, evaluate battery-powered projectors with at least 2 hours runtime. Many dedicated Halloween projectors advertise battery life but check real-world tests; battery often drops under bright usage. For sustained neighborhood shows, plan for AC power or a reliable inverter to avoid mid-run shutdowns. 🔋
Rear vs front projection: For street-facing window displays choose rear projection so images appear correct from outside. Most projectors include a “rear projection” image flip in settings (Menu > Projection > Rear projection) — confirm this early in setup to avoid mirrored playback. If the chosen projector lacks a direct rear mode, flip the video file before loading it onto a USB to ensure correct orientation outside the house.
Safety and permissions: check local ordinances and HOA guidance about projecting onto shared facades or public thoroughfares. Secure all tripods, runs of extension cord, and speaker placements to avoid trip hazards. Use weather-rated gear when projecting outside and protect electronics from dew and rain.
Pro tip: test with a frosted shower curtain and cheap mini-projector first to confirm the idea, then upgrade to a higher-lumen unit if the effect needs to scale. For inspiration on content and timing, see curated playlists and projection kits in community shopping lists like Halloween window projections and the 1080p projector suggestions.
Key insight: a reproducible Halloween window show blends the right material, a stable projector with looped playback, careful power planning, and subtle lighting behind the screen to create convincing depth. 🔦
Troubleshooting, Creative Hacks, and Shopping Tips for a Window Wonderland Projection
Even with the right gear, small details decide whether a display delights or disappoints. This section covers troubleshooting, creative craft hacks from a seasonal decor perspective, and practical shopping links for a successful Blackout Blinds or White Screens Halloween Projection. 🎃
Common problems and fixes: washed-out images — increase contrast by dimming ambient lights and moving the projector closer to reduce throw loss. Grainy holograms — switch from tulle to chiffon or AtmosFX hollusion for a smoother surface. Mirrored images — engage rear projection mode (Menu > Projection) or flip the video file in editing software. Audio delay — use a wired speaker connection to avoid Bluetooth lag. For more nuanced DIY fixes see advice on whether blackout curtains or roller blinds will suffice: can I use blackout curtains as a projector screen and can I use a blackout blind as a projector screen.
Creative craft hacks: frame a chiffon hollusion with an upcycled window sash and add faux cobwebs to hide clamps; paint subtle black gradients on the edge of a white screen to increase perceived depth; use a YINUO Mirror or small mirrored panels behind props to create unexpected reflections that sell the 3D illusion. Partner projections with physical props like giant skeletons or floating ghost rigs (see floating ghosts) for mixed-media displays that read well from the sidewalk.
Shopping suggestions and content bundles: AtmosFX sells themed content and matching hollusion material, making it easy to match media to fabric. Reaper Brothers materials and RoseBrand fabrics scale for larger windows and frequent reuse. For costumes and in-person interaction ideas pair projection nights with budget costume accessories or themed playlists from Halloween playlists to add atmosphere. If seeking ready-made Hallowindow kits, review curated starter packs like home starter packs and specialized projection kits at niche retailers.
Compatibility checks: ensure the projector supports the resolution of your chosen content (1080p recommended for crisp windows), confirm the media player supports loop playback, and verify that audio outputs match the speaker inputs. For mobile setups, make sure cables and adapters are short and secure; avoid long thin extension cord chains that trip breakers.
Pro craft tip: save setup time by building a simple frame that snaps together and holds fabric under slight tension; store the frame with clips and a labeled USB containing tested loops for fast seasonal deployment. This workflow was adopted by a neighborhood decorator who reduced setup time from 90 minutes to 20 minutes and increased nightly engagement. For accessory mounting tips see FixItBlinds tips.
Shopping and inspiration links: browse themed projection materials and accessories via ProjectorScreen.com and Elite Screens for quality frames; peek at seasonal ideas and props at community pages like Halloween window projections, Halloween entryway ideas, and Halloween projectors 1080p for gear that pairs well with local displays.
Final troubleshooting insight: prepare with a simple test rig two weeks before events, confirm loop playback and rear/front mode settings, and keep a backup lightweight projector for last-minute failure recovery. This small redundancy often saves the night. 🛡️