
Show index Hide index
- 1. Easy Felt Christmas Ornament Supplies: What to buy and where to score deals
- 2. DIY Felt Snowman Ornament: A simple, storeable favorite that beginners master fast
- 3. DIY Felt Reindeer Ornament: Cute, slightly advanced details that still suit beginners
- 4. Personalized Felt Name Ornament: Simple monogramming and gift-ready packaging ideas
- 5. Felt Gingerbread & Star Ornaments: Two quick projects to finish a set and elevate your tree


1. Easy Felt Christmas Ornament Supplies: What to buy and where to score deals
Opening (quick 50 words): The best way to get started with Felt Christmas Ornaments is to gather a compact, reliable kit and a few extra supplies from trusted stores. The best starter shopping list includes wool or acrylic felt, DMC embroidery thread, a sharp Fiskars scissor, and Aleene’s glue — items that hold up well when making ornaments. 🎄
The best felt ornament supplies are: basic felt sheets, embroidery floss, stuffing, a needle set, and adhesives like Aleene’s or Beacon Adhesives. These solve the beginner’s problem of inconsistent results by offering durable materials that don’t fray and that stitch cleanly. Quick wins come from choosing felt that’s about 1.5–2mm thick and thread that’s colorfast — this avoids sagging on the finished ornament. ✨
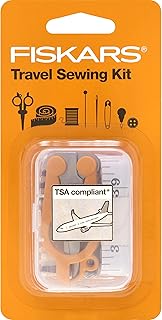
Quick Answer (100 words): For a compact, beginner-friendly stash pick the following: 10 assorted felt sheets in festive colors, a small pack of DMC embroidery floss, a sharp pair of Fiskars fabric scissors, polyester stuffing, and a tube of Aleene’s Tacky Glue or Beacon Adhesives craft glue for no-sew options. Buy the felt and specialty holiday trims at Michaels, Joann Fabrics, or Hobby Lobby, and check Etsy for unique buttons and tiny charms. Budget-conscious crafters can look at Amazon Basics for scissors and storage boxes. Save for reference! 📌
Deep Dive (200–400 words): Start by choosing felt. Wool felt is premium — it’s sturdy, holds embroidery well, and gives a soft, rich finish. Acrylic felt is cheaper and highly available at stores like Michaels and Joann Fabrics, and it’s perfectly acceptable for ornaments that hang on a tree. When selecting thread, DMC provides consistent color and sheen, which matters if adding small embroidered details like names or snowflake motifs. Need tools? A tiny embroidery needle set, a thimble for short fingers, and Fiskars scissors with a fine tip make cutting tiny shapes precise and painless. For adhesives, Aleene’s is the go-to for fabric; for faster bonding, Beacon Adhesives has quick-dry options that won’t stiffen felt too much.
Where to buy and budgeting tips: If shopping in person, compare the seasonal sales at Michaels and Joann Fabrics — both often run 40–60% off coupons in November. Hobby Lobby tends to have lower baseline prices on embellishments. For curated charm packs, Etsy sellers offer tiny wooden buttons, mini bells, and personalized tags that make a handmade ornament feel boutique. For bulk basics (storage boxes, extra stuffing), Amazon Basics saves time and money. Expect to spend roughly $20–$35 for a starter kit that will make 10–20 ornaments depending on complexity. Plan purchases 45–60 days before gifting season to avoid shipping delays and sold-out holiday motifs. 🎁
Pro tip: If planning to cut shapes with precision, pairing felt with a Cricut machine makes fast work of repetitive shapes — especially useful if making a dozen matching ornaments. For inspiration and free patterns, check tutorials like the ones at The Yellow Birdhouse and step-by-step guides at Better Homes & Gardens. Pin for later! 📌
To read Christmas Ornament Crafts: DIY Projects for All Ages
2. DIY Felt Snowman Ornament: A simple, storeable favorite that beginners master fast
Opening (about 50 words): The best beginner-friendly snowman felt ornament is the one that balances simplicity with charm. Snowman ornaments made from two white felt pieces, a carrot nose, and stitched details are forgiving and fast. They teach basic stitches and assembly without overwhelming the crafter. ☃️
The best snowman ornament approach is: trace, stitch, stuff, and embellish. This solves the beginner’s problem of messy seams by using a blanket stitch or running stitch and provides a small practice project that yields quick, satisfying results — ideal for gifting or hanging immediately. Buying small black beads for eyes and tiny pom-poms at Hobby Lobby or Michaels streamlines detail work. ✂️
Quick Answer (100 words): Cut two identical white felt snowman silhouettes, sew on black felt eyes and an orange carrot nose, then blanket-stitch the edges leaving a gap for polyester stuffing. Add a scarf from leftover felt or a scrap of festive fabric, and fasten a loop of ribbon for hanging. Glue (Aleene’s) can substitute for tiny stitches when crafting with kids. For a step-by-step visual, try a hands-on tutorial at Fun Thrifty Mom which demonstrates beginner-friendly stitch techniques. This project takes about 20–30 minutes once supplies are prepped. 🎯
Deep Dive (200–400 words): Start by selecting the right pattern. Trace a snowman outline onto the felt using a cookie cutter or a small template printed from a blog like The Spruce Crafts. Trace on the wrong side for neatness. Cut two identical shapes with pointed Fiskars scissors — sharp tips make tiny curves clean. Applying eyes and buttons before assembly keeps the front neat. Tiny black beads or small black felt circles work best; secure them with a few stitches to avoid losing them during tree storage.
Stitch choices matter. A running stitch gives a minimal look and is the quickest; a blanket stitch adds a decorative ridge and seals edges better for stuffing. If trying embroidery details, use DMC floss doubled or tripled for visible color — red and green are classic scarf tones. When stuffing, use polyester fiberfill sparingly; overstuffing distorts the silhouette. Leave a 1cm gap to push stuffing, then stitch closed with small, even stitches.
Time-saving variations: For an entirely no-sew option, glue edges with Beacon Adhesives or Aleene’s textile glue and press firmly with clips until dry. This is especially useful for classroom sessions or craft nights. Personalization ideas include adding the year or initials with tiny backstitch embroidery, or sewing a small jingle bell into the scarf. For more pattern ideas and inspiration, see tutorials at SewnScissors and Six Clever Sisters. An insight to carry forward: practicing one small ornament like the snowman builds confidence for stitched detail work on more advanced projects. ☃️
3. DIY Felt Reindeer Ornament: Cute, slightly advanced details that still suit beginners
Opening (50 words): The best reindeer felt ornament blends a simple silhouette with layered accents — antlers, a red nose, and a tiny coat or scarf. Reindeer pieces teach placement and layered stitching, plus they look impressive on the tree. 🦌
To read Christmas Characters: Popular Figures for Decorating
The best reindeer ornament strategy is to prep all tiny elements before sewing pieces together. That avoids fumbling with antlers and noses mid-seam. Use light brown felt for the body, dark brown for antlers, and a red felt circle for a nose. This method solves the beginner’s alignment problems and results in a polished ornament. ✨
Quick Answer (100 words): Cut two reindeer silhouettes, stitch on the small dark brown antlers between the two layers, add bead eyes and a red felt nose, then blanket-stitch and stuff. Attach a red felt coat or scarf and finish with a hanging loop. For a clear how-to, consult the reindeer tutorials and pattern alternatives on blogs like Kippi at Home and Fun Thrifty Mom. Expect 30–45 minutes per reindeer with practice. 🎄
Deep Dive (200–400 words): The trick with a reindeer is making the antlers secure and flat. Cut the antlers from dark brown felt and sandwich them carefully at the head before stitching around the whole body. Pin or clip in place with tiny craft clips (use those from general craft kits found at Michaels) so the pieces don’t shift as the seam is sewn. For eyes, small black beads or tiny stitched French knots work; French knots add a handcrafted texture that reads well even from a distance.
Customize the coat: A small rectangle of red felt folded into a coat, trimmed with a thin white collar, elevates the look. Secure the coat with a couple of discreet running stitches so it can be removed if used as a gift tag. For the nose, try a slightly padded red felt circle stuffed with a thread or two of fiberfill to give the classic Rudolph puffiness. These thoughtful details are what make the reindeer look professional without complicated stitches.
Materials and alternative approaches: If using a Cricut, cut the silhouette and antlers in multiples to speed production. For embellishments, source tiny bells and metallic charms from Etsy or stash from holiday trims at Joann Fabrics. If glue is preferred, secure antlers and noses with a dab of Aleene’s or Beacon Adhesives, but reinforce the hanging loop with a few stitches so it won’t pop free. Anecdote: a craft fair seller reported doubling sales on small reindeer ornaments when switching from plain faces to beaded eyes — tiny upgrades matter to buyers. Final insight: practice accurate alignment once and the silhouette becomes a go-to quick gift option for neighbors. 🦌
4. Personalized Felt Name Ornament: Simple monogramming and gift-ready packaging ideas
Opening (50 words): The best personalized felt name ornaments are bold, readable, and fast to stitch. Names or initials on a white or colored base instantly turn an ornament into a meaningful gift. This project teaches letter cutting and applique in a friendly way. ✉️
The best name ornament method uses cut letters glued or stitched onto a base shape, then finished with embroidery accents. This solves the problem of messy lettering by allowing practice on spare felt and by using a thin backing for stability. Using DMC floss for outlines makes letters pop. 🎁
To read Retro Christmas: Vintage-Inspired Holiday Decoration Ideas
Quick Answer (100 words): Cut two base circles or stocking shapes from felt, cut letters from contrasting felt or use stitched letters with DMC thread, attach letters using tiny stitches or fabric glue, assemble and stuff, and add a loop for hanging. For pattern help and inspiration, see examples at The Yellow Birdhouse and personalized tutorials at Paperflo Designs. Budget tip: cut initials from scraps to keep costs under $2 per ornament. ✂️
Deep Dive (200–400 words): Lettering can be intimidating, but there are efficient methods. Print a bold font at roughly twice the desired final size, cut the paper letters, then trace onto felt. Use slightly stiff felt for letters or back each letter with a tiny scrap of interfacing to keep edges clean. When attaching letters, position them and pin with a dab of fabric glue to avoid shifting. Then use a small running stitch around each letter with DMC floss to secure them permanently and add an extra handcrafted look.
For more personality, add small embroidered motifs like a snowflake, holly sprig, or a tiny heart. Employ simple French knots for berries and backstitches for outlines. This step is where the ornament becomes a keepsake. If producing multiple for classmates or a family set, create a mini assembly line: pre-cut bases, pre-cut letters, and one person for stitching — this approach saves time and improves consistency.
Packaging and gifting: Attach the ornament to a kraft paper tag or tie it onto a wrapped present with twine — this instantly upgrades a package. For bulk gifting or a more boutique presentation, try a tiny organza bag and a handwritten note. For creative inspiration and step-by-step photo examples, consult tutorials at Six Clever Sisters and Easy Crafts Ideas. Insight: personalized ornaments become little time capsules — include the year discreetly on the back so recipients remember when they received it. ✨
5. Felt Gingerbread & Star Ornaments: Two quick projects to finish a set and elevate your tree
Opening (50 words): The best finishing ornaments are the ones that tie a set together: think a felt gingerbread man and a colorful star. These projects add variety and teach decorative stitches while remaining fast and forgiving. 🍪⭐
The best approach for a cohesive ornament set is to choose a consistent color palette and thread choice. Using the same DMC thread shades and similar ribbon loops ensures that snowmen, reindeer, names, and gingerbread look like a curated collection. This solves the aesthetic mismatch problem often seen when ornaments are made from random scraps. 🎨
Quick Answer (100 words): For gingerbread, cut two brown felt shapes, stitch zigzag “frosting” with white thread, add bead eyes and button decorations, stuff lightly, and close. For stars, cut two star shapes, stitch decorative lines from the center out, stuff, and finish with a ribbon loop. Both projects take 15–25 minutes once comfortable with basic stitches. For free pattern ideas, consult Treasurie Blog and the tutorial roundup at Six Clever Sisters. Save for later! 📌
To read Christmas Paintings on Canvas: Art Project Ideas
Deep Dive (200–400 words): The gingerbread man is charming because of its simple decoration cues. Use white embroidery thread for the zigzag “frosting” on arms and legs — a backstitch works for smooth curves and a French knot can form an eye or a gumdrop button. Small green felt circles or tiny green buttons make perfect chest “buttons.” Keep stuffing minimal so the gingerbread remains flat enough to sit on a tree branch without tipping. For durability, stitch the hanging loop into a seam rather than gluing it on.
Stars are a fantastic way to use scrap felt. Experiment with contrasting front and back colors: a gold front with deep teal back creates a modern look. Use straight stitches radiating from the center for a dimensional starburst. Try a sewn panel technique where each point is stitched slightly inward to catch light and create a 3D effect. These small structural choices elevate the simple star into a focal piece.
Display and finishing tips: Mix the ornaments into garlands and gift wrap for a consistent look. If producing a whole set as a gift, wrap them in kraft boxes with a small card explaining the materials and care — recipients appreciate knowing whether to handwash or spot clean. For pattern refresh and new ideas check resources like The Yellow Birdhouse and seasonal design inspiration on vintage-style decorating. Final insight: a small, consistent detail like using the same ribbon or thread across a set gives a handcrafted collection a professional, gift-shop feel. 🌟
Extra inspiration & resources: For more patterns and gallery ideas visit The Yellow Birdhouse, BHG, and Fun Thrifty Mom. For profile images and seasonal decor inspiration, explore choose-christmas-pfp, christmas-tree-bows-styling, diy-christmas-decor-budget, christmas-countdown-excitement, and christmas-decor-living-room. Happy crafting — save for reference and start a cozy holiday tradition today! 🎄